
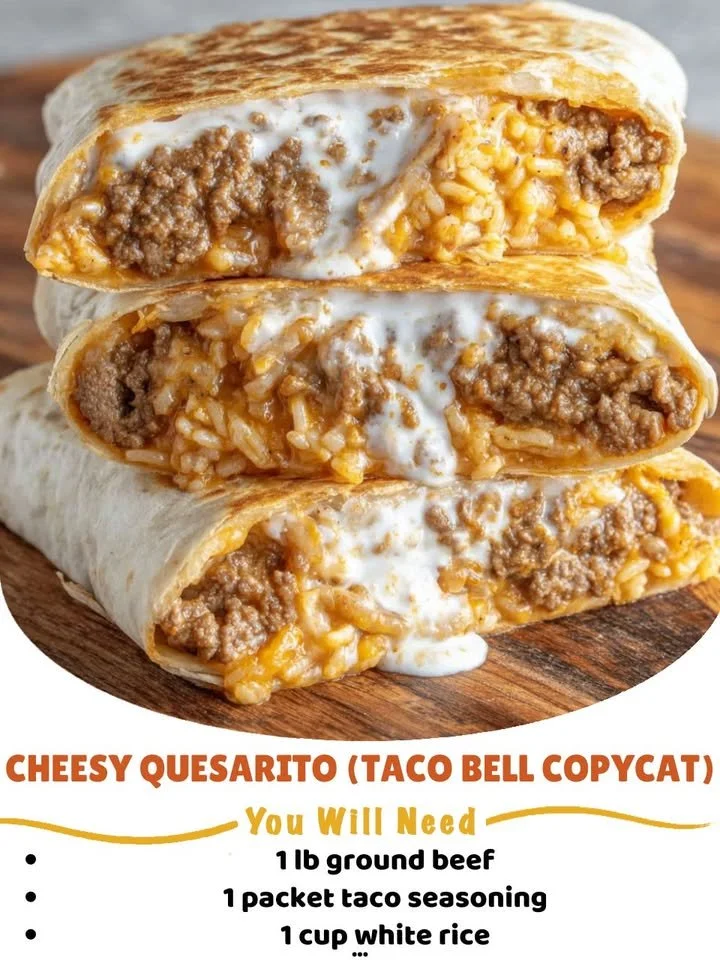
When I first discovered Taco Bell’s Quesarito, I was instantly hooked. The combination of creamy cheeses, flavorful rice, and seasoned meat wrapped in a warm tortilla sent my taste buds into a frenzy. It wasn’t long before I decided that I wanted to recreate this deliciousness in my own kitchen. Let me share my take on the Cheesy Quesarito, a Taco Bell copycat that you can easily whip up at home!
Why You’ll Love This Recipe
This recipe is not only simple but it fully embraces the cheesy, hearty goodness that makes Quesaritos so addictive. Plus, making your own means you can control the ingredients and customize it to your liking! Trust me, once you try this at home, it’s hard not to fall in love. Oh, and the best part? You can make extras for meal prep! (See the ingredients in the next page below…)
Ingredients
– 2 large flour tortillas
– 1 cup seasoned ground beef (or vegetarian option)
– 1 cup cooked rice
– 1 cup shredded cheese (Cheddar or a blend)
– 1/2 cup nacho cheese sauce
– 1/4 cup sour cream
– 1 tablespoon taco seasoning
– 1/2 cup lettuce (optional)
– 1/2 cup diced tomatoes (optional)
– Salsa (for serving)
Equipment Needed
– Large skillet
– Mixing bowl
– Spatula
– Aluminum foil (for wrapping)
– Baking sheet
Step-by-Step Instructions
To kick things off, I start by cooking my seasoned ground beef in a large skillet. If you’re anything like me, you’ll want to get those juicy flavors going as soon as possible. I usually add a tablespoon of taco seasoning to the meat for that extra kick. Once it’s browned and cooked through, I set it aside to cool slightly. I absolutely love how the aroma wafts through my kitchen! (See the next page below to continue steps…)
Next, it’s time to prepare the rice. I prefer using leftover rice, as it’s a great time-saver. Just mix the cooked rice with a little bit of nacho cheese sauce until it’s creamy and well-combined. This method gives the rice that cheesy flavor that complements the meat perfectly. Once that’s done, it’s assembly time! Lay one tortilla flat, and spread a layer of that delicious cheesy rice in the center.
Then, add an even layer of the seasoned ground beef. Top it off with a generous sprinkle of shredded cheese and some lettuce and diced tomatoes if you’re feeling fancy. It’s amazing to see the colors and textures come together! Finally, to seal the deal, drape another tortilla on top and lightly press down.
Now comes the tricky part—folding the Quesarito. I usually tuck in the sides first, then roll it tightly from the bottom up. Making sure all those delicious fillings stay inside is key! Once I have it all wrapped up nicely, I wrap it in aluminum foil to keep it warm and secure, then pop it in a preheated oven at 350°F for about 10-15 minutes to get that delightful melty goodness happening.
Pro Tips for Best Results
In my experience, the best way to ensure a creamy, cheesy interior is to use freshly shredded cheese rather than pre-packaged. Those bags have anti-caking agents that can affect melting, and we want the ultimate gooey texture, right? I tested this three ways—pre-packaged versus freshly shredded—and it made all the difference in taste!
Another tip is to experiment with your fillings. I sometimes like to add black beans for extra protein and fiber, which also gives an amazing texture. Trust me, it ups the game! You can also spice things up by adding jalapeños for a kick.
Lastly, make sure your tortillas are warm before rolling. Warming them up in the microwave for about 10-15 seconds makes them more pliable and less likely to tear while you’re assembling your Quesarito.
Common Mistakes to Avoid
One mistake I made early on was overfilling the tortillas. Let me tell you, that leads to messy Quesaritos that just fall apart the moment you take a bite! I learned the hard way that a moderate amount of filling is key to a successful wrap. (See the next page below to continue…)
Another pitfall is skipping the heating step in the oven. Sure, you can eat it cold, but warming it up really allows the flavors to meld together beautifully. If you skip that, you might miss out on the melty cheesiness that makes the Quesarito so special.
Don’t forget to keep an eye on your cooking time as well. Overcooking can turn your delicious blend into a rubbery mess. I always set a timer because you want it just right—golden brown and gooey, not chewy and tough!
Serving Suggestions
Once those Cheesy Quesaritos are out of the oven, I love to slice them in half and serve them with a little salsa on the side. The fresh tanginess just balances out the richness of the quesadilla perfectly! You can also serve them up with some guacamole or extra sour cream for those who love creamy dips.
For a complete meal, I often pair them with a simple side salad. Just some crisp lettuce, diced cucumbers, and a sprinkle of cheese create a perfect contrast to the heartiness of the Quesarito. The brightness of the salad really elevates the dish!
Lastly, these are fantastic for game day or any gathering. Just cut them into smaller pieces, and watch how quickly they disappear! Trust me; your guests will be coming back for seconds!
Variations & Customizations
The beauty of the Cheesy Quesarito is its versatility. Sometimes, I love to switch things up by using shredded chicken or pulled pork instead of beef. It gives a completely different flavor profile while still being absolutely delicious! You can also easily make it vegetarian using sautéed vegetables or ‘meat’ substitutes if you prefer that direction.
If you’re feeling adventurous, why not try adding different cheeses? A mix of Monterey Jack and Pepper Jack can create a delightful fusion of flavors. I once tried a smoked gouda in my Quesarito and wow, did it add a nice richness!
Lastly, for those spice lovers out there, throwing in some diced chipotle peppers or hot sauce will take this dish to a whole new level! I personally enjoy a good kick, and this layer of heat adds such depth to the overall taste.
How to Store, Freeze & Reheat
If you happen to have leftovers (and that’s a big if since it’s so delicious!), simply wrap them in foil and store them in the fridge for up to 3 days. Reheating is easy; I recommend putting them back in the oven to preserve that crispy outer layer.
For longer-term storage, these Cheesy Quesaritos freeze beautifully! Just wrap them tightly in plastic wrap and then foil before placing them in a freezer bag. They will keep well for about 2-3 months in the freezer.
When you’re ready to enjoy them again, you can bake them straight from frozen—just add a little extra time in the oven. I usually check on them after about 20 minutes to see if they’re warmed through.
Conclusion
If you’ve been craving that cheesy goodness from Taco Bell but want to make it in the comfort of your own home, this Cheesy Quesarito recipe is a total game changer! I hope you give it a try and enjoy it as much as I do. Happy cooking, and may your kitchen always smell delicious!