
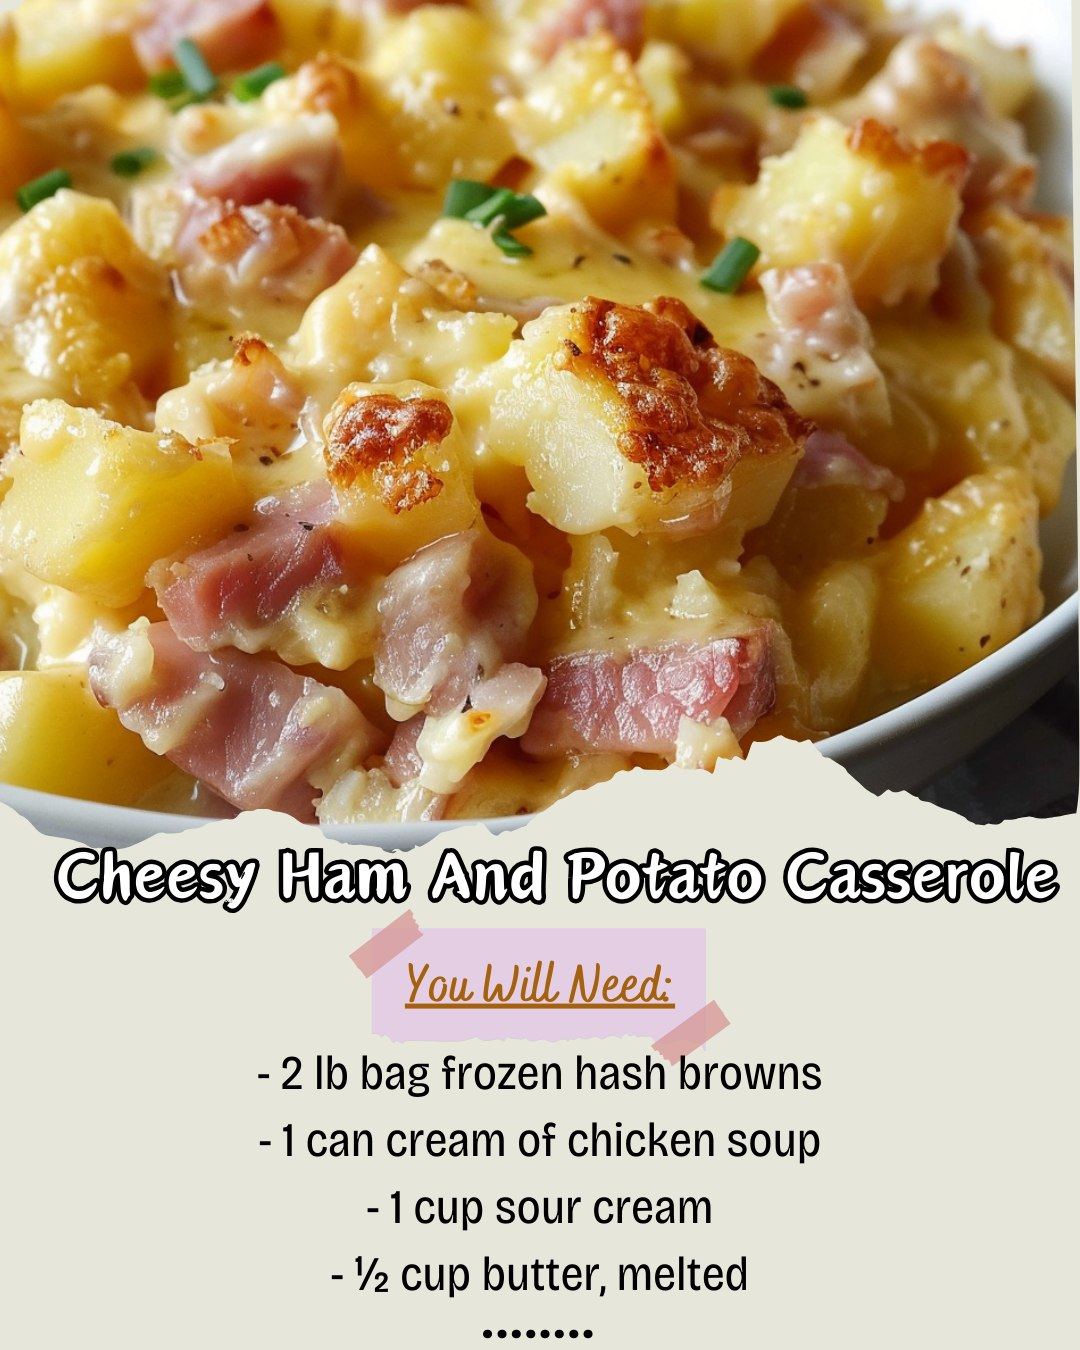
This Cheesy Ham and Potato Casserole recipe came to me on a frantic weeknight after Easter, born from a need to use up leftover holiday ham and feed my family something deeply comforting with minimal effort. I remember the hopeful clatter as I poured the bag of frozen hash browns into my biggest bowl, the rich, savory scent of melting butter and cream of chicken soup promising an easy win. As I folded in the sour cream and handfuls of sharp cheddar, the mixture transformed into something that just looked like a hug in a dish. The moment I pulled the bubbling, golden-brown casserole from the oven, my kitchen filled with a smell so cheesy and inviting it felt like home. That first creamy, hearty, perfectly salty forkful told me I’d found a new family favorite—a recipe that turns simple ingredients into pure, uncomplicated comfort.
Why You’ll Love This Recipe
You are going to love this recipe because it is the ultimate definition of easy, reliable, and satisfying comfort food. It comes together in about 15 minutes with ingredients you likely have on hand, and it bakes into a glorious, golden-topped dish that feeds a crowd or promises delicious leftovers. It’s incredibly forgiving, endlessly customizable, and delivers that perfect creamy-to-crunchy texture in every bite. Whether you’re cleaning out the fridge after a holiday, need a hearty brunch dish, or simply want a no-fuss weeknight dinner that everyone will devour, this casserole is your answer. It’s the kind of humble, hearty food that just makes everything feel better.
Ingredients
- 1 (2 lb) bag frozen shredded hash browns, thawed
- 2 cups diced cooked ham
- 1 (10.5 oz) can cream of chicken soup (condensed)
- 1 cup sour cream
- 1/2 cup unsalted butter, melted
- 1 small yellow onion, finely diced
- 2 cups shredded sharp cheddar cheese, divided
- 1/2 teaspoon garlic powder
- 1/4 teaspoon black pepper
- Optional Topping: 1 cup crushed cornflakes or panko breadcrumbs mixed with 2 Tbsp melted butter
Let’s talk ingredients, because a few choices elevate this from good to great. First, the hash browns: I use the shredded, not cubed, style for the best texture, and I always thaw them first. This is crucial—using them frozen leads to a watery, unevenly cooked casserole. Let them sit in the fridge overnight or spread them on a tray for an hour. For the ham, use a good-quality diced ham steak or leftovers for the best flavor, not the super-wet packaged chunks. The cream of chicken soup and sour cream are the creamy soul of the dish; full-fat versions work best for richness and stability. That sharp cheddar is non-negotiable for its flavor punch. Pre-shredded bags contain anti-caking agents that can make the sauce grainy; take the extra minute to shred a block yourself. Trust me, it makes a huge difference in the silky, cheesy sauce.(See the next page below to continue…)
Equipment Needed
- 9×13 inch baking dish
- Large mixing bowl
- Medium mixing bowl
- Whisk or wooden spoon
- Skillet (optional, for sautéing onion)
- Measuring cups and spoons
Step-by-Step Instructions
My process always starts with prep. I take my bag of frozen hash browns out of the freezer well in advance. If I forget, I spread them in a single layer on a baking sheet for about an hour to thaw quickly. Meanwhile, I preheat my oven to 350°F (175°C) and grease my 9×13 baking dish. I also finely dice my onion. Here’s a tip I learned: I sauté the diced onion in a tablespoon of the melted butter until soft and translucent before adding it to the mix. This cooks out the raw bite and adds a sweet, savory depth you don’t get from raw onion. I tried it raw once, and the texture was a bit too prominent.
Now, for the satisfying part: making the sauce. In my large mixing bowl, I combine the cream of chicken soup, sour cream, the remaining melted butter, garlic powder, and black pepper. I whisk it all together until it’s completely smooth and homogenous. This creamy, tangy base is what binds everything together. Then, I stir in one and a half cups of the shredded cheddar cheese, reserving the last half cup for the top. The warmth from the mixture starts to melt the cheese slightly, creating an even richer sauce.
Next, I add the star players. To the cheesy sauce bowl, I add the thawed hash browns, the diced ham, and the sautéed (or raw, if you must!) onion. Using a large spatula or my hands (clean, of course!), I gently fold everything together. I make sure every strand of potato and every cube of ham gets coated in that luxurious sauce. The mixture will be thick, chunky, and incredibly fragrant. I then transfer it all to the greased baking dish, pressing it down into an even layer.(See the next page below to continue…)
Finally, I sprinkle the reserved half cup of cheddar cheese evenly over the top. For an extra-crunchy, golden top—which I highly recommend—I mix crushed cornflakes or panko breadcrumbs with a little melted butter and sprinkle that over the cheese. I cover the dish with foil and bake for 40 minutes. Then, I remove the foil and bake for another 20-25 minutes, until the top is beautifully browned, the edges are bubbly, and a knife inserted into the center meets no resistance from frozen potato. I let it rest for 10 minutes before serving; this allows the sauce to set slightly so you get perfect slices.
Pro Tips for Best Results
I tested the hash brown texture three different ways: frozen solid, partially thawed, and completely thawed. Completely thawed was the undeniable winner. Frozen potatoes released too much water, creating a soupy mess. Partially thawed led to some crunchy, icy bits in the middle. Letting them thaw fully ensures even cooking and allows the potatoes to absorb the creamy sauce properly, resulting in a cohesive, tender casserole. Patience here is key.
Here’s what I learned the hard way about the bake time: don’t skip the foil-covered period. Baking it uncovered the whole time can cause the top to brown too quickly, leaving the center undercooked and cold. The 40 minutes covered essentially steams and heats the casserole through, then the final 20-25 minutes uncovered gives you that perfect, irresistible golden crust. I’ve tried this both ways, and trust me, the two-stage bake is essential.
For the absolute best flavor, consider using a homemade or high-quality store-bought condensed soup, or even swap the cream of chicken for cream of mushroom or celery for a different note. If you want to add more vegetables, finely diced bell peppers or a handful of thawed frozen peas or corn fold in beautifully with the ham. Just be sure any added veggies are cooked or thawed to avoid adding excess moisture.
Common Mistakes to Avoid
My biggest first-time mistake was using frozen hash browns straight from the bag. The result was a watery, separated casserole that took forever to bake through, with a soggy bottom and an oddly crunchy top where the ice crystals had evaporated. The excess water also diluted the cheesy sauce. Always, always thaw your potatoes first. Spread them on a kitchen towel if you need to speed the process and press out any extra moisture.(See the next page below to continue…)
Another error is overmixing after adding the potatoes and ham. You want to fold gently just until combined. If you stir too vigorously, the shredded potatoes can break down and start to become mushy, releasing more starch and resulting in a gummy texture instead of distinct, tender shreds. A light hand preserves the perfect hearty texture.
Do not skip the rest time after baking. I was once so eager to eat that I served it straight from the oven. It was delicious, but it slumped on the plate like a cheesy lava flow. Letting it sit for 10 minutes allows the hot, bubbly sauces to settle and thicken slightly, making it much easier to slice and serve neatly. It also saves the roof of your mouth from a serious scalding!
Finally, avoid using low-fat or fat-free sour cream and soup. The fat content is necessary for the sauce to be rich, creamy, and stable during baking. Low-fat alternatives can separate or become watery when heated. For the best, most decadent result, embrace the full-fat dairy in this recipe—it’s what makes it the ultimate comfort food.
Serving Suggestions
I love serving this casserole right from the baking dish, family-style. It’s a complete meal on its own, but I always offer a bright, acidic side to cut through the richness. A simple arugula salad with a lemon vinaigrette or a tangy, vinegar-based coleslaw are my go-to pairings. The crisp, fresh contrast makes the whole meal feel balanced.
For a classic brunch spread, I’ll serve it alongside scrambled eggs, fresh fruit, and buttery biscuits. The casserole acts as the hearty, savory anchor of the meal. It’s also fantastic for potlucks and holiday gatherings like Christmas morning or Easter brunch—it travels well, holds its heat, and pleases both kids and adults.
Leftovers are a true gift. I reheat individual portions in a skillet with a little butter for a crispy bottom, or enjoy it cold straight from the fridge (it’s surprisingly good that way, too!). It’s one of those dishes that tastes just as good, if not better, the next day.
Variations & Customizations
This recipe is a fantastic canvas. For a different protein, swap the ham for cooked, crumbled breakfast sausage or diced cooked chicken. For a vegetarian version, omit the ham and use cream of mushroom soup, adding in sautéed mushrooms and spinach. You can even add a layer of thawed, drained frozen spinach to the mix for a pop of color and nutrients.
You can play with the cheese blend, too. A mix of cheddar and Monterey Jack is lovely, or add a handful of grated Parmesan to the topping for extra savoriness. For a “loaded baked potato” vibe, stir in cooked, crumbled bacon and top with sliced green onions after baking.
If you want to make it ahead, you can assemble the entire casserole (without the final topping), cover tightly, and refrigerate overnight. Let it sit at room temperature for 30 minutes before adding the topping and baking; you may need to add 5-10 extra minutes to the bake time since it’s starting cold.
How to Store, Freeze & Reheat
To store leftovers, let the casserole cool completely, then cover tightly or transfer portions to airtight containers. It will keep in the refrigerator for up to 4 days. The texture remains creamy, though the topping will soften.
This casserole freezes beautifully, either before or after baking. To freeze unbaked, assemble in a foil baking dish, cover tightly with foil and plastic wrap, and freeze for up to 2 months. Thaw overnight in the fridge before baking as directed. To freeze baked portions, cool completely, wrap individual slices tightly, and freeze. Reheat from frozen in the oven at 350°F until hot throughout.
The best way to reheat is in the oven (350°F for 15-20 minutes) or toaster oven to restore the crispy topping. The microwave works for speed but will make the topping soggy. For a single serving, I love reheating it in a small skillet with a lid over medium-low heat to re-crisp the bottom.
Conclusion
This Cheesy Ham and Potato Casserole is more than just a recipe to me; it’s my go-to symbol of easy, nourishing, and crowd-pleasing comfort. It’s the dish I make when I need a guaranteed win, when I want to use up leftovers creatively, or when I simply need to feed my people something that feels like a warm, hearty hug. I hope this recipe finds a regular spot in your rotation, bringing simplicity, satisfaction, and deliciousness to your table. Now, go grab that bag of hash browns—your new favorite comfort food is just an hour away.