
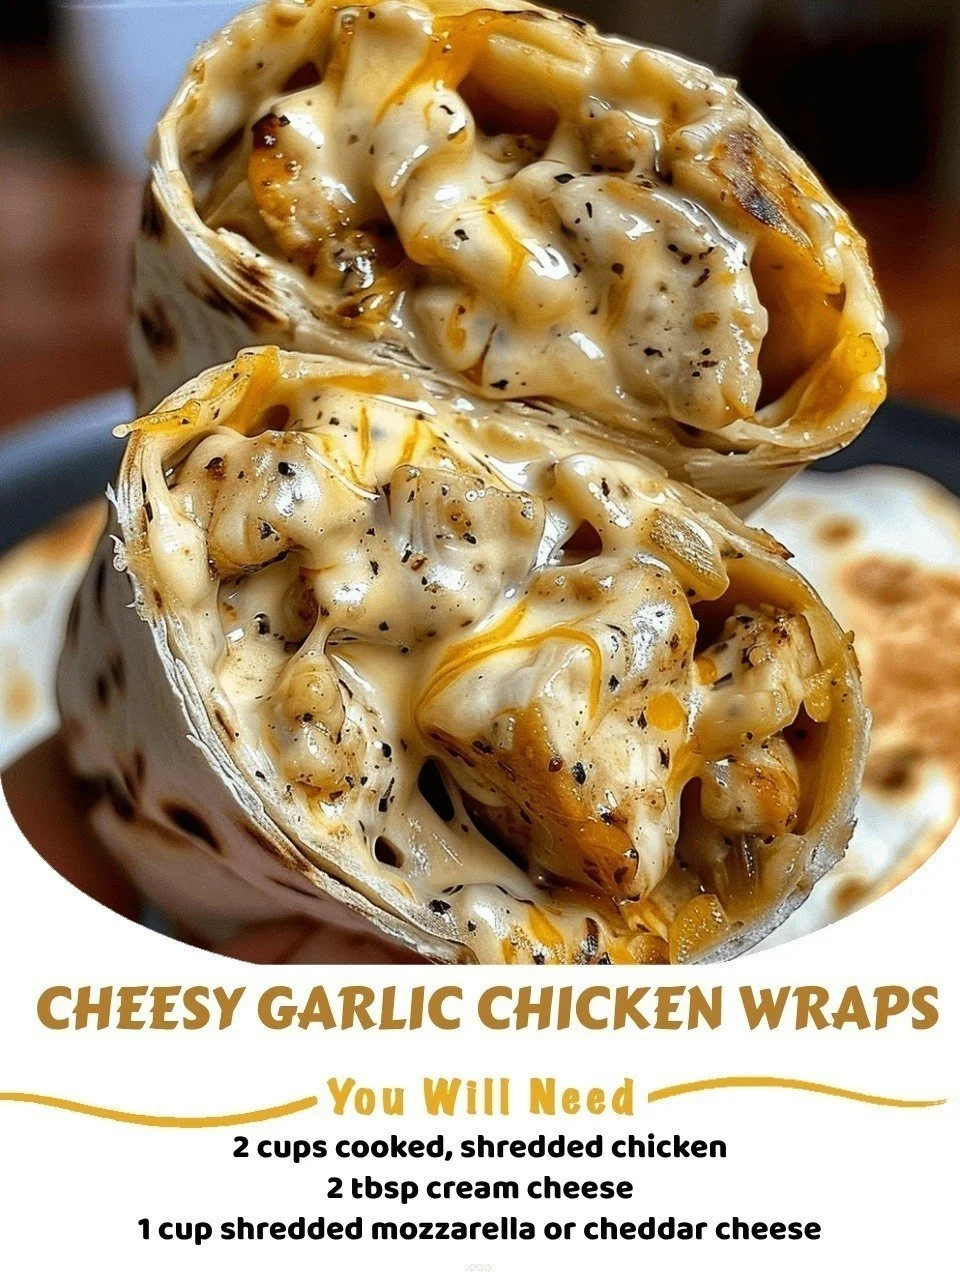
I’ll never forget the first time I pulled a tray of these cheesy garlic chicken wraps out of my oven. My entire kitchen was filled with the most incredible aroma—sizzling, buttery garlic, sweet caramelized onions, and bubbling, golden cheese. It was a “throw together what’s in the fridge” kind of night that turned into a revelation. That first bite was pure comfort: warm, gooey, savory, and so satisfyingly easy. This recipe has since become my secret weapon for busy weeknights, casual gatherings, and anytime I need a guaranteed crowd-pleaser that feels indulgent but is deceptively simple to make.
Why You’ll Love This Recipe
You are going to love this recipe because it solves the eternal “what’s for dinner?” question with something that feels special without requiring special skills. It’s incredibly versatile, delivers that irresistible restaurant-style cheesy pull in every bite, and the whole process, from chopping to serving, is wonderfully straightforward. I promise, the smell alone will have your family gathered in the kitchen, plates in hand, long before you’re ready to serve.(See the ingredients in the next page below…)
Ingredients
- 2 large boneless, skinless chicken breasts, cut into ½-inch cubes
- 1 tablespoon olive oil
- 1 large yellow onion, thinly sliced
- 4-5 large flour tortillas (burrito-size)
- 2 cups shredded mozzarella cheese
- 1 cup shredded cheddar cheese
- ½ cup (1 stick) unsalted butter
- 5-6 large garlic cloves, finely minced (trust me, fresh is best here)
- 2 tablespoons fresh parsley, finely chopped
- 1 teaspoon paprika
- ½ teaspoon dried oregano
- Salt and freshly ground black pepper, to taste
- Optional for serving: sour cream, salsa, chopped green onions, or shredded lettuce
Equipment Needed
- Large skillet
- Medium saucepan
- Baking sheet
- Parchment paper or silicone baking mat
- Mixing bowls
- Sharp knife and cutting board
- Grater (if shredding cheese from a block)
- Tongs or a spatula
Step-by-Step Instructions
The magic starts with the chicken. I heat the olive oil in my trusty large skillet over medium-high heat and add the cubed chicken in a single layer. Don’t crowd the pan—I made that mistake once and ended up steaming the chicken instead of getting those nice golden edges. I season it generously with salt, pepper, and the paprika, letting it cook until it’s just cooked through and no longer pink. Then, I remove it to a bowl and set it aside. Into the same skillet goes the thinly sliced onion. This is where patience pays off. I cook them over medium-low heat, stirring occasionally, until they become soft, sweet, and beautifully caramelized. This takes about 10-15 minutes, but it builds a foundational flavor that’s absolutely worth it.(See the next page below to continue steps…)
While the onions are working their magic, I turn my attention to the star of the show: the garlic butter. In my small saucepan, I melt the stick of butter over low heat. As soon as it’s liquid, I stir in all of that freshly minced garlic. The key here is low and slow—you want to gently cook the garlic to mellow its bite and infuse the butter, not burn it. I let it simmer for just 2-3 minutes until it’s fragrant, then I turn off the heat and stir in the chopped parsley and dried oregano. The smell at this point is honestly heavenly.
Now for the fun assembly! I line my baking sheet with parchment paper and lay out my tortillas. I divide the cooked chicken and caramelized onions evenly among them, placing the filling down the center of each tortilla. Then comes the cheese—I use a mix of mozzarella for its legendary melt and cheddar for a sharp flavor kick. Don’t skimp! I’ve tried this step both ways, and trust me, the generous cheese layer makes the wrap cohesive and utterly delicious. I spoon a generous amount of the garlic butter sauce over the filling in each tortilla, reserving about a quarter of it for later.
To wrap them, I fold in the sides of the tortilla over the filling, then roll it up tightly from the bottom, placing it seam-side down on the baking sheet. I brush the tops of each wrap with the remaining garlic butter—this gives them that gorgeous, golden, crispy exterior in the oven. Into a preheated 375°F (190°C) oven they go for about 15-20 minutes, until the tortillas are crisp and I can see cheese starting to bubble out the ends. That’s my cue that they’re perfectly done.
Pro Tips for Best Results
I tested the cheese blend three different ways, and the mozzarella-cheddar combo is the winner. Pre-shredded cheese is convenient, but if you have an extra minute, shredding a block yourself makes a noticeable difference in meltiness and flavor. The anti-caking agents in pre-shredded can sometimes make the cheese a bit grainy when melted, whereas freshly shredded melts into a smooth, glorious pool.
The garlic butter step is non-negotiable. I once tried to shortcut it by just mixing raw garlic into the filling, and it was far too harsh. Gently cooking the garlic in the butter tames its intensity and allows that flavor to permeate every single component of the wrap. Also, don’t skip brushing the outside with butter before baking. It transforms the tortilla from merely cooked to wonderfully crisp and flavorful.
Let the wraps rest for about 5 minutes after they come out of the oven. I know it’s tempting to dive right in, but this brief pause allows the molten cheese filling to set just slightly, so your first bite is gloriously gooey instead of dangerously lava-hot. It also makes them much easier to cut in half cleanly if you’re serving them that way.
Common Mistakes to Avoid
My first attempt at these was a lesson in overfilling. I piled the chicken and cheese so high that I couldn’t roll them tightly, and they burst open spectacularly in the oven, creating a cheesy, delicious mess. A mess is still tasty, but it’s not a wrap! Now I aim for a moderate, even layer down the center, which ensures a neat roll that holds together beautifully and cooks evenly.(See the next page below to continue…)
Do not use stale or cold tortillas straight from the fridge. I made this mistake once, and they cracked and split as soon as I tried to fold them. Let your tortillas sit at room temperature for a bit, or even warm them briefly in a dry skillet or the microwave wrapped in a damp paper towel. A pliable tortilla is a happy tortilla that rolls without protest.
Skipping the caramelization step for the onions is a flavor misstep. Onions cooked until just translucent are fine, but onions cooked slowly until they’re sweet, soft, and golden add a complex sweetness that balances the garlic and cheese perfectly. It’s an extra ten minutes that elevates the entire dish from good to “can I have another?”
Finally, watch your oven temperature. I learned this the hard way when I got impatient and cranked the heat to 400°F. The tortilla edges burned before the inside was fully heated through. A steady 375°F (190°C) is the sweet spot—it crisps the wrap perfectly and gives the cheese ample time to melt into gooey perfection without any burnt surprises.
Serving Suggestions
I love serving these wraps straight from the oven on a big platter, maybe with a final sprinkle of fresh parsley on top for a pop of color. They are a complete meal in your hand, but I often add a couple of simple sides to round things out. A crisp, cool side salad with a tangy vinaigrette is my go-to, as it cuts through the richness of the cheese beautifully.
For a more casual, game-day or movie-night vibe, I’ll set out small bowls of toppings like fresh pico de gallo, chunky guacamole, and a big dollop of sour cream. Let everyone customize their bite! They’re also fantastic sliced in half on a bias and served with a side of warm marinara or a creamy cilantro-lime sauce for dipping.
When I’m feeding a crowd, I’ll often make a double batch and arrange them on a large board alongside other easy finger foods like seasoned fries, raw veggie sticks, and different dipping sauces. It’s a spread that looks impressive but required surprisingly little fuss to put together.
Variations & Customizations
The beauty of this recipe is how easily it adapts. I’ve swapped the chicken for seasoned black beans and corn for a fantastic vegetarian version—just be sure to drain the beans well. The cheese blend is also a playground for experimentation. A pepper jack cheese adds a lovely kick, and I sometimes mix in a bit of cream cheese with the shredded cheese for an even creamier, richer interior.
You can play with the flavor profile, too. For a “buffalo chicken” twist, I’ll toss the cooked chicken in a bit of buffalo sauce before assembling and use a ranch-seasoned garlic butter. Or, for a Mediterranean spin, I’ll add some chopped spinach, sun-dried tomatoes, and swap the cheddar for feta cheese. The basic method remains your perfect canvas.
Even the wrap itself can change. I’ve used spinach herb tortillas for extra color and flavor, and whole wheat tortillas work perfectly, though they may need an extra minute in the oven. The key is to use a large, burrito-size tortilla so you have plenty of room to fold and roll without running out of space.
How to Store, Freeze & Reheat
If, by some miracle, you have leftovers, let them cool completely. I store them individually wrapped in aluminum foil and then place them in an airtight container in the fridge. They’ll keep well for up to 3 days. To reheat, I never use the microwave—it turns the tortilla soggy. Instead, I unwrap them and reheat in a 350°F oven (still on the foil, for easy cleanup) for 10-15 minutes, or in an air fryer for about 5-6 minutes, until hot and crispy again.
These wraps freeze surprisingly well for a future easy meal! After baking and cooling, I wrap each one tightly in plastic wrap and then in foil before placing them in a freezer bag. They can be frozen for up to 2 months. To cook from frozen, I don’t thaw them. I simply unwrap them from the plastic, re-wrap in the foil, and bake at 375°F for 25-30 minutes, until heated through.
A word of caution from experience: I don’t recommend freezing the unbaked, assembled wraps. The tortillas can become soggy and gummy during the thawing process. Freezing after they’re baked and crisped preserves the texture much better. When you reheat, you’ll get back that delightful crunch and gooey center with minimal effort.
Conclusion
This recipe is more than just a list of ingredients and steps; it’s a little bundle of joy I love sharing. It’s the kind of food that brings people to the table with happy anticipation, and the kind of cooking that makes you feel like a weeknight hero. I hope these cheesy garlic chicken wraps find a regular spot in your kitchen, creating delicious memories and satisfying cravings for years to come. Now, go preheat that oven—your new favorite dinner awaits.