
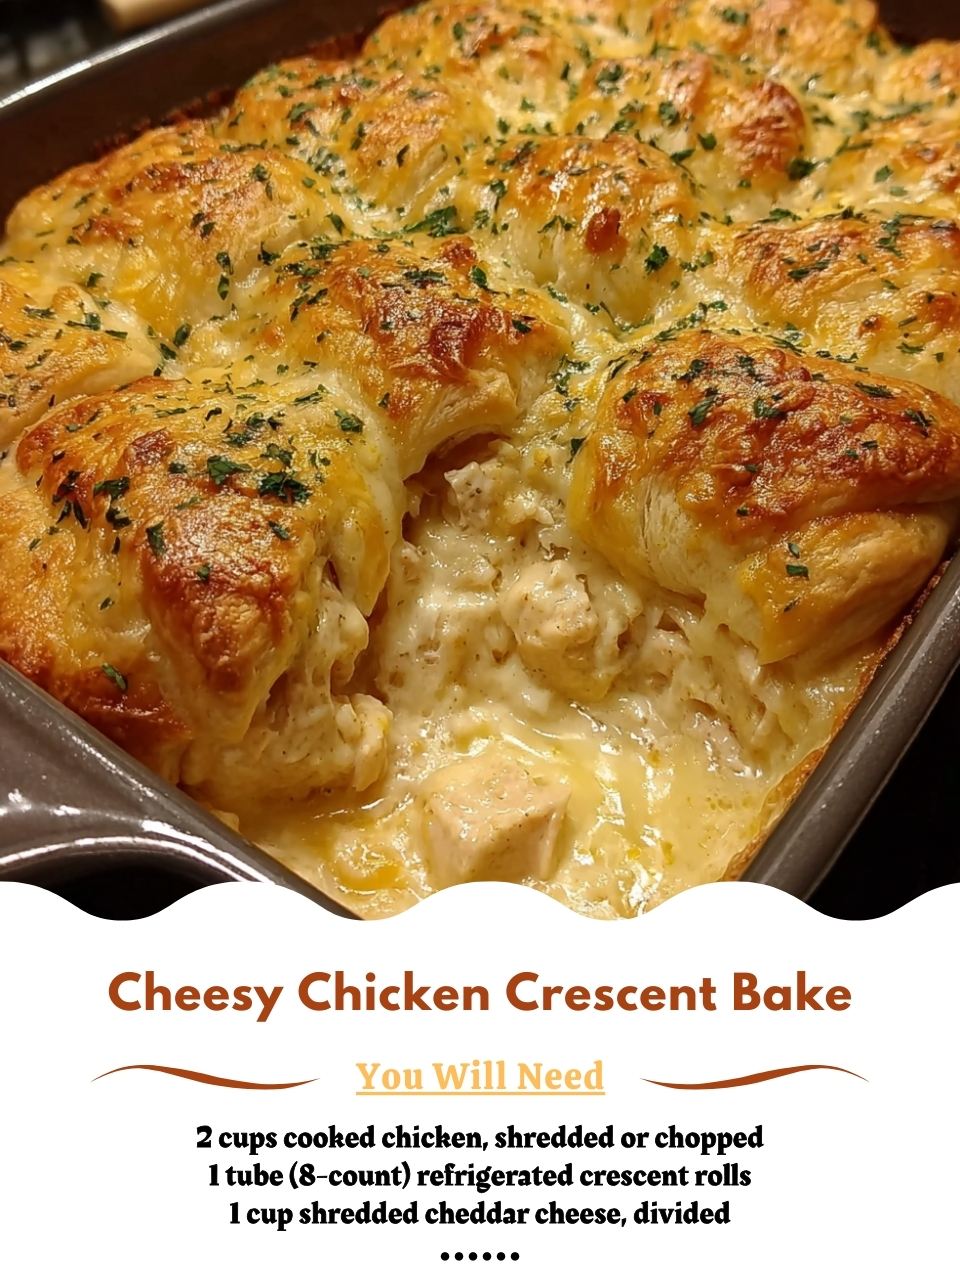
When I pull it out, the bubbling is music to my ears. This is critical: I let it rest for 5-10 minutes before cutting into it. I learned this the hard way when I served it immediately once and the filling just ran everywhere. That short rest lets everything set up perfectly, so you get neat squares with layers intact. I garnish with a sprinkle of fresh parsley or chives for a pop of color and freshness against all that rich, golden brown deliciousness.
Pro Tips for Best Results
For the flakiest, most golden crust, make sure your oven is fully preheated before the dish goes in. I’ve rushed this step before, putting it in a cooler oven, and the bottom crust turned out pale and a bit doughy instead of crisp. The instant blast of heat is what makes those crescent layers puff and separate beautifully. An oven thermometer is a cheap tool that ensures your temperature is accurate—it’s a game-changer for all baking.
Season your filling aggressively. The condensed soup and cheese bring salt, but the chicken and dough can mute flavors. I always taste the filling mixture before adding the chicken, and I often add an extra pinch of garlic powder or a dash of seasoned salt. Don’t be shy here. This is your chance to build depth. I also find that letting the filled mixture sit for 10 minutes before assembling (if I have time) lets the flavors marry and results in a more cohesive taste in every bite.
If you’re worried about the crust getting too dark before the center is hot, you have options. I bake mine on the middle rack. If the top is browning too quickly, I’ll loosely tent a piece of aluminum foil over it for the last 5-10 minutes of baking. Conversely, if the top looks done but you’re unsure about the dough on the bottom, give the pan a gentle shake. If the center seems overly jiggly, give it a few more minutes. The crust should feel firm to the touch.
Letting it rest is not a suggestion—it’s a rule. I promise, the wait is worth it. Those 5-10 minutes off the heat allow the creamy filling to thicken up just enough to be luscious instead of runny. It also makes slicing and serving infinitely easier. I use this time to toss a simple green salad or set the table. When you finally cut in, you’ll get perfect, distinct layers: flaky crust, creamy filling, melted cheese.
Common Mistakes to Avoid
The biggest mistake is not sealing the crescent dough seams. The first time I made this, I just laid the triangles in the dish and poured the filling on top. Big mistake. The filling seeped through every crack during baking, gluing the crust to the dish and making a huge mess. Now, I press those seams together with a fork until they are completely fused. It takes 30 seconds and saves so much frustration during cleanup and serving.
Don’t use dry, overcooked chicken. The moisture in your chicken matters. If you’re boiling chicken breasts specifically for this, don’t overcook them. I prefer using thighs or a rotisserie chicken because they’re naturally more moist and forgiving. If your chicken is a bit dry, you can add an extra tablespoon of sour cream or milk to the filling mixture. A dry filling won’t be as cohesive or satisfying.
Avoid overbaking. We want golden brown, not dark brown. The crescents cook quickly. Once the top is bubbly and the crust edges are a rich golden hue, it’s done. Overbaking will dry out the filling and make the crust tough instead of tender-flaky. I set my timer for 5 minutes less than the recipe suggests and then watch it closely. Ovens vary so much, and visual cues are your best guide.(See the next page below to continue…)