
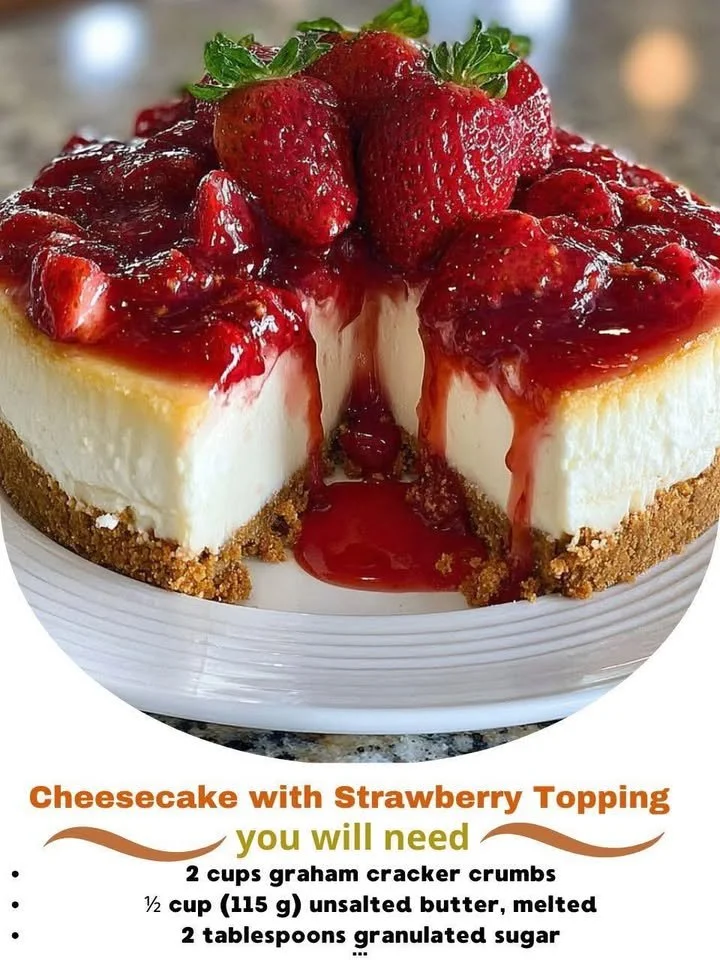
Welcome to my kitchen! Today, I’m excited to share a delightful recipe that has become a staple in my home – a creamy cheesecake topped with luscious strawberries. There’s something utterly satisfying about creating this dessert from scratch, and the combination of the rich cheesecake with the sweet-tart strawberries is a match made in heaven. Plus, it’s perfect for any occasion, be it a family gathering or a cozy night in. Let’s don our aprons and dive into this delicious adventure!
Why You’ll Love This Recipe
This cheesecake recipe is not just about flavor; it’s about the experience of making something truly special. The creamy texture melts in your mouth, while the strawberry topping adds a burst of freshness that elevates every bite. I adore how simple the ingredients are, yet they come together to create something that tastes like a gourmet treat! Whenever I serve this cheesecake, it never fails to impress. I bet you and your loved ones will adore this delightful dessert just as much as I do! (See the ingredients in the next page below…)
Ingredients
- 1 ½ cups graham cracker crumbs
- ½ cup unsalted butter, melted
- 2 cups cream cheese, softened
- 1 cup granulated sugar
- 1 teaspoon vanilla extract
- 3 large eggs
- 1 cup sour cream
- 1 cup fresh strawberries, hulled and sliced
- ¼ cup sugar (for the strawberry topping)
- 1 tablespoon lemon juice
Equipment Needed
- 9-inch springform pan
- Mixing bowls
- Electric mixer or whisk
- Rubber spatula
- Baking sheet (for the water bath)
- Knife for slicing
- Serving platter
Step-by-Step Instructions
Making this cheesecake is a labor of love, but I promise it’s worth every moment spent in the kitchen. First, I prepare the crust by mixing the graham cracker crumbs with melted butter and pressing this mixture tightly into a greased springform pan. The sweet aroma of the graham crackers fills my kitchen, creating a slight anticipation for the luxurious cheesecake to come. Once the crust is ready, I bake it for about 10 minutes at 350°F until it’s golden and set, which adds a lovely depth of flavor. (See the next page below to continue steps…)
Next, in a large mixing bowl, I beat the softened cream cheese with granulated sugar until smooth and creamy—this is when the magic happens! The texture transforms, and the sweetness begins to shine through. I then add in the vanilla extract, followed by the eggs, one at a time, ensuring each is fully incorporated before adding the next. Finally, I fold in the sour cream, which adds a rich tang that balances perfectly with the sweetness. Once everything is blended, I pour this luscious mixture over the crust and tap the pan gently on the counter to release any air bubbles.
I place my cheesecake in a water bath (a little tip I’ve learned to prevent cracks) and bake it at 325°F for about an hour until it’s slightly jiggly in the center but set around the edges. The tantalizing smell wafts through my kitchen, and I can hardly wait for it to cool! Once it’s done, I let it cool at room temperature for an hour before transferring it to the refrigerator. I like to keep it chilled for at least four hours—overnight is even better—as this allows the flavors to develop fully!
As the cheesecake sets, it’s time to prepare the strawberry topping. I combine sliced strawberries with sugar and lemon juice in a bowl, allowing the mixture to macerate for about 15-20 minutes. This simple process allows the strawberries to release their juices and create a vibrant, sweet topping that is the crowning glory of this cheesecake. When it’s finally time to serve, I slice the cheesecake and spoon the glossy strawberry topping over each slice, and oh my, it’s a sight to behold! I can hardly resist a piece for myself at this point!
Pro Tips for Best Results
I’ve tested this cheesecake recipe several times, and trust me, allowing it to chill overnight makes a world of difference! The flavors settle beautifully, and aiming for a smooth texture is easier when it has more time in the fridge. I also recommend using room-temperature ingredients whenever possible. This small step ensures they blend seamlessly, avoiding any lumps and giving you that ultra-creamy texture that every cheesecake craves.
Also, I swear by the water bath method to prevent cracks. It’s super simple: just wrapping the springform pan with aluminum foil and placing it in a larger pan filled with hot water creates a gentle cooking environment. I’ve had plenty of cheesecakes crack before I learned this trick! Lastly, don’t skip the sour cream; it truly adds depth and tang, enhancing the overall flavor of your cheesecake.
I also like to experiment with the sugar levels in the strawberry topping. If your strawberries are particularly sweet or if you prefer a more balanced flavor, adjust the sugar accordingly. I’ve played around with different amounts, and I’ve learned that sometimes less is more, especially when it comes to fresh fruits.
Common Mistakes to Avoid
One common mistake I see is overmixing the batter, which can introduce air and lead to cracking during baking. When you mix, aim for a smooth consistency without lots of air bubbles, as this will help your cheesecake remain dense and creamy. Another pitfall is not baking the cheesecake long enough. It can be tricky to judge doneness—you want it to be set around the edges but still slightly jiggly in the center. Don’t be tempted to take it out too early, as it will continue to firm up as it cools! (See the next page below to continue…)
I also highly recommend allowing the cheesecake to cool gradually. If you move it from the hot oven to a cold environment too quickly, it can shock the texture and cause it to crack. Patience is key! Lastly, I learned the hard way to ensure the strawberries are fresh and ripe. If they’re too sour, it can throw off the balance, so always taste test before adding sugar!
Serving Suggestions
When it comes to serving, I love adding a dollop of whipped cream on the side for an extra touch of indulgence. The lightness of the whipped cream contrasts beautifully with the dense cheesecake, making every bite a truly delightful experience. For gatherings, consider adding a sprig of mint on top for a pop of color and freshness; it enhances the presentation and adds a lovely aroma to each slice!
Another serving suggestion is to pair this cheesecake with a cup of coffee or tea. The bittersweet notes of coffee complement the dessert wonderfully, while herbal teas can add a refreshing contrast. Whether you’re hosting or just treating yourself, this pairing is always a hit.
If you’re feeling adventurous, you might also serve it with a drizzle of chocolate or caramel sauce for an added layer of decadence. There’s something special about a little extra treat on top that makes the dessert feel even more luxurious!
Variations & Customizations
One of my favorite variations is to make a chocolate swirl cheesecake by adding melted chocolate to part of the batter before pouring it into the crust. This creates a mesmerizing marbled effect and introduces rich chocolate flavors that pair beautifully with the strawberries. It’s a fun twist that friends and family love!
For a healthier spin, I’ve experimented with Greek yogurt instead of sour cream. It offers a tangy flavor while also reducing calories. You can also consider using a whole-grain crust or substituting coconut sugar for conventional sugar for a more natural sweetness. Personalizing this recipe to suit your taste ensures that it never feels too repetitive.
If you love other fruits, you can easily substitute the strawberries for other favorites like blueberries, raspberries, or peaches. Each fruit brings its own unique flavor profile that transforms this cheesecake into a new creation each time!
How to Store, Freeze & Reheat
Storing your cheesecake is simple! I recommend keeping it covered in the refrigerator to prevent it from absorbing any odors from other foods. It stays delicious for about 5 days—though I doubt it’ll last that long! Just slice it and make sure each piece is well-wrapped if you’re saving some for later.
If you want to freeze it, I suggest wrapping individual slices in plastic wrap first and then placing them in an airtight container or freezer bag. This way, you can enjoy a slice whenever a craving strikes! It can be stored in the freezer for up to two months without loss of flavor or texture.
When it’s time to enjoy your frozen cheesecake, just remove it from the freezer and allow it to thaw in the refrigerator for several hours or overnight. I don’t recommend microwaving it, as that can change the creamy texture dramatically; just be patient, and it will be just as delicious as the day you made it!
Conclusion
I hope this cheesecake with strawberry topping becomes a cherished recipe in your kitchen as it has in mine. The process is not just about baking; it’s about sharing joy, love, and deliciousness with those around us. So gather your ingredients, get your family involved if you can, and enjoy the sweet rewards of homemade goodness. Happy baking!