
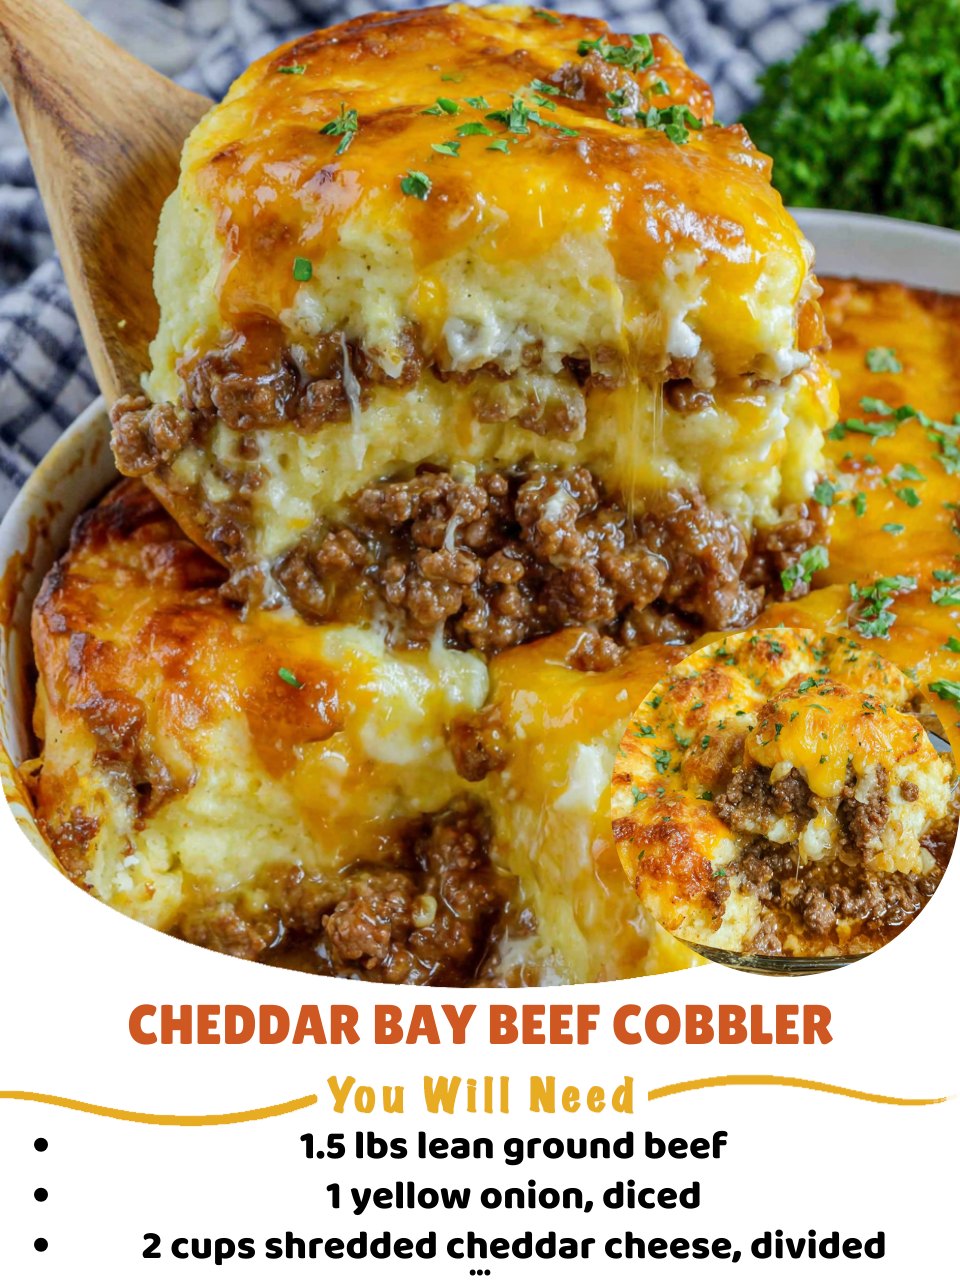
The idea for this Cheddar Bay Beef Cobbler struck me while I was dreaming of the iconic flavors of those famous seafood restaurant biscuits, but wanting something hearty and main-dish worthy. I wondered, what if those buttery, cheesy, garlicky toppings met a savory beef filling? The experiment began. As the ground beef and onions sizzled, and I mixed the cobbler dough, my kitchen filled with an aroma that was pure comfort food alchemy. When I pulled the dish from the oven, the golden, bubbling biscuits sitting atop the rich, cheesy beef stew was a sight to behold. That first spoonful—tender biscuit soaking up the savory filling—was a revelation. It’s the ultimate cozy, one-dish meal that feels like a hug from the inside out.
Why You’ll Love This Recipe
You are going to be obsessed with this recipe because it’s the glorious, comforting mashup you never knew you needed. It takes the nostalgic, irresistible flavor of Cheddar Bay biscuits and turns them into the perfect topping for a rich, cheesy ground beef filling. It’s a complete meal in one dish that’s incredibly satisfying, family-friendly, and perfect for any night you crave something indulgent yet homemade. The contrast between the fluffy, cheesy-herb biscuits and the savory beef beneath is pure magic. It’s a guaranteed crowd-pleaser that will have everyone asking for the recipe.
Ingredients
For the Beef Filling:
- 1.5 lbs lean ground beef (90/10 is ideal)
- 1 large yellow onion, diced
- 3 cloves garlic, minced
- 2 tablespoons all-purpose flour
- 1 (10.5 oz) can condensed cheddar cheese soup
- 1 cup beef broth
- 1 tablespoon Worcestershire sauce
- 1 teaspoon dried parsley
- ½ teaspoon garlic powder
- ½ teaspoon onion powder
- ½ teaspoon smoked paprika
- Salt and black pepper to taste
- 1 cup frozen mixed vegetables (peas and carrots work great), optional
- 1 ½ cups shredded sharp cheddar cheese, divided
For the Cheddar Bay Cobbler Topping:
- 2 cups all-purpose flour
- 1 tablespoon baking powder
- 1 teaspoon granulated sugar
- ½ teaspoon salt
- ½ teaspoon garlic powder
- ½ cup (1 stick) cold unsalted butter, cubed
- ¾ cup cold milk
- 1 cup shredded sharp cheddar cheese
- 2 tablespoons fresh parsley, chopped
- For the Garlic Butter Brush: 2 tbsp melted butter mixed with ½ tsp garlic powder and ¼ tsp dried parsley. (See the next page below to continue…)
Equipment Needed
- Large, oven-safe skillet (12-inch cast iron is perfect) or a 9×13 baking dish
- Mixing bowls (one large, one medium)
- Box grater (for cheese)
- Pastry cutter or two forks
- Whisk
- Measuring cups and spoons
Step-by-Step Instructions
We start by building the rich, cheesy beef base that will cradle our biscuits. If you’re using a skillet, preheat your oven to 400°F (200°C). Over medium-high heat, cook the ground beef and diced onion, breaking up the meat until it’s fully browned and the onions are soft. Drain any excess grease—this is important to prevent a greasy filling. Add the minced garlic and cook for one more minute until fragrant. Now, sprinkle the 2 tablespoons of flour over the beef mixture. Stir constantly for about 2 minutes. This cooks out the raw flour taste and will help thicken our sauce beautifully.
Next, we create the luscious sauce. Pour in the cheddar cheese soup, beef broth, and Worcestershire sauce. Stir well to combine, scraping up any browned bits from the bottom of the pan—that’s flavor! Add the dried parsley, garlic powder, onion powder, and smoked paprika. If you’re using the frozen vegetables, stir them in now. Bring the mixture to a simmer and let it cook for 3-5 minutes, until it thickens slightly. It should be the consistency of a thick stew. Remove from heat and stir in 1 cup of the shredded cheddar cheese until melted. Taste and season with salt and pepper. Set this aside while we make the iconic topping.
Now for the star of the show: the Cheddar Bay biscuit dough. In a medium mixing bowl, whisk together the flour, baking powder, sugar, salt, and garlic powder. Using a pastry cutter or two forks, cut the cold, cubed butter into the flour mixture until it resembles coarse crumbs with some pea-sized butter pieces remaining. These bits of butter are what will create flaky layers in the oven. Gently stir in the cold milk, the remaining 1 cup of shredded cheddar, and the fresh parsley just until a shaggy dough forms. Don’t overmix! Overworking the dough makes tough biscuits. (See the next page below to continue…)
Time to assemble our cobbler. If your beef mixture is not already in an oven-safe skillet, transfer it to a 9×13 baking dish. Drop the biscuit dough in 8-10 roughly equal mounds over the top of the hot beef filling. Don’t smooth them out; the craggy tops will get beautifully golden. Place the skillet or dish in the preheated oven and bake for 20-25 minutes, until the biscuits are puffed, golden brown, and cooked through. In the last 5 minutes of baking, I mix the garlic butter and brush it generously over the hot biscuits. That final touch is non-negotiable—it gives that authentic, irresistible Cheddar Bay flavor and shine. Let it cool for 5-10 minutes before serving; the filling will be lava-hot.
Pro Tips for Best Results
My top tip is about the butter in the biscuit dough. I’ve tested this with melted butter and cold butter, and cold butter is the only way to go. When those little cold butter pockets hit the hot oven, they steam, creating the most wonderful flaky, tender layers in your biscuits. I even cube my butter and pop it in the freezer for 10 minutes before I start. Also, handle the dough as little as possible. Mix until it just comes together, even if it looks a little rough.
The second tip is all about the filling consistency. You want it thick, like a hearty chili, not soupy. If it’s too thin, the biscuit dough will sink into it and become soggy on the bottom. The flour you add to the beef and the simmering time are crucial to achieve the right thickness. If, after simmering, it still looks too loose, let it cook uncovered for a few more minutes. A properly thickened filling supports the biscuits and creates the perfect textural contrast.
Finally, don’t skip the garlic butter brush at the end. I’ve tried mixing garlic into the dough and brushing with plain butter, but adding that garlicky, buttery gloss after baking is what replicates the true Cheddar Bay experience. It soaks into the hot biscuit tops, amplifying the flavor and giving them a beautiful sheen. Do it in the last few minutes of baking or right when they come out of the oven for the best effect.
Common Mistakes to Avoid
The first mistake I made was using a filling that was too wet. I didn’t simmer it long enough after adding the broth, and my biscuit topping sank into a saucy abyss, emerging soggy and undercooked on the bottom. The filling must be thick and stew-like before you add the dough. Take the time to let it reduce and thicken on the stovetop—it’s the foundation your fluffy biscuits need to stay proud and golden. (See the next page below to continue…)
Another error is overmixing the biscuit dough. In my early attempts, I kept stirring until it was a smooth ball, worried about uneven mixing. This developed the gluten in the flour and resulted in dense, tough little hockey pucks instead of light, flaky biscuits. The dough should be shaggy and just barely holding together when you drop it. A few dry spots are okay; they’ll incorporate as you gently form the mounds.
Using pre-shredded cheese for both the filling and the biscuit dough is a shortcut that affects quality. Pre-shredded cheese is coated with anti-caking agents like cellulose, which can prevent it from melting as smoothly and can make your biscuits a bit gummy. For the creamiest filling and the best melt in your biscuits, take two minutes to shred a block of sharp cheddar yourself. The flavor and texture difference is noticeable and worth it.
Finally, not letting the dish rest before serving is a disservice to yourself and your guests. The filling is bubbling and intensely hot straight from the oven. A 5-10 minute rest allows it to cool to a edible temperature and also lets the filling set up slightly, so when you spoon it out, it holds together beautifully on the plate instead of running everywhere. Patience here makes for a perfect presentation.
Serving Suggestions
I love serving this cobbler right from the skillet or baking dish at the table. It’s a stunning, rustic presentation. The dish is a complete meal with protein, veg (if you added them), carbs, and dairy, so it truly needs no sides. However, I often pair it with a simple, crisp green salad with a tangy vinaigrette to cut through the richness. A Caesar salad or an arugula salad with lemon also works wonderfully.
For a heartier plate, especially for big appetites, a side of steamed green beans, roasted broccoli, or garlicky sautéed spinach is a perfect vegetable companion. The cobbler is so flavorful and satisfying that you don’t need anything elaborate. A cold beer or a glass of iced tea is the perfect drink to wash it all down.
If I have any leftovers (a rarity!), the biscuit topping softens into the filling, creating a delicious, savory bread-pudding-like texture that’s amazing for lunch the next day. It’s one of those dishes that’s arguably just as good, if not better, as leftovers.
Variations & Customizations
This recipe is a fantastic canvas. For a different meat, try using ground turkey, chicken, or even a plant-based crumble. For a “Shepherd’s Pie” twist, use ground lamb and add a teaspoon of rosemary to the filling. You can also add a can of drained and rinsed black beans or kidney beans to the beef mixture for extra fiber and heartiness.
Feel free to play with the vegetables. Corn, diced zucchini, or chopped mushrooms sautéed with the onions are all great additions. For the biscuit topping, you can add a pinch of cayenne for heat, or swap half the cheddar for Pepper Jack cheese. If you’re out of fresh parsley, a teaspoon of dried parsley in the dough and the butter brush works in a pinch.
For a low-carb version, you can skip the biscuit topping altogether and instead top the beef filling with a layer of cauliflower mash mixed with cheese, then bake until golden. The core concept of a savory, cheesy filling with a delicious topping is endlessly adaptable.
How to Store, Freeze & Reheat
Leftovers can be stored in an airtight container in the refrigerator for up to 3 days. The biscuits will soften into the filling, which is still delicious. To reheat, the oven is best to re-crisp the topping a bit. Place portions in an oven-safe dish, cover with foil, and warm at 350°F for 15-20 minutes. The microwave will work but will keep everything soft.
You can assemble the cobbler ahead of time and freeze it before baking. Prepare the filling and let it cool completely. Make the biscuit dough and drop it on top. Wrap the entire dish tightly in plastic wrap and then foil. Freeze for up to 2 months. To bake from frozen, do not thaw. Remove the wrappers, cover with foil, and bake at 400°F for 30 minutes, then uncover and bake for 25-30 minutes more, until the filling is bubbling and the biscuits are cooked through. You may need to brush with garlic butter after baking.
I do not recommend freezing already-baked cobbler, as the biscuit texture becomes very compromised upon thawing and reheating. For the best make-ahead strategy, freeze it unbaked. This ensures you get that fresh-from-the-oven texture whenever the craving strikes.
Conclusion
This Cheddar Bay Beef Cobbler is more than just a clever recipe; it’s a fun, flavorful, and deeply comforting experience that turns a simple weeknight into something special. It has become a beloved favorite in my home, combining nostalgic flavors in the most satisfying way. I hope it brings the same warmth, cheesy joy, and delicious simplicity to your table, becoming a recipe you turn to whenever you need a guaranteed smile. Now, go grab that skillet and get ready to bake up some comfort with a cheesy, garlicky twist