
The first time I made CARMELITAS, my entire kitchen filled with the buttery, brown-sugar aroma that tells you something incredible is happening in the oven. As the oatmeal crust baked, it turned golden and fragrant, and I remember standing there watching the caramel melt with the chocolate chips like a tiny lava flow in my saucepan. When I layered everything together—the warm crust, the silky caramel, the melted chocolate—I had to stop myself from diving into the pan before it even went back into the oven. And when it finally came out, bubbling gently around the edges and smelling like pure dessert heaven, I knew instantly that this was one of those recipes that becomes an instant classic.
Why You’ll Love This Recipe
You’ll love this recipe because it gives you ridiculously rich, gooey, buttery, melt-in-your-mouth dessert bars with almost zero effort, and every bite tastes like the kind of indulgence you didn’t even know your sweet tooth was capable of craving.
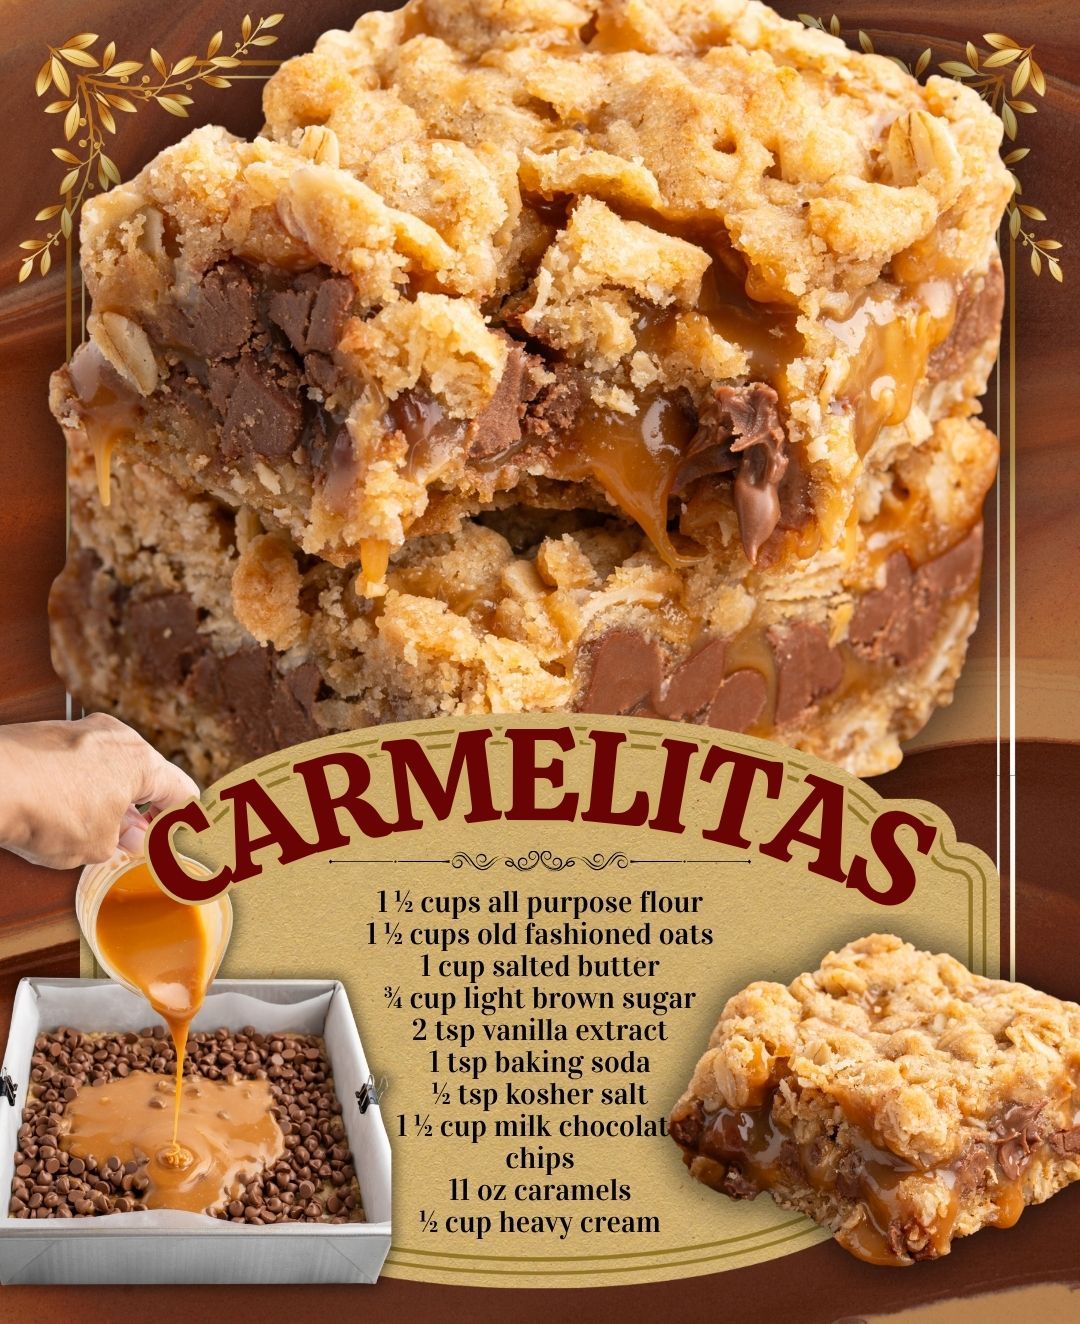
Ingredients
- 1 cup unsalted butter, melted
- 1 cup brown sugar, packed
- 1 cup all-purpose flour
- 1 cup old-fashioned rolled oats
- 1 teaspoon baking soda
- ¼ teaspoon salt
- 1 (11–14 oz) bag soft caramels, unwrapped
- ½ cup heavy cream
- 1 cup semi-sweet chocolate chips
- ½ teaspoon vanilla extract
One tip I’ve learned is that using old-fashioned rolled oats—not quick oats—gives the crust the perfect hearty texture without turning mushy. For the caramel, I’ve tried both wrapped caramels and soft caramel bits, and either works beautifully as long as you melt them gently with cream to keep the mixture smooth. The chocolate chips can be semi-sweet, dark, or milk, depending on how sweet you want the bars. And melted butter is essential because it combines evenly with the oats and flour to create that irresistible chewy crumble layer.
Equipment Needed
- 8×8 or 9×9 baking pan
- Parchment paper
- Mixing bowls
- Heatproof spatula
- Medium saucepan
- Measuring cups and spoons
- Oven mitts
I prefer using an 8×8 pan because it creates thicker, gooier bars, but a 9×9 also works if you want them slightly thinner. Parchment paper makes the bars so much easier to lift out—trust me, the caramel gets sticky, and skipping parchment once taught me a lesson I’ll never forget. A saucepan is needed for melting the caramel, but make sure it’s heavy-bottomed so nothing scorches. And a sturdy spatula helps press the crust layer evenly without sticking to your hands.
Step-by-Step Instructions
Whenever I make CARMELITAS, I start by preheating the oven and lining my baking pan with parchment so the bars lift out easily. Then I stir together the melted butter, brown sugar, oats, flour, baking soda, and salt. The mixture looks crumbly but should clump when you squeeze it. I press half of this mixture into the bottom of the pan and bake it until the edges turn lightly golden. This becomes the foundation for all the gooey goodness that gets layered on top.
While the crust bakes, I melt the caramel and heavy cream together over low heat. This step always fills the kitchen with the nostalgic scent of caramel corn. I stir constantly because caramel will seize if it’s heated too quickly. When it becomes smooth and glossy, I remove it from the heat and whisk in the vanilla. This makes the caramel pourable, silky, and ready for layering.
Once the crust comes out of the oven, I sprinkle chocolate chips evenly across the warm surface. They begin to soften immediately from the heat, and that first wave of chocolate aroma hits me every time. Then I pour the caramel mixture over the chocolate layer, spreading it gently so it reaches all the corners. The caramel sinks into tiny gaps between the oats, creating molten ribbons that bake into the bars later.
Next, I crumble the remaining oat mixture over the caramel in little clusters. I never pack the top crust down—I learned through trial and error that a light sprinkle gives you beautiful texture and lets some of the caramel bubble through as it bakes. The bars bake until the top is golden brown and the caramel is bubbling at the edges. Once out of the oven, the hardest part begins: letting the bars cool. They need time to set, or the caramel will spill everywhere. Once cooled, they slice into the most gorgeous, gooey squares.
Pro Tips for Best Results
One of the biggest tips I can share is to let the caramel melt slowly. I tested the caramel step three different ways—high heat, medium heat, and low heat—and low heat won by a landslide. High heat scorched it within minutes, giving the whole dessert a burnt flavor. Medium heat was okay but still risky. Low and slow gives you perfectly smooth, creamy caramel every single time.
Another tip I learned the hard way is not to press the top layer too firmly. The first time I made Carmelitas, I mashed the top oat layer down like I was compacting granola bars. The result was a dense, hard top layer that didn’t let the caramel bubble up as it baked. Leaving the topping loose makes the bars crumbly, buttery, and perfectly textured.
Chilling the bars before slicing is another game changer. I used to try to cut them warm because I was impatient (the smell is torture), but warm caramel doesn’t slice—it oozes. Just one hour in the fridge gives perfect, clean edges without compromising texture. They taste even better slightly chilled.
Lastly, don’t skimp on parchment paper. I have tried buttering the pan instead, thinking the caramel would pop out easily. Big mistake—half the bars stuck to the bottom like cement. Parchment saves your dessert and your sanity.(See the next page below to continue…)