
Another common mistake is letting the temperature get too high. If the caramel passes 240°F, it shifts into the firm-ball stage, creating a much harder candy. Many people think they can “fix” it afterward, but once the texture changes, it’s nearly impossible to bring it back. Watching the thermometer closely is the key to buttery, soft caramels.
Adding the evaporated milk too quickly is another pitfall. If you pour it in all at once, the mixture can seize or create crystals. I learned to add it slowly, stirring constantly, letting each splash incorporate fully before adding more. This keeps the mixture smooth and creamy.
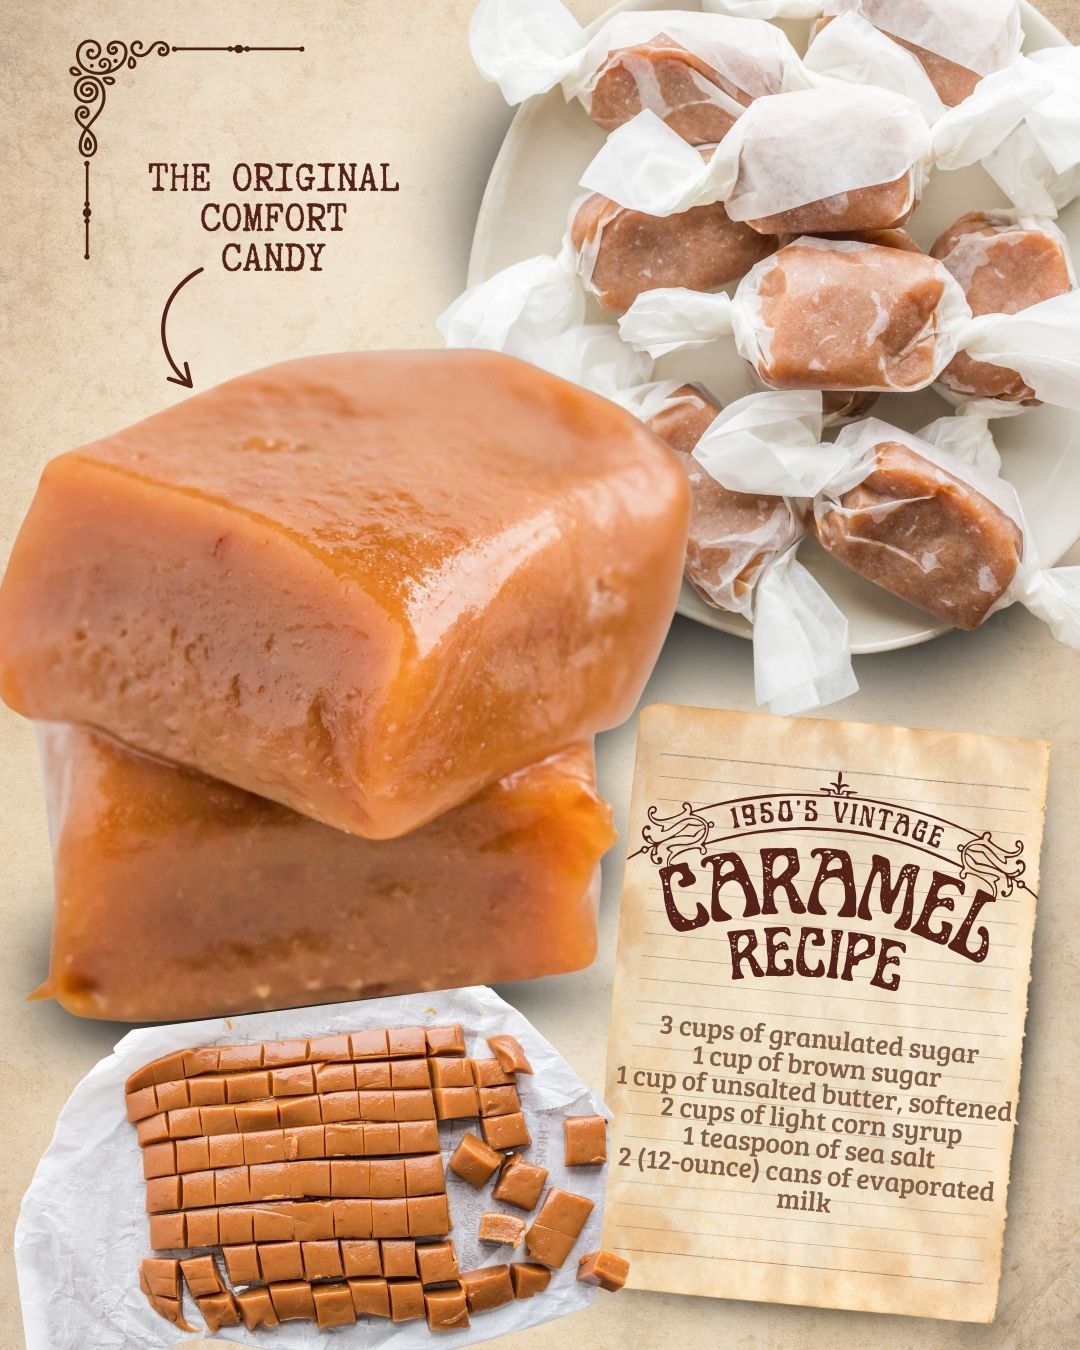
Lastly, avoid cutting the caramel before it has cooled completely. I used to get impatient and try slicing it at the 45-minute mark, only to end up with misshapen edges and sticky pieces. Waiting until it’s fully set makes slicing clean, easy, and satisfying.
Serving Suggestions
I like serving these homemade caramels as part of a holiday dessert tray. Their warm golden color and soft texture pair beautifully with chocolate truffles, sugar cookies, and peppermint bark. Guests always gravitate toward them because they look like little wrapped treasures.
Another way I enjoy serving them is alongside coffee or tea. The slight bitterness of a dark roast contrasts perfectly with the sweet, buttery caramel. I’ve even dropped a small caramel into a mug of hot coffee—it melts slowly and turns the drink into something luxurious.
For parties or potlucks, I love arranging the wrapped caramels in a bowl like vintage candy shop treats. People always smile when they unwrap one because it feels nostalgic and special. These caramels are especially loved at events with older generations who remember traditional homemade candies.
And for gifting, these caramels are unbeatable. I wrap them in wax paper, tie a string around small bundles, and tuck them into tins or jars. They feel homemade, heartfelt, and thoughtful—perfect for neighbors, teachers, and friends.
Variations & Customizations
One of my favorite variations is adding vanilla extract at the end. A teaspoon or two gives the caramels a smoother, softer flavor that tastes almost like a caramel latte. Vanilla balances the sweetness beautifully without overpowering the caramel’s natural richness.
Another version I’ve tried includes coarse sea salt sprinkled over the top before the caramel cools. This transforms the candy into salted caramels, giving each bite a perfect blend of sweet and salty. If you’re a fan of modern caramel flavors, this variation is a must-try.
I’ve also stirred toasted nuts—like pecans or almonds—into the caramel right before pouring it into the pan. The crunchy texture adds a delightful contrast and turns the candy into something closer to praline. It feels rustic and indulgent.
If you want something fun for kids, you can dip the caramel squares in melted chocolate after they cool. I’ve done this around the holidays, and people go wild for chocolate-covered caramels. You can even sprinkle festive toppings like crushed candy canes or sprinkles for a seasonal touch.
How to Store, Freeze & Reheat
These caramels keep beautifully at room temperature if wrapped individually. I place them in an airtight tin or container, and they stay fresh for up to three weeks. The wax paper prevents sticking and helps maintain the chewy texture.
If I want to store them longer, I freeze them—yes, they freeze wonderfully! I place the wrapped caramels in a freezer bag and remove as much air as possible. They last for up to three months in the freezer. When I want one, I simply let it thaw on the counter for a few minutes; it softens perfectly and tastes as fresh as when first made.
You don’t actually need to reheat caramels, but if you want them slightly softer, you can warm them for just a few seconds in your hand or near a warm cup of coffee. Avoid microwaving them; even a few seconds can turn them into a melted puddle.
If storing in warm climates, keep them in a cool pantry or even the refrigerator—but always let them warm slightly before eating so the texture stays smooth and chewy instead of firm.
Nutrition Information
Caramels are definitely a treat, but they’re the kind of treat that delivers satisfaction in a single piece. Each square offers a balance of sugar, butter, and milk that creates a decadent little bite. I like knowing exactly what goes into them—no preservatives, no artificial flavors, just real ingredients.
Because the portions are small, it’s easy to enjoy one or two without feeling heavy. The fat from the butter and milk gives the caramels that creamy texture, while the sugar provides quick energy. It’s a dessert that feels indulgent but doesn’t require a huge serving to satisfy a craving.
If you want a slightly lighter caramel, you can cut them into smaller pieces. I’ve done this before for parties, and it actually works out beautifully because people like taking just a bite or two. It stretches the batch further as well.
Overall, while caramels are certainly a sweet treat, they’re also a nostalgic, made-from-scratch comfort candy that brings joy in moderation—and that’s something I personally feel great about.
FAQ Section
Can I make this caramel without a thermometer?
Yes, but it’s much harder. I’ve done the “soft-ball test” in cold water before, but nothing is as reliable as a candy thermometer, so I strongly recommend using one.
Why did my caramel turn grainy?
Graininess usually happens when sugar crystals form on the pot edges. To avoid this, stir consistently and avoid scraping the sides of the pot once it starts boiling.
Can I use heavy cream instead of evaporated milk?
You can, but the texture will be slightly different—cream makes it softer and richer, but evaporated milk gives that classic 1950s caramel chew.
Why is my caramel too soft?
It likely didn’t reach the full 238°F. Even a couple degrees under can change the final texture. Next time, watch the thermometer closely.
Why is my caramel too hard?
It went past the soft-ball stage. Once caramel reaches 240°F and beyond, it becomes firmer. It’s still delicious, but more like toffee.
Conclusion
These homemade caramels have become one of my favorite nostalgic recipes to share, not just because they taste incredible, but because every step—from the slow simmering on the stove to wrapping each little square in wax paper—feels like stepping back into a simpler, sweeter time. I hope they bring the same warmth, joy, and buttery comfort to your kitchen that they bring to mine. Enjoy every chewy, golden bite!