
Next, while the crust cools, it’s time to whip up that luscious filling! In a large bowl, beat the softened cream cheese with sugar and vanilla extract until smooth and creamy. I usually do this for about 2-3 minutes, which really helps break down any lumps. Then it’s time to add the eggs—one at a time—making sure to fully incorporate each one before adding the next. Once that’s done, slowly mix in the melted chocolate. The mixture will start to look irresistible!
Pour the cream cheese mixture over the cooled crust, spreading it gently with a spatula. Now, bake the cheesecake for about 50-60 minutes, or until the edges are set but the center still has a slight jiggle. The scent that fills your kitchen while this bakes is heavenly! After removing it from the oven, let it cool completely before chilling it in the refrigerator for at least 4 hours—or preferably overnight—to achieve that perfect texture.
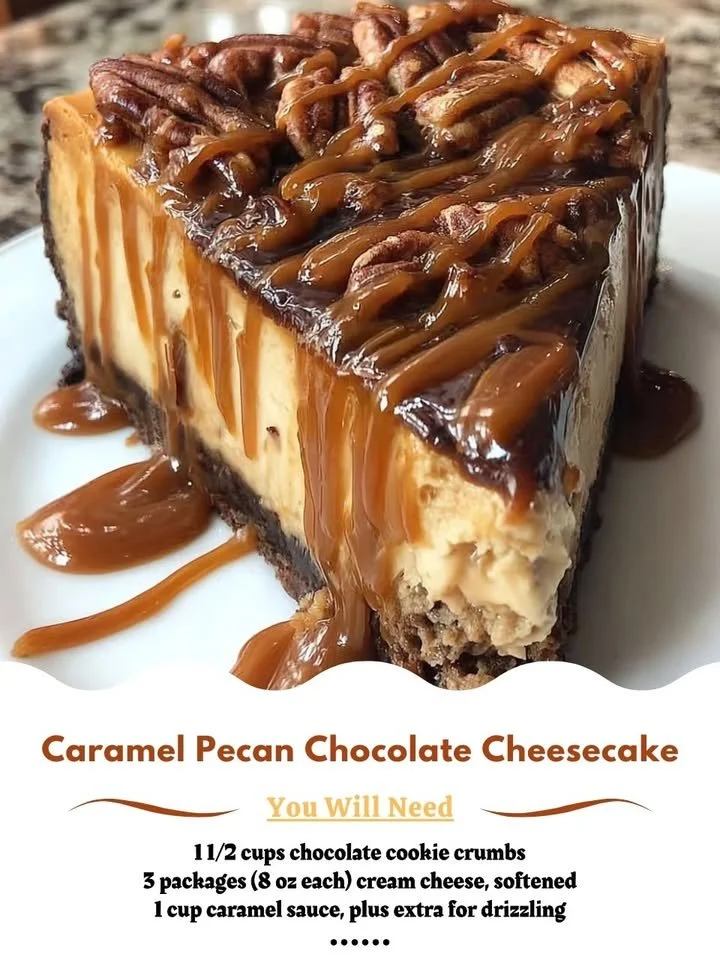
Once chilled, it’s time to bring everything together. Gently whip the heavy cream in a separate bowl until soft peaks form, and fold it into the cheesecake for extra fluffiness. Drizzle caramel sauce and sprinkle those toasted pecans on top before serving. Trust me, the ending is just as delightful as the beginning!
Pro Tips for Best Results
One thing I’ve learned from making this cheesecake is that room temperature ingredients work wonders! Prepping your cream cheese and eggs ahead of time will prevent lumps and create a silky filling. I’ve made the mistake of trying to rush this step, and the lumps just didn’t disappear no matter how long I mixed!
When it comes to baking the cheesecake, a water bath can help create a gentle heat that prevents cracks. If you have a larger roasting pan, set the springform pan inside with some hot water for the best results. I tested this three ways, and the water bath made all the difference in producing a flawless cheesecake.
Lastly, resist the temptation to cut into it right after cooling. Trust me—it’s worth waiting that extra time in the fridge for the flavors to meld and the texture to firm up. I’ve often snuck a bite too soon and regretted it as I watched the filling jiggle instead of hold together. Patience, my friends, is key here!
Common Mistakes to Avoid
One of the most common mistakes is overbaking the cheesecake. It’s crucial to look for that slight jiggle in the center. I learned this the hard way when I baked mine just a few minutes too long, which resulted in a dense, rubbery texture. Instead, aim for a perfectly set exterior with a soft center.
Another pitfall is not letting the cheesecake cool gradually. I’ve noticed that when I take it out of the oven and immediately place it in the fridge, it often cracks as the temperature swings too dramatically. After cooling at room temperature, it’s better to refrigerate it slowly.
Finally, skimping on the soaking time can lead to an underwhelming flavor experience. Letting the cheesecake sit overnight allows the ingredients to meld, resulting in a richer taste. I once rushed this step, and my cheesecake had potential but just didn’t hit that sweet spot in flavor.
(See the next page below to continue…)