
Next, I make the cookie dough. I cream the butter and sugar together until they turn light and fluffy, a step that always makes my kitchen smell like the beginning of something delicious. Then I add the egg and vanilla, mixing until smooth. In a separate bowl, I whisk the flour, baking powder, and salt. Incorporating the dry ingredients slowly helps the dough stay tender, not tough. When the dough comes together, it’s soft but not sticky—perfect for forming the cookie bases.
Now comes the fun part: assembling the cookies. I scoop small balls of dough and press a shallow well into each one with my thumb. By this time, the cheesecake filling has firmed up enough to scoop or pipe into the center of each cookie. I add a small dollop—just enough to sit comfortably inside the well. I gently pinch the dough up around the filling, but not fully covering it. The goal is to cradle the filling without sealing it inside. As the cookies bake, the filling settles into a creamy pocket that stays perfectly soft.
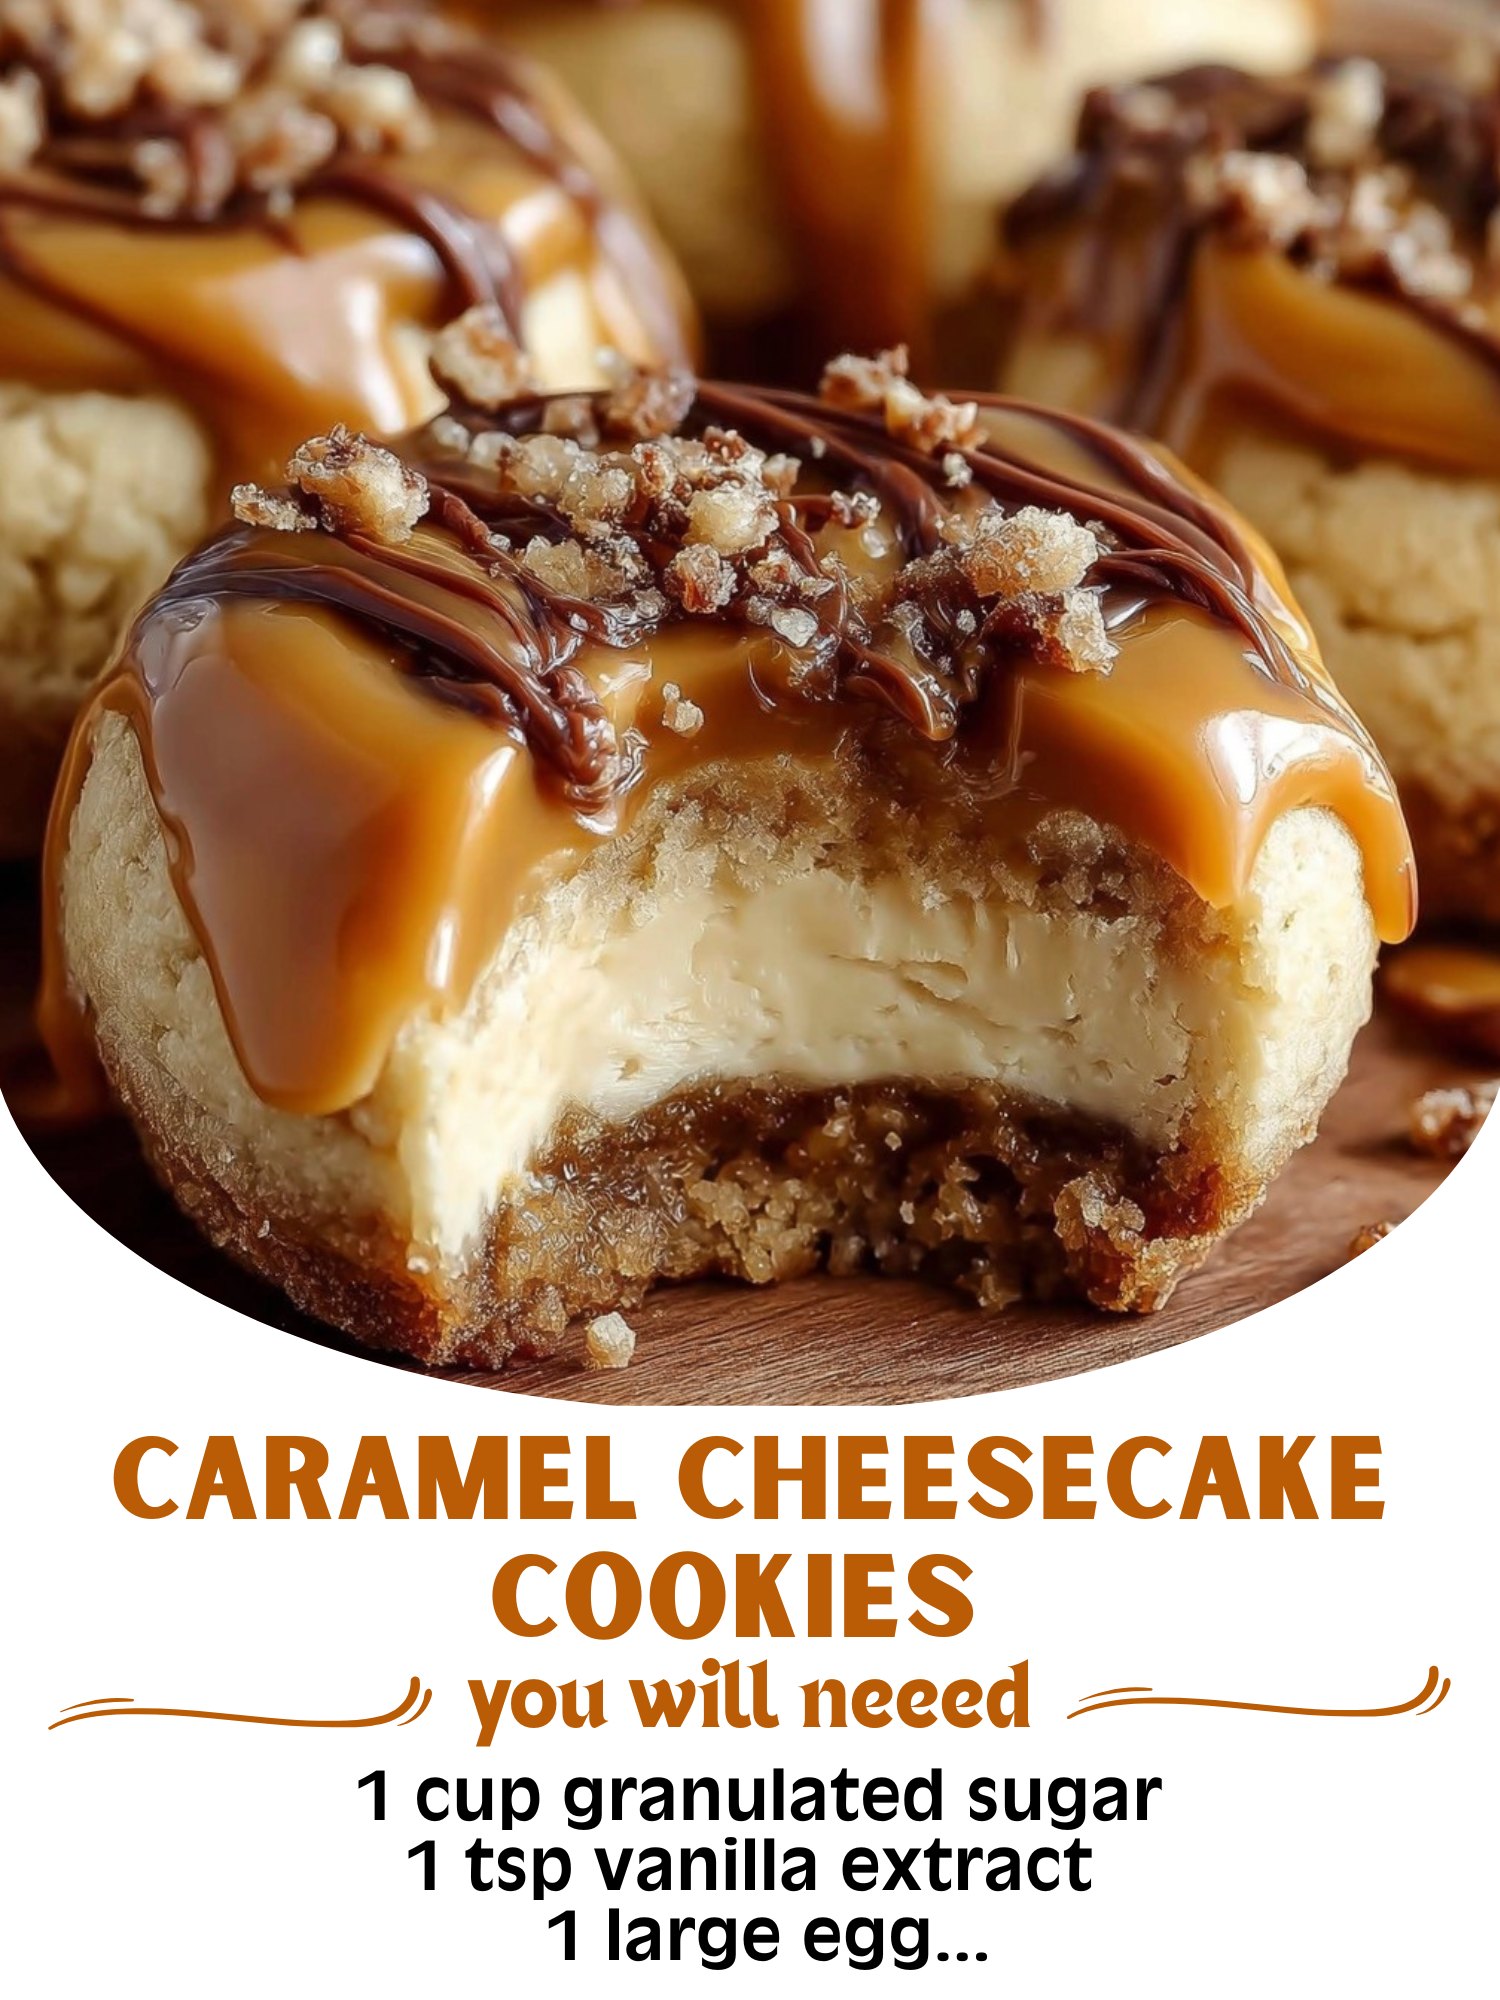
I place the cookies on a lined baking sheet and bake them until the edges turn a light golden brown. The moment I take them out of the oven, the warm, slightly sweet aroma fills the kitchen—the kind that makes you stop and take a deep breath. After they cool slightly, I melt the caramel with heavy cream until smooth and glossy, then drizzle it generously over the tops. Seeing that caramel drip down the sides of the cookies feels like the finishing touch on a true bakery-style creation.
Pro Tips for Best Results
I tested this recipe three different ways—chilling the dough, not chilling the dough, and chilling only the cheesecake filling—and I discovered that chilling just the filling works best. When I chilled the dough, the cookies didn’t spread enough, and when I didn’t chill the filling, it melted too fast while baking. Chilling the cheesecake center alone maintains the perfect texture.
Another tip I learned the hard way is not to overfill the cheesecake centers. The first time I made these, I added way too much filling because I wanted the cookies to be extra decadent. Instead, the filling bubbled over the edges and made a delicious but messy situation. A teaspoon-sized amount is perfect—it spreads slightly as it bakes without overflowing.
When melting the caramel, go slowly. I used to microwave caramel bits all at once for a long interval, and they would seize. Now I heat them in 20–30 second increments, stirring each time, until the mixture becomes smooth. The cream helps loosen everything, but gentle heating is key for that glossy, pourable consistency.
Lastly, let the cookies cool before adding caramel. I know—it’s tempting to drizzle caramel on warm cookies—but it melts right off. Cooling keeps the caramel in place so it forms that gorgeous shiny layer. If you want to speed things up, pop the cookies into the fridge for 5 minutes before drizzling.
Common Mistakes to Avoid
I made this mistake the first time—using cold cream cheese for the filling. Cold cream cheese doesn’t blend smoothly, and no amount of mixing can remove those stubborn lumps. Room-temperature cream cheese creates the silky-smooth center these cookies deserve.
Another mistake is overmixing the dough after adding the flour. I once mixed the dough too vigorously, and the cookies came out tough instead of tender. As soon as the flour disappears, stop mixing. Your cookies will thank you with a soft, melt-in-your-mouth texture.(See the next page below to continue…)