
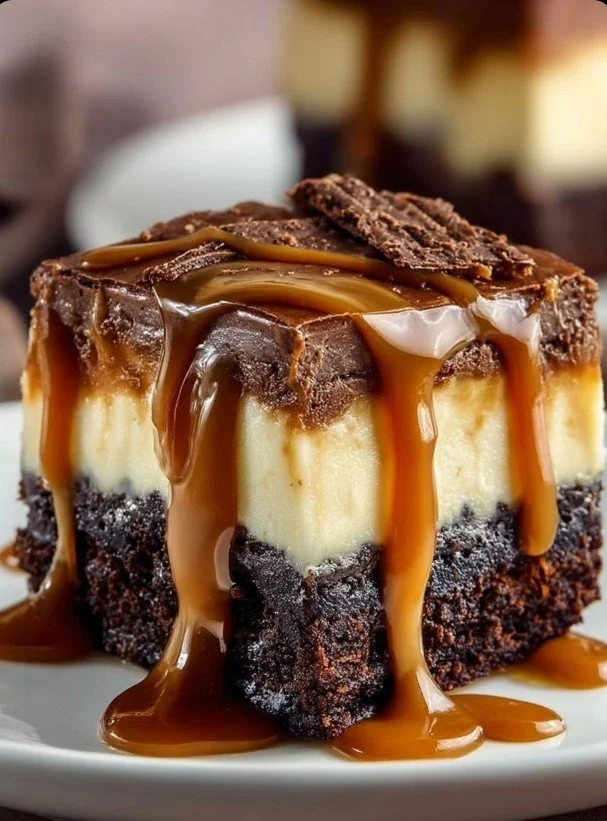
Caramel Brownie Cheesecake Bliss! This dessert is the epitome of indulgence, combining layers of rich brownie, creamy cheesecake, and luscious caramel. Just the thought of it makes my mouth water. It’s perfect for celebrations, gatherings, or even just as a comforting dessert to enjoy by yourself.
Why You’ll Love This Recipe
What sets this Caramel Brownie Cheesecake Bliss apart is its incredible texture and flavor layers. The fudgy brownie base, silky cheesecake filling, and gooey caramel topping create a symphony of taste in every bite. I often find it hard to resist going back for seconds (or even thirds)! Plus, it’s surprisingly simple to make, proving that fancy desserts don’t have to be complicated. (See the ingredients in the next page below…)
Ingredients
– 1 box of brownie mix (plus ingredients as directed)
– 16 oz cream cheese, softened
– 1 cup granulated sugar
– 1 teaspoon vanilla extract
– 3 large eggs
– 1 cup sour cream
– 1 cup caramel sauce (store-bought or homemade)
– 1 cup chocolate chips (optional for garnish)
– Whipped cream (optional for serving)
Equipment Needed
– 9-inch springform pan
– Mixing bowls
– Electric mixer or whisk
– Rubber spatula
– Measuring cups and spoons
– Oven
Step-by-Step Instructions
To start, preheat your oven to 350°F (175°C). First, prepare the brownie base according to the box instructions, pouring the batter into a greased springform pan. I always love the smell of brownies baking; it fills my kitchen with such warmth! Once the brownies are set in the oven, mix together the softened cream cheese, sugar, and vanilla in a large bowl until smooth. Add the eggs one by one, beating after each addition. Then, fold in the sour cream gently. This step creates a light, fluffy cheesecake filling that complements the fudgy brownie. (See the next page below to continue steps…)
After the brownie layer has baked for about 15-20 minutes (it should be slightly underbaked), pull it out and pour the cheesecake mixture over the top. I sometimes give it a little shake to level everything out. Now comes the fun part: drizzle half of your caramel sauce over the cheesecake layer and use a knife or toothpick to swirl it in for a marbled effect—this really gives it a beautiful appearance! Carefully return the springform pan to the oven and bake for an additional 40-45 minutes, or until the cheesecake is set but still slightly jiggly in the center. The aromas wafting through my kitchen are simply heavenly at this stage.
Once done, allow the cheesecake to cool completely and chill in the refrigerator for at least 4 hours or overnight if you can wait. When you’re ready to serve, drizzle the remaining caramel sauce on top and garnish with chocolate chips or whipped cream if desired. The combination of caramel drizzles and that creamy top layer makes my heart skip a beat every time. Trust me, your friends and family won’t be able to resist!
Pro Tips for Best Results
I’ve tried this recipe a few ways and found that using room temperature ingredients—especially the cream cheese and eggs—helps create a creamy, smooth filling. This makes mixing much easier and ensures there are no lumps. Also, don’t rush the cooling process; letting the cheesecake chill fully is essential for the best flavor and texture.
One time, I was impatient and cut into the cheesecake too early. The result was a delicious mess that wouldn’t hold its shape! Now, I give it plenty of time in the fridge to firm up before slicing. When cutting, I use a warm, dry knife, dipping it into hot water then wiping it off, making each slice clean and gorgeous.
Finally, consider making your own caramel sauce. I did this one time, and it added a level of homemade goodness that store-bought couldn’t quite match. Plus, it’s super simple and makes the whole kitchen smell divine while it’s simmering!
Common Mistakes to Avoid
One common mistake I’ve encountered is overbaking the cheesecake. It’s easy to lose track of time when the smell of caramel and chocolate is filling the air! Remember, the center should be slightly jiggly when you take it out. It will continue to set as it cools. (See the next page below to continue…)
Another pitfall is not preparing the pan properly. Make sure to grease your springform pan well before adding the brownie mix. If you don’t, you could end up with beautiful layers that stick to the pan, making your dessert a real challenge to serve. I learned this the hard way after one unfortunate cheesecake that decided to cling to the sides!
Lastly, be careful with the caramel. If you pour too much at once or don’t swirl it properly, you can end up with a hard layer that’s difficult to slice through when you serve. Smaller dollops for swirling create a much better effect.
Serving Suggestions
Caramel Brownie Cheesecake Bliss is decadent enough on its own, but I love to pair it with a dollop of freshly whipped cream for a light, airy contrast. The cream’s smooth texture complements the rich layers beautifully—it’s a match made in dessert heaven! Sometimes, I drizzle extra caramel on top of the whipped cream for that extra wow factor.
For special occasions, I’ll also serve it with fresh berries—like raspberries or strawberries—which provide a lovely tartness. The bright colors and flavors uplift the rich cheesecake and make the presentation pop! You can’t go wrong with this combination, especially when guests are around, eager to indulge.
If you want to enhance the chocolate flavor, a sprinkle of cocoa powder or some chocolate shavings on the top can elevate your presentation even more. Each bite offers a delightful contrast of sweet and bitter—absolutely mouthwatering!
Variations & Customizations
This recipe is incredibly versatile. If you’re feeling adventurous, swapping out the brownie layer for a chocolate cookie crust adds a delightful crunch and another layer of flavor. Just crush some chocolate cookies, mix them with melted butter, and press it into the bottom of your springform pan before adding the cheesecake layer.
For those who love a bit of zing, try incorporating some orange zest into the cheesecake mixture. The citrus notes really brighten up the dessert and create a refreshing twist that surprises your taste buds. I once made it this way for a family gathering, and it became an instant hit!
I’ve also experimented with different types of chocolate for the brownie layer. Using dark chocolate gives the dessert a more intense flavor, while milk chocolate offers a sweeter profile. You can even use white chocolate for a unique twist—just know it will be a bit sweeter than the traditional version!
How to Store, Freeze & Reheat
If you happen to have leftovers (which is rare in my home!), you can store the cheesecake in the refrigerator for up to five days. I always cover it tightly with plastic wrap to keep those rich flavors intact. It’s still delicious the next day—if anything, the flavors meld together even more overnight!
For longer storage, you can freeze slices of this delightful cheesecake. Just ensure they are well-wrapped in plastic wrap and then aluminum foil to prevent freezer burn. They can last up to three months in the freezer. When you’re ready to enjoy a slice, thaw it in the refrigerator overnight for the best texture and flavor.
Reheating isn’t necessary, but if you prefer a warm slice, you can microwave it for about 10-15 seconds. Just be cautious; too long in the microwave can lead to a rubbery texture, which I’ve learned from personal experience! Enjoying it slightly warmed enhances the gooeyness of the caramel—truly delightful!
Conclusion
There you have it—my cherished recipe for Caramel Brownie Cheesecake Bliss! I can’t wait for you to try it because I know you and your loved ones will fall in love with its delicious, indulgent layers as much as I do. Don’t forget to share your experiences and any personal touches you add. Happy baking!