
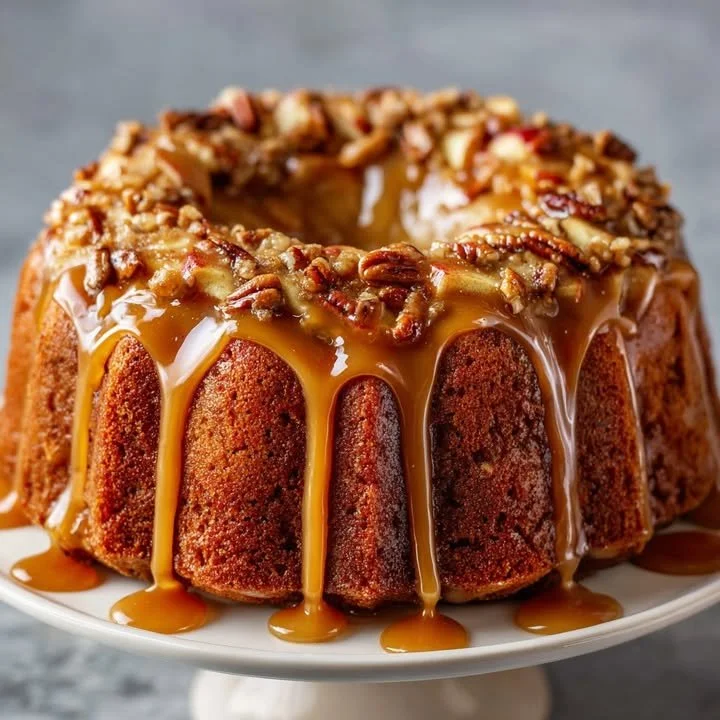
Caramel Apple Cake has an incredible way of capturing the essence of fall with every bite. I remember the first time I made this cake; the sweet scent of caramel filled my kitchen, mingling beautifully with the warm, spiced aroma of apples. It’s the kind of dessert that makes your home feel cozy and inviting, perfect for family gatherings or simply to spoil yourself. Today, I want to share my method for creating this deliciously moist cake topped with decadent caramel that will make your taste buds dance!
Why You’ll Love This Recipe
This Caramel Apple Cake takes the classic flavors of autumn and wraps them in a pillowy-soft cake that is perfect for any occasion. The balance of tartness from the apples and the rich sweetness of the caramel creates an irresistible flavor combination that keeps you coming back for more. Plus, it’s surprisingly simple to make, making it a go-to recipe I turn to time and time again. Whether you’re a novice baker or a seasoned pro, this cake will surely impress! (See the ingredients in the next page below…)
Ingredients
– 2 cups all-purpose flour
– 1 ½ teaspoons baking powder
– 1 teaspoon baking soda
– ½ teaspoon salt
– 1 teaspoon cinnamon
– ½ cup unsalted butter, softened
– 1 cup granulated sugar
– ½ cup packed brown sugar
– 2 large eggs
– 1 teaspoon vanilla extract
– 1 cup buttermilk
– 2 cups peeled and chopped apples (like Granny Smith)
– 1 cup caramel sauce (store-bought or homemade)
Equipment Needed
– Mixing bowls
– Measuring cups and spoons
– Electric mixer or stand mixer
– Rubber spatula
– 9×13 inch baking pan
– Parchment paper (optional)
– Oven mitts
Step-by-Step Instructions
To start making my Caramel Apple Cake, I preheat my oven to 350°F (175°C). While it’s warming up, I grease my 9×13 inch baking pan, sometimes even lining it with parchment paper for easier removal. In a medium bowl, I whisk together the flour, baking powder, baking soda, salt, and cinnamon. The smell of the cinnamon alone is enough to make me feel cozy already. In a separate large bowl, I combine the softened butter, granulated sugar, and brown sugar, beating them until they are light and fluffy. It always feels so satisfying to watch the mixture transform! (See the next page below to continue steps…)
Next, I add the eggs one at a time, mixing well after each addition. Then, I stir in the vanilla extract, which perfumes my kitchen in the most delightful way. It’s now time to add the dry ingredients and buttermilk alternately, starting and ending with the dry. I usually do about three additions of dry and two of wet. Then, I gently fold in the chopped apples. At this point, the batter is thick and luxuriant, studded with pieces of apple that will caramelize beautifully while baking.
I pour the batter into my prepared pan and spread it out evenly. This step can be a bit messy, but I embrace it; I’ve learned a spatula can be your best friend here. I bake it in the preheated oven for about 30-35 minutes, or until a toothpick comes out clean. While it’s baking, I prepare my caramel sauce if I’m making it from scratch. There’s something so rewarding about the nutty scent that fills my kitchen as the sugar caramelizes. Once the cake is done and has cooled slightly, I drizzle that luscious caramel over the top, letting it cascade down the sides like a sweet waterfall!
Pro Tips for Best Results
I’ve tested this cake three different ways to find the perfect texture and flavor balance. If you want a more intense apple flavor, feel free to add more apples—just make sure to adjust your flour slightly if needed to keep the batter from becoming too wet. I also found that using a mix of tart and sweet apples really heightens the flavor profile, so don’t hesitate to experiment.
Another useful tip I have is to bake the cake a day ahead of time. It allows the flavors to deepen and settle; plus, you can warm slices in the microwave and drizzle more caramel on them when ready to serve. Trust me, it’s a little slice of heaven!
Finally, don’t rush the cooling process. Many cakes, including this one, taste better when they’ve had time to rest; this lets the flavors meld beautifully. So be patient, and savor the fragrant aroma as it wafts around your home while you wait!
Common Mistakes to Avoid
One mistake I made the first few times was not properly measuring my flour. It can be tempting to scoop directly from the bag with a measuring cup, but this can lead to a dense cake. Instead, spoon the flour into your measuring cup and level it off with a knife. This little tip can transform your baked goods from heavy to light and airy! (See the next page below to continue…)
Another pitfall is underbaking the cake. I get it; the smell wafting from the oven can be so enticing that you might feel tempted to take it out early. Trust your toothpick! If it comes out with wet batter, the cake needs more time; if it has moist crumbs but no batter, it’s perfect.
Lastly, I once rushed the caramel and ended up with sugar that crystallized. It’s crucial to keep your heat low and stir gently while the sugar is melting. The patience pays off when you end up with a smooth, glossy caramel sauce that elevates the whole cake experience!
Serving Suggestions
When it comes to serving my Caramel Apple Cake, I love pairing it with a scoop of vanilla ice cream. The cold creaminess melds perfectly with the warm cake and the gooey caramel. Drizzling a bit of extra caramel on top of the ice cream creates a gorgeous presentation and adds richness.
Sometimes, I sprinkle some chopped nuts, like pecans or walnuts, on top of the cake for added crunch. The contrast between the soft cake, runny caramel, and the little bits of nutty goodness takes the dessert to the next level.
For a festive touch, I often make a spiced whipped cream by adding a sprinkle of cinnamon to regular whipped cream. It adds a delightful flavor without overpowering the cake itself and presents beautifully, especially when hosting guests!
Variations & Customizations
I love to get a little creative with my Caramel Apple Cake. For instance, I sometimes switch things up by adding caramelized pecans or walnuts right into the batter, giving it an additional layer of flavor and texture. The toasted crunch adds an amazing twist, and my family always raves about it!
On occasion, I’ll swap out a little of the flour for almond flour to enhance the nutty undertones of the cake itself. This creates a slightly different texture that I find really lovely, especially when combined with the caramel. If you’re gluten-free, you can also substitute the flour with a certified gluten-free blend with similar ratios.
Lastly, if you want to get adventurous, consider incorporating spices like nutmeg or allspice into the batter for a more complex flavor profile. It’s amazing how a pinch of spice can elevate the classic combination of caramel and apples!
How to Store, Freeze & Reheat
Storing leftover Caramel Apple Cake is a breeze—just cover it with plastic wrap or store it in an airtight container at room temperature for up to three days. However, I usually find that it never lasts that long with my family around! If you want to keep it for longer, you can refrigerate it for about a week, though I recommend reheating it slightly in the microwave before serving for the best flavor.
For longer storage, freezing it works wonderfully too! Simply allow the cake to cool completely, then wrap it tightly in foil or plastic wrap before placing it in a freezer bag. It can be frozen for up to three months. When you’re ready to enjoy it again, just thaw it in the refrigerator overnight.
Reheating is simple—use the microwave for a quick warm-up, or pop it back in a preheated oven at 350°F for about 15-20 minutes. I sometimes drizzle it with caramel again before serving, because, why not indulge?
Conclusion
As the leaves change and the weather cools down, this Caramel Apple Cake is the perfect addition to my baking rotation. It’s not just a dessert; it’s a hug in cake form! I hope you enjoy making it as much as I do, sharing it with loved ones, and creating sweet memories in your kitchen. Let the aromas fill your home, and I can guarantee you’ll feel the warmth of autumn in every bite! Happy baking!