
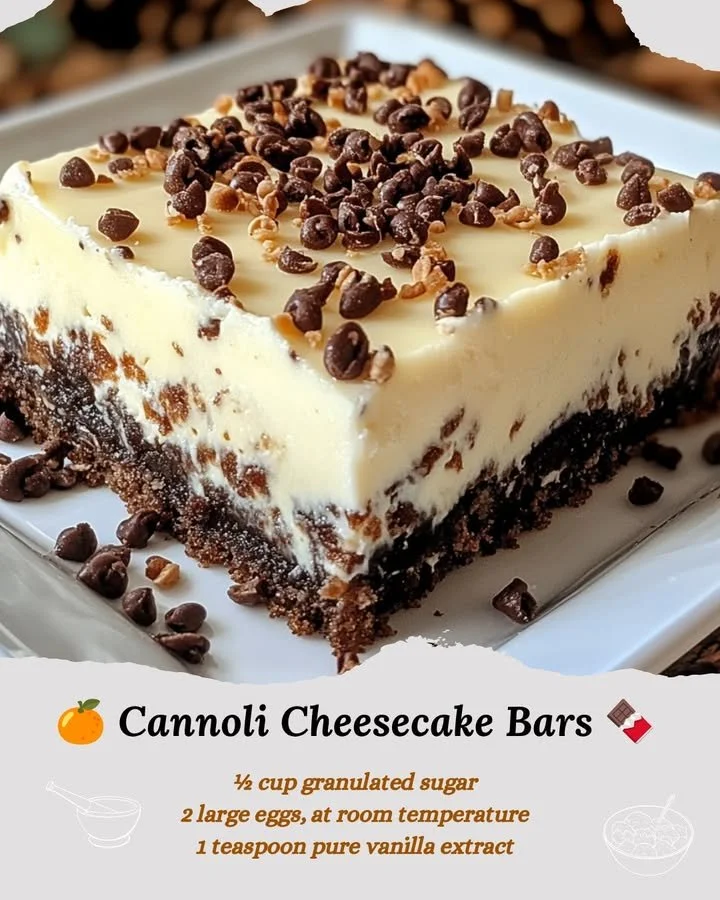
One of my all-time favorites is the classic Italian dessert, cannoli, and trust me, nothing beats the creamy goodness of a cannoli filling. That’s why I decided to try my hand at making Cannoli Cheesecake Bars, a dessert that combines the rich, velvety taste of cheesecake with that delightful crunch of a cannoli shell. The result? Pure bliss in every bite!
Why You’ll Love This Recipe
These Cannoli Cheesecake Bars are a delightful treat that satisfies my sweet tooth while giving me that nostalgic feeling of indulging in a cannoli. With layers of creamy filling, a crunchy crust, and a sprinkle of mini chocolate chips, they’re as beautiful to look at as they are delicious to taste. Plus, they’re perfect for sharing at gatherings or just enjoying a quiet evening at home. If you’re a fan of creamy desserts with a twist, you’re going to want to try these! (See the ingredients in the next page below…)
Ingredients
– 1 cup graham cracker crumbs
– 1/4 cup granulated sugar
– 1/2 cup unsalted butter, melted
– 16 oz cream cheese, softened
– 1 cup ricotta cheese
– 3/4 cup powdered sugar
– 1 teaspoon vanilla extract
– 1/4 teaspoon ground cinnamon
– 2 large eggs
– 1/2 cup mini chocolate chips
– Additional chocolate chips for topping (optional)
Equipment Needed
– Mixing bowls
– 9×9-inch baking dish
– Parchment paper
– Electric mixer
– Rubber spatula
– Measuring cups and spoons
Step-by-Step Instructions
To make these Cannoli Cheesecake Bars, the first step is to prepare your crust. In a mixing bowl, combine the graham cracker crumbs, granulated sugar, and melted butter. Mix well until the crumbs are evenly coated and the mixture resembles wet sand. Press this crumb mixture firmly into the bottom of your lined baking dish to form an even crust. It’s crucial to pack it down nicely so it holds up when you cut the bars. Once that’s done, pop the crust into the oven and bake it at 350°F (175°C) for about 10 minutes until lightly golden. This step keeps the crust nice and firm! (See the next page below to continue steps…)
Next, while the crust is cooling, I move on to the creamy filling. In a large mixing bowl, combine the softened cream cheese and ricotta cheese and beat them together using an electric mixer until smooth and creamy. I like to take my time here to really incorporate air into the mixture, aiming for a light and fluffy texture. Once it’s well mixed, add in the powdered sugar, vanilla extract, ground cinnamon, and eggs. Beat until everything is combined and the mixture is silky. Gently fold in the mini chocolate chips, because let’s be honest—the more chocolate, the better!
Now it’s time to pour that delicious filling over the pre-baked crust. Make sure to spread it evenly, then smooth out the top with a rubber spatula. I love to sprinkle a few extra mini chocolate chips on top for a decorative finish. Once that’s ready, bake the entire dish in the oven for about 30-35 minutes or until the filling is set but still slightly jiggly in the center. The aroma wafting through my kitchen is simply divine during this stage!
Once they are done baking, I let my Cannoli Cheesecake Bars cool at room temperature for a bit, and then I transfer them to the fridge to chill for at least 4 hours (or ideally overnight!) so they can set beautifully. Trust me, you want to give them that time to chill for best results! When you’re ready to serve, just slice them into squares, and enjoy the delightful textures and flavors.
Pro Tips for Best Results
One thing I found helpful is to ensure all your ingredients are at room temperature before you start mixing. This truly helps create a smoother filling and avoids lumps—I once tried to rush the process and ended up with a not-so-pretty texture. Also, make sure you use full-fat cream cheese and ricotta; it makes a world of difference in the creaminess of your bars!
Another tip I absolutely swear by is letting the bars cool completely before slicing. I usually make mine the night before to serve at gatherings, and it makes such a difference having them chilled overnight. The flavors meld beautifully, and the texture firms up perfectly for cutting.
Lastly, don’t skip the extra chocolate chips on top! They not only make the bars prettier but give a nice little crunch that complements the creamy filling perfectly. I experimented with different toppings, but honestly, these mini chocolate chips really do the trick!
Common Mistakes to Avoid
One common mistake I made when I first started making these bars was overbaking. Trust your oven! You want the center to be slightly jiggly when you take it out. If it’s too firm, you’re likely going to end up with a dry texture. Keep an eye on them during the last few minutes of baking; it’s better to underestimate than overestimate. (See the next page below to continue…)
Another pitfall is not giving the bars enough time to chill. I get the excitement of wanting to dive in right away, but letting them sit in the fridge for at least four hours—or even overnight—is key to achieving the perfect texture. I once eagerly cut into a batch that hadn’t chilled long enough, and while they tasted delicious, they didn’t hold their shape at all.
Additionally, be careful with your crust. Pressing it too hard can make it overly dense, while not packing it enough could lead to a crumbly mess. I’ve learned that a gentle but firm touch works best to get just the right balance.
Serving Suggestions
I love serving my Cannoli Cheesecake Bars chilled from the fridge, drizzled with a bit of chocolate or caramel sauce for an extra special touch. They look gorgeous on a platter, and it’s hard to resist tearing into them! I sometimes garnish with fresh raspberries or strawberries for a pop of color and a hint of tartness—it brings the whole dessert to life.
These bars are fabulous for parties, too. If you have friends over or are hosting a family gathering, I often cut them into bite-sized squares for easy sharing. They pair beautifully with a cup of coffee or espresso, making them perfect for an afternoon treat or after dinner dessert.
And let’s not forget about holidays! I love serving these at holiday parties because they’re unique yet familiar, and everyone loves them. Honestly, you can’t go wrong—there’s just something about that sweet, creamy filling and the crunchy crust that gets everyone smiling.
Variations & Customizations
One of the best things about Cannoli Cheesecake Bars is how adaptable they are. If you want to mix things up, consider adding a bit of orange zest into the filling for that classic cannoli flavor without the need for citrus in your typical cheesecake. It’s a small change but one that adds a refreshing note that pairs beautifully with the sweetness.
Alternatively, try swapping out the chocolate chips for diced pistachios or candied fruit to really bring a different twist to your bars. I once made a batch with crushed pistachios and they were a hit—not only did they look gorgeous, but the flavor was just divine!
Lastly, if you’re not into using ricotta, you can also experiment with mascarpone cheese for a richer filling. While the texture will be slightly different, it results in a wonderfully decadent dessert that’s still in the spirit of the classic cannoli. I love experimenting and finding new combinations that bring joy to my bakes!
How to Store, Freeze & Reheat
Storing my Cannoli Cheesecake Bars is pretty straightforward! After they’re fully chilled and cut, I simply place the squares in an airtight container separated by parchment paper. They can easily be stored in the refrigerator for up to a week—if they last that long!
If you happen to have leftovers (which trust me, is uncommon!), these bars also freeze beautifully. I individually wrap each piece in plastic wrap and then place them in a freezer-safe bag. When I need a sweet treat, I just take out a square and let it thaw in the fridge for a few hours before enjoying. It’s like having a little stash of happiness waiting for me!
As for reheating, I recommend letting them come back to room temperature rather than microwaving. Microwaving can mess with the texture, so I typically allow them to sit out for about 15-20 minutes before serving. That way, the flavors come alive again just as they should!
Conclusion
So there you have it—my Cannoli Cheesecake Bars that combine delectable flavors and textures for a delightful dessert experience! I hope you find as much joy in making these as I do. Whether you’re enjoying them at home, sharing them with friends, or bringing them to a party, these bars are sure to impress. Happy baking, and may your kitchen always be filled with delicious aromas!