
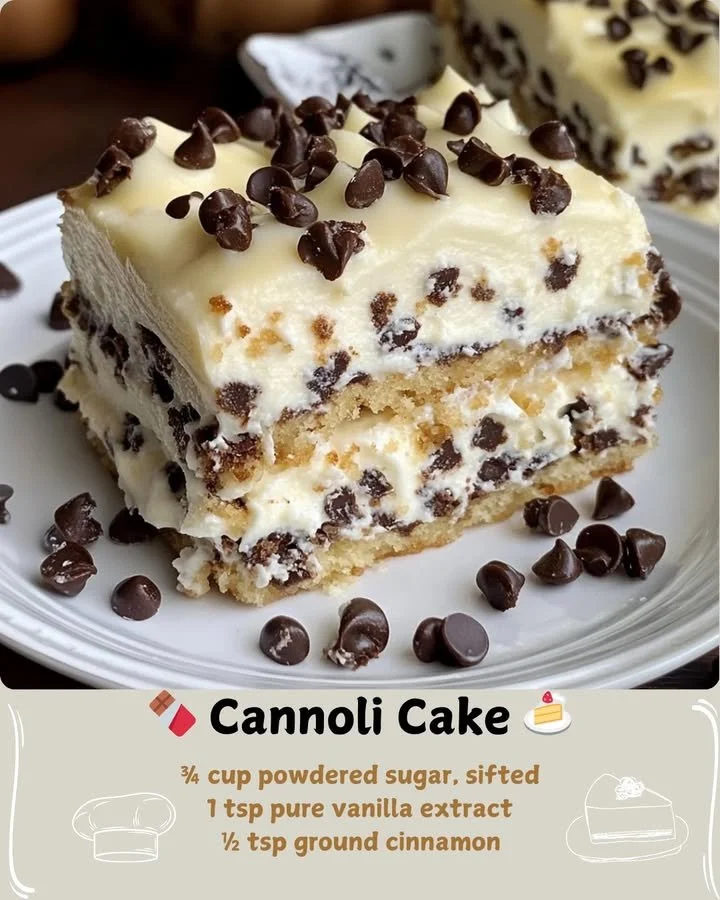
I can’t tell you how excited I am to share my Cannoli Cake recipe with you! Every time I make this cake, my kitchen fills with the delightful aroma of sweet ricotta and vanilla, evoking memories of Italian bakeries I’ve loved visiting. It’s a whimsical twist on the classic cannoli—your taste buds will do a little happy dance, just like mine do!
Why You’ll Love This Recipe
This Cannoli Cake is an indulgent treat that’s surprisingly easy to make. The combination of moist vanilla cake layered with creamy ricotta frosting and chocolate chips brings a little slice of Italy straight to my home. Plus, it’s the perfect dessert for any occasion—birthdays, holidays, or just a treat for yourself! Trust me, once you try this cake, you won’t want to go back to regular desserts. (See the ingredients in the next page below…)
Ingredients
– 2 cups all-purpose flour
– 1 ½ cups granulated sugar
– ½ cup unsalted butter, softened
– 4 large eggs
– 1 cup whole milk
– 2 teaspoons baking powder
– 1 teaspoon vanilla extract
– 1 cup ricotta cheese
– ½ cup powdered sugar
– ½ cup mini chocolate chips
– Zest of 1 orange (optional)
Equipment Needed
– Mixing bowls
– Hand mixer or stand mixer
– Measuring cups and spoons
– Rubber spatula
– 9-inch round cake pans (2)
– Cooling rack
– Parchment paper
Step-by-Step Instructions
Let’s dive into the deliciousness! First, preheat your oven to 350°F (175°C) and grease your cake pans. I usually line the bottom with parchment paper to ensure easy removal. In a large mixing bowl, cream together the softened butter and granulated sugar until light and fluffy. The texture should be almost cloud-like; I love the way it looks! Next, add the eggs one at a time, mixing well after each addition. Then, stir in the milk and vanilla extract until everything is combined. Oh, the smell of vanilla makes my heart sing! (See the next page below to continue steps…)
Now, in another bowl, whisk together the flour and baking powder. Gradually add this dry mixture to your butter mixture, mixing just until incorporated—not overmixing is key to keep your cake tender. Once the batter is ready, divide it evenly between the prepared pans and smooth the tops. Bake for about 25-30 minutes or until a toothpick inserted in the center comes out clean. You’ll know they’re done when your kitchen smells divine!
While the cakes cool, I prepare the ricotta frosting. In a mixing bowl, combine the ricotta cheese, powdered sugar, and orange zest (if using). I love how the zest adds a refreshing twist—so good! Beat until smooth and fluffy, then fold in the mini chocolate chips. This frosting is the star of the show; it’s creamy, sweet, and just the right amount of rich.
Once the cakes are completely cool, I gently remove them from the pans. Place one layer on your serving platter, add a generous layer of the ricotta frosting, and then stack the second layer on top. Finish off with another layer of frosting on top—or, if you’re feeling indulgent, go ahead and frost the sides too! You can also sprinkle additional mini chocolate chips or orange zest on top for that beautiful finishing touch that never fails to impress.
Pro Tips for Best Results
I tested this recipe three ways to find the perfect balance. One time, I tried substituting the granulated sugar with brown sugar, and while it added a unique flavor, it didn’t result in the same lightness in texture. So I recommend sticking with granulated sugar for that fluffy finish!
Another thing I learned through trial and error is that letting the cakes cool completely is crucial. When I rushed this step, the frosting melted into the cake, which was delicious but not pretty. I love a good-looking cake as much as I love one that tastes great!
Lastly, I like to make the ricotta frosting ahead of time and chill it in the fridge. This helps develop the flavors and makes it easier to spread. Just remember to give it a quick stir before using, so it’s not too firm to work with.
Common Mistakes to Avoid
One common mistake I’ve encountered is overmixing the batter. It’s tempting to keep mixing to ensure everything is well combined, but overmixing can lead to a dense cake instead of the light, airy texture we want. Mixing just until you don’t see any dry ingredients left is the way to go. (See the next page below to continue…)
Another pitfall is not measuring ingredients accurately. Baking is a science, and even slight variations can affect the outcome. I always use a kitchen scale for precision when I’m serious about my baking. It might seem like a hassle, but the results speak for themselves.
Lastly, don’t rush the cooling process. I once tried to frost a warm cake, and the frosting just slid right off! It’s worth the wait to let the layers cool completely. When done right, the frosting will retain its beautiful shape and provide that delightful creaminess with every bite!
Serving Suggestions
When it comes time to serve, I love to dust my Cannoli Cake with a bit of powdered sugar for a touch of elegance. It gives it that lovely Italian pastry vibe that always impresses guests. I usually pair it with a cup of freshly brewed espresso or an Italian coffee, as the flavors complement each other beautifully.
Also, don’t shy away from garnishing with additional chocolate chips or fresh berries. Strawberries or raspberries add a nice popping color and flavor contrast that brightens the plate. Plus, I’ve found that everyone loves a little extra treat on their slice of cake!
If you have any leftovers (which is rare, but it happens!), they make for a fantastic breakfast. Just a slice paired with a cup of coffee is the perfect way to start the day if you ask me.
Variations & Customizations
While I adore the classic Cannoli Cake, I’ve experimented with a few variations that you might enjoy too! One delightful twist is adding a layer of almond paste for a richer flavor profile. This adds a nutty sweetness that pairs beautifully with the ricotta frosting.
Another fun option is to infuse the cake batter with lemon or almond extract instead of vanilla. The citrus notes are refreshing, especially during warmer months, and give it a unique personality that surprises everyone.
Lastly, if you’re feeling adventurous, try adding different mix-ins to the frosting, like crushed pistachios or dried fruit for a little texture and flavor punch. It’s such a fun way to customize the cake while staying true to its cannoli roots!
How to Store, Freeze & Reheat
If you somehow manage to have leftovers (which is unlikely but totally possible!), make sure to keep them in an airtight container in the fridge. I’ve found that Cannoli Cake stays fresh for up to 4 days, but trust me—you’ll want to enjoy it in the first 24 hours for the best taste!
If you want to make this cake ahead of time, it freezes beautifully. Just make sure it’s completely cooled, then wrap it tightly in plastic wrap and foil before placing it in the freezer. It can last for up to 2 months frozen. When you’re ready to enjoy it, simply thaw it in the fridge overnight, and then frost if you’ve opted to freeze plain layers.
Reheating isn’t necessary, as the cake is delightful served cold. However, if you prefer it slightly warmed, I recommend briefly using the microwave for 10-15 seconds. Just be cautious not to overheat it, as you want that lovely creamy frosting to maintain its integrity!
Conclusion
I hope you find as much joy in making and sharing this Cannoli Cake as I do in my kitchen! Each bite is a celebration of flavors and memories that make life just a little sweeter. Don’t forget to invite your loved ones to join in on the fun—there’s nothing better than enjoying this cake together. Happy baking!