
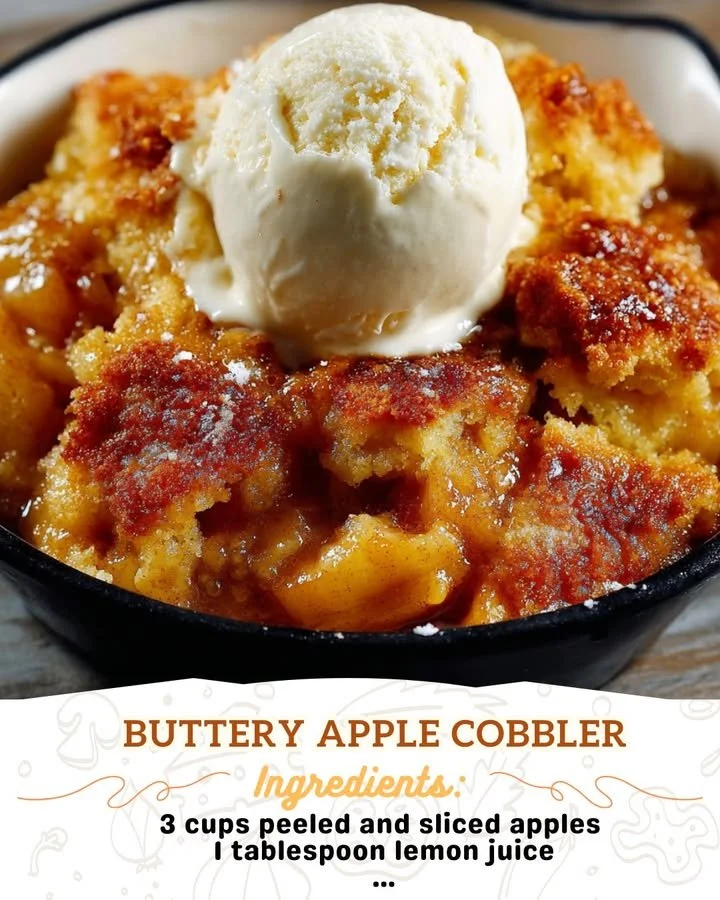
When the leaves start to turn and the air gets a little crisper, I find myself craving the warm, comforting flavors of fall. One of my all-time favorite desserts to whip up in my kitchen is Buttery Apple Cobbler. It perfectly captures the essence of autumn with its sweet, spiced apples and a buttery, crumbly topping. This recipe is not just a treat for my taste buds; it’s also a wonderful way to fill my home with the smell of baked goodness. Grab your apron, and let’s dive into this delightful recipe together!
Why You’ll Love This Recipe
I absolutely adore how simple yet satisfying this Buttery Apple Cobbler is. With its flaky topping and juicy apple filling, every bite feels like a warm hug. Plus, it’s super versatile; whether served hot out of the oven or at room temperature, it never fails to impress family and friends. It’s perfect for a cozy family dinner or a gathering with friends over coffee. I feel like every time I make it, I learn something new about flavor pairings and textures, and it’s so easy that I genuinely look forward to making it again and again. (See the ingredients in the next page below…)
Ingredients
– 6 cups of peeled and sliced apples (I like using Granny Smith for their tartness)
– 1 cup of granulated sugar
– 1 teaspoon of cinnamon
– 1/2 teaspoon of nutmeg
– 1 tablespoon of lemon juice
– 1 cup of all-purpose flour
– 1 cup of rolled oats
– 1/2 cup of brown sugar
– 1 cup of unsalted butter, melted
– 1 teaspoon of baking powder
– A pinch of salt
Equipment Needed
– 9×13 inch baking dish
– Mixing bowls
– Whisk
– Measuring cups and spoons
– Peeler and knife for the apples
– Spoon or spatula for mixing
Step-by-Step Instructions
To start, preheat your oven to 350°F (175°C) and grease your 9×13 baking dish with a little butter. While that’s heating, I peel and slice my apples, then toss them in a mixing bowl with sugar, cinnamon, nutmeg, and lemon juice. This mixture not only flavors the apples beautifully but also creates a lovely syrup as they bake. Once everything is combined, I spread this apple mixture evenly in the greased baking dish. (See the next page below to continue steps…)
Next, it’s time to prepare the topping! In another mixing bowl, I combine the flour, oats, brown sugar, melted butter, baking powder, and salt. I mix it until it resembles a crumbly texture—this part always makes my kitchen smell heavenly! Then, I scoop the oat mixture over the apple layer, trying to cover it as evenly as possible. Don’t worry about making it perfect; the rustic look adds to the charm of this dish.
Now, it’s time to bake this beauty in the preheated oven for about 45-50 minutes. You’ll know it’s ready when the apples are bubbly and the topping is golden brown. The aroma wafting through my kitchen during this time is nothing short of magical. Once it’s done, I let it cool for about 10 minutes before serving, as the flavors meld beautifully while it’s resting.
And there you have it! A delicious Buttery Apple Cobbler that will have everyone asking for seconds. Trust me when I say, it pairs perfectly with a dollop of whipped cream or a scoop of vanilla ice cream, turning an ordinary dessert into something truly special.
Pro Tips for Best Results
I tested this recipe three ways to find the perfect balance of flavors. The first time, I used only granulated sugar, but the addition of brown sugar really deepens the sweetness and adds a hint of caramel flavor that I find irresistible. Also, the type of apples you choose matters—a mix of tart and sweet apples gives the cobbler a well-rounded taste that really shines through.
Next, don’t skip the lemon juice. Just a tablespoon adds a brightness to the filling that cuts through the sweetness and brings out the best in the apples. I was amazed at how much of a difference it made when I forgot this step during one of my tests!
Lastly, I recommend slightly underbaking the cobbler if you want a softer topping. Letting it cool completely allows the juices to set and gives you that ideal gooey consistency. Trust me, this one tip turned every single one of my batches into a family favorite.
Common Mistakes to Avoid
One common mistake I ran into was using apples that were too soft. While they might seem like a good choice, using firm apples like Granny Smith or Honeycrisp helps maintain shape and texture during baking. I once made the mistake of using softer apples, and the cobbler turned into more of a mushy mess than a delightful dessert. (See the next page below to continue…)
Another pitfall is forgetting to mix the spices thoroughly with the apples. I learned the hard way that some bites had no cinnamon or nutmeg flavor, while others were overwhelmingly spiced. Now, I take the time to toss them well and ensure every slice is equally flavorful.
Additionally, I recommend not skipping the resting time after baking. This is essential for the filling to thicken up and makes serving a lot easier. If you dive right in, you might end up with a runny filling all over your plate!
Lastly, it’s easy to overlook the cooling time before serving. Hot cobbler can be delicious, but letting it cool first helps the topping firm up, making it easier to serve. I once rushed to serve it, and while tasty, it was a mound of chaos on my dessert plates.
Serving Suggestions
This Buttery Apple Cobbler is delightful on its own, but I love to serve it with a scoop of vanilla ice cream. The way the ice cream melts into the warm cobbler is simply divine, creating a creamy, sweet contrast to the spicy apples.
If you want something a little different, try a dollop of freshly whipped cream. I usually whip my cream with a touch of sugar and vanilla extract, making it a perfect pairing with the cobbler. The lightness of the cream elevates the dessert, creating a delightful balance of rich and airy.
For a fun twist, you can serve the cobbler in individual ramekins and top each serving with a sprinkle of cinnamon sugar before baking. It adds an extra crunch on top that I think everyone will love. Plus, they look so cute when served!
Variations & Customizations
One of the best things about this recipe is how versatile it can be. You can mix up the fruits to cater to what you have on hand! Swap out some of the apples for pears or even berries for a different flavor profile. I’ve experimented with combinations, and they all result in a delicious cobbler!
Another customization I love is adding some nuts to the topping. Chopped pecans or walnuts give a nice crunch and a little extra richness. Plus, it makes the cobbler feel even more rustic, bringing a bit of homey charm that’s perfect for any gathering.
Sometimes, I like to add a splash of bourbon or maple syrup to the apple mixture for a unique twist. The bourbons’ depth enhances the flavors beautifully, making it a hit at dinner parties. Just don’t tell my kids—it’s my little secret ingredient!
How to Store, Freeze & Reheat
If there’s any cobbler left after serving, storing it is a breeze! Just cover it with plastic wrap or foil and keep it in the fridge for up to three days. I recommend reheating slices in the oven for a few minutes to bring back that fresh out-of-the-oven taste; it really makes all the difference!
You can also freeze leftovers—just wrap the cooled cobbler in a double layer of plastic wrap and then in foil. It keeps well for about three months. When you’re ready for a taste of homemade goodness, let it thaw overnight in the fridge, then reheat it in the oven until warmed through.
I’ve found that it’s best to reheat it gently; the flavors come alive again, and the topping crisps back up nicely. It’s like having a little slice of fall whenever I crave something sweet!
Conclusion
I hope this Buttery Apple Cobbler brings as much joy to your kitchen as it has to mine! There’s something truly magical about creating a dish that not only nourishes but also spreads warmth and happiness. Whether you’re serving it to family at home or taking it to a gathering, I promise this cobbler will be a cherished addition to your dessert repertoire. Happy baking!