
I have a deep, nostalgic love for butterscotch that goes back to my grandmother’s candy dish. When I decided to combine that rich, buttery flavor with the crunch of toffee in a cookie bar, I knew I was onto something special. The first time I pulled these bars from the oven, my kitchen was filled with the most incredible caramel-like aroma, sweet and inviting with a hint of toasted sugar. Cutting into that golden, crisp-edged slab to reveal a chewy center packed with melty chips and crunchy bits was a moment of pure baker’s joy. That first bite—a perfect balance of sweet, salty, and crunchy—told me this recipe was a keeper.
Why You’ll Love This Recipe
You are going to adore this recipe because it delivers the perfect cookie experience with none of the fuss of scooping and baking individual batches. It’s a one-bowl, one-pan wonder that yields rich, decadent bars with a fantastic contrast of textures. The base is buttery and tender, while the butterscotch chips melt into sweet pools, and the toffee bits add little bursts of caramelized crunch in every bite. They’re incredibly easy to make, travel perfectly, and are guaranteed to disappear from any cookie platter or bake sale table. They’re the ultimate treat for anyone who loves that irresistible butterscotch-toffee flavor combo.
Ingredients
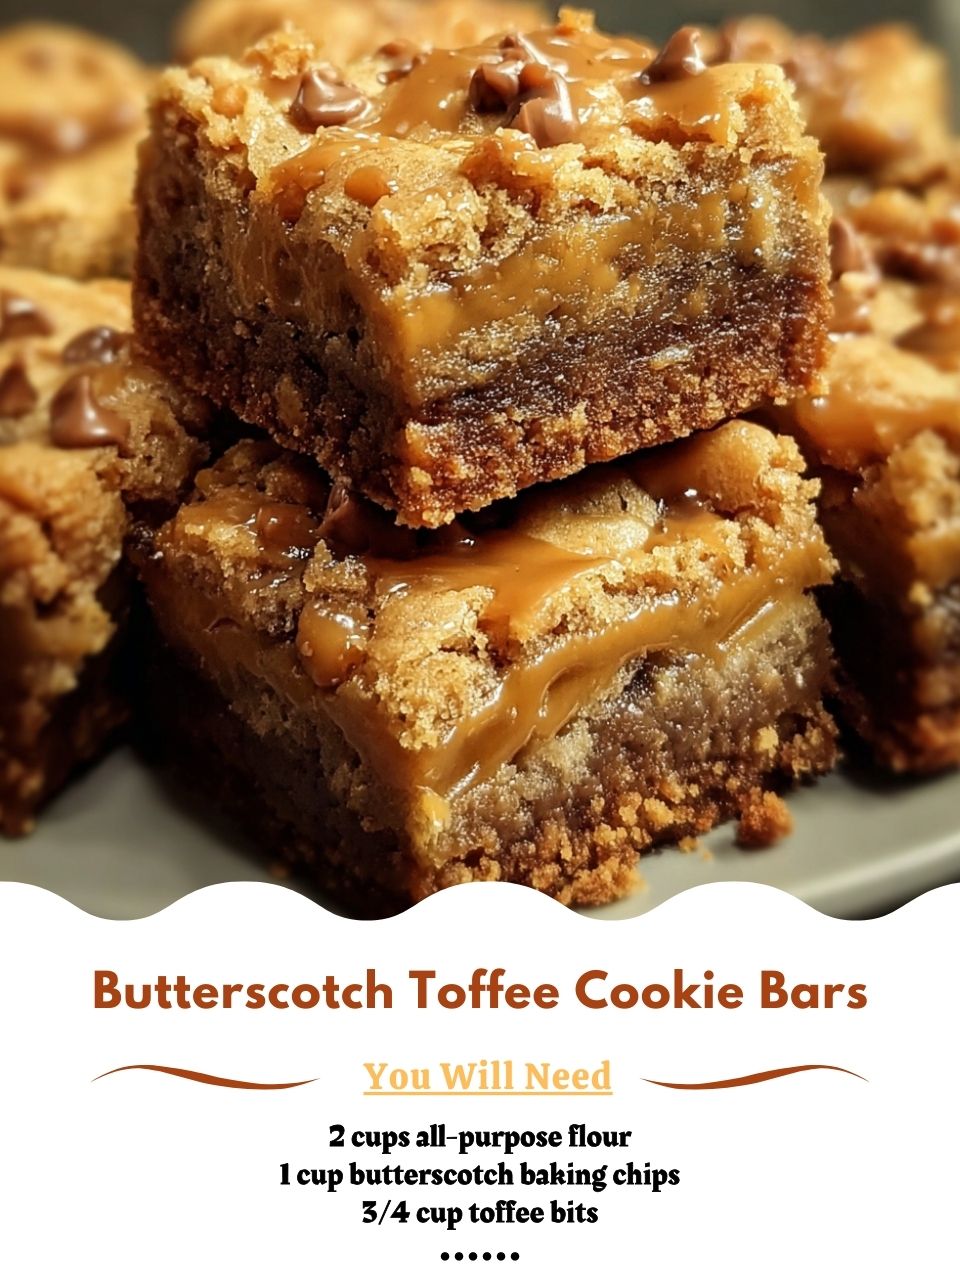
- 2 cups all-purpose flour
- 1/2 teaspoon baking soda
- 1/2 teaspoon salt
- 3/4 cup unsalted butter, melted and slightly cooled
- 1 cup packed light brown sugar
- 1/2 cup granulated sugar
- 1 large egg + 1 large egg yolk
- 2 teaspoons vanilla extract
- 1 cup butterscotch baking chips
- 3/4 cup toffee bits (I use the ones with chocolate, but plain are great too!)
Let’s talk ingredients because quality matters here. Using real butter that you melt yourself is key—it gives these bars a chewy, dense texture and that irreplaceable flavor. Don’t substitute margarine. The brown sugar is non-negotiable; its molasses content is what gives the bars their moistness and deep, caramel-like taste. For the toffee bits, I personally love the ones that are coated in a thin layer of milk chocolate (like Heath bits); they add another layer of flavor. But plain toffee bits work wonderfully too. And a quick note: measure your flour correctly by spooning it into the cup and leveling it off. Packing the flour leads to dry, cakey bars.
Equipment Needed
- 9×13 inch metal baking pan
- Medium mixing bowl
- Whisk and sturdy spatula
- Measuring cups and spoons
- Parchment paper
The right pan makes all the difference. I always use a metal 9×13 inch baking pan for these bars. Glass pans can cause the edges to overbake before the center is set. Lining the pan with parchment paper, leaving an overhang on the two long sides, is my best trick. It allows you to lift the entire slab of cookie out of the pan for easy, clean cutting—no sticking, no mess. A good whisk for combining the wet ingredients and a sturdy spatula for folding in the flour and mix-ins are all you need. No mixer required!
Step-by-Step Instructions
First, I preheat my oven to 350°F (175°C) and line my 9×13 pan with parchment paper. In a medium bowl, I whisk together the flour, baking soda, and salt. This ensures my leavening and seasoning are evenly distributed. In a large mixing bowl, I combine the melted (and slightly cooled) butter with both sugars. I whisk them together vigorously for a good minute until the mixture is smooth, thick, and glossy. This step helps dissolve the sugars slightly, which contributes to that perfect chewy texture.
Next, I add the whole egg, the extra egg yolk, and the vanilla extract to the butter-sugar mixture. The extra yolk adds richness and chew without making the bars cakey. I whisk again until everything is completely combined and the mixture is pale and smooth. Now, I switch to my spatula. I add the dry flour mixture to the wet ingredients in two additions, folding gently just until the last streaks of flour disappear. Overmixing at this stage is the enemy of a tender bar.(See the next page below to continue…)