
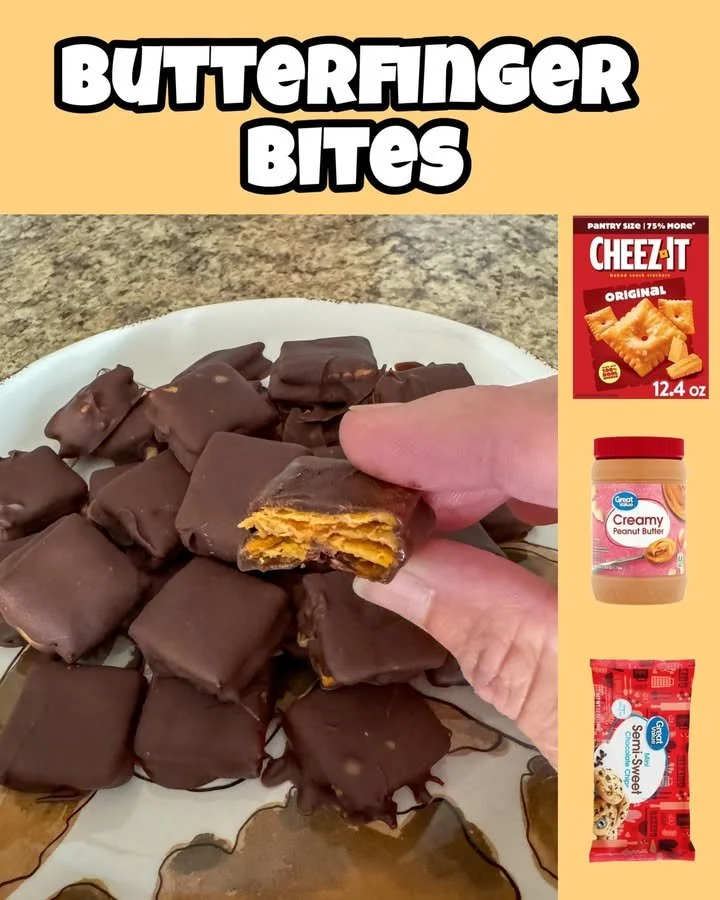
I stumbled upon the recipe for Butterfinger Bites during a late-night scrolling session on my favorite cooking blog. The idea of replicating those crunchy, peanut-buttery candy bars from my childhood sent my taste buds into a frenzy. As I gathered the ingredients in my cozy kitchen, the sweet and nutty aroma enveloped me like a warm hug. The thrill of making something that could transport me back to simpler times filled me with excitement. Each step felt like a delicious reminder of what I loved about cooking—transforming simple ingredients into delightful treats.
Why You’ll Love This Recipe
You’re going to love this recipe for Butterfinger Bites because it’s not just simple; it packs a flavor punch that will leave you and your loved ones wanting more. Imagine biting into a perfect little nugget that’s crunchy yet melts in your mouth with a rich, peanut-buttery essence. You can whip this up in no time, and it brings everyone together, whether it’s for a movie night or afternoon snack. Trust me, making these treats will fill your kitchen with warmth, laughter, and the kind of yummy smells that only home-baked goodies can create.
Ingredients
- 1 cup creamy peanut butter
- 1 ½ cups powdered sugar
- 1 ½ cups crushed cornflakes (See the next page below to continue…)
- 1 cup semi-sweet chocolate chips
- 1 teaspoon coconut oil (optional)
Equipment Needed
- Large mixing bowl
- Wooden spoon or spatula
- Baking sheet
- Parchment paper
- Microwave-safe bowl
Step-by-Step Instructions
The first step in recreating these delightful Butterfinger Bites is to combine the peanut butter and powdered sugar in a large mixing bowl. I always use creamy peanut butter for that smooth texture, and when I stir it in, the mixture comes together like a glorious union of flavors. You want to aim for a creamy consistency that holds together well. Pro tip: Don’t be afraid to get in there with your hands if the spatula doesn’t do the trick; that’s when you can really feel the dough coming together.
Next, I gently fold in the crushed cornflakes. The crunchiness of the cornflakes is what gives these bites that iconic Butterfinger texture. Now, be careful not to over mix—this is one step I learned the hard way. The cornflakes should be mixed just enough to coat each flake without turning them to dust. As I fold everything together, the sweet peanut butter smell intertwines with the crispy cereal aroma, and it’s downright irresistible.
Once my mixture is ready, I scoop out small portions, rolling them into bite-sized balls. I like to use my hands to form them into the perfect little nuggets, about one inch in diameter. I find that slightly wet hands work best to prevent sticking. As I roll each one, I can’t help but sneak a taste of the dough—it’s utterly delicious. I place each ball on a baking sheet lined with parchment paper, making sure they’re spaced evenly, and then pop them into the fridge for about 30 minutes to firm up.(See the next page below to continue…)
While the bites chill, it’s time for the chocolate coating! I melt the semi-sweet chocolate chips in a microwave-safe bowl, adding a teaspoon of coconut oil to give it that perfect dip. I always microwave in short bursts to prevent burning, stirring regularly. Once the chocolate is smooth and glossy, I’m ready for the fun part: dipping each chilled peanut butter ball into the melted chocolate! Make sure to coat them well—this is what gives them that beautiful, shiny finish. After coating, I return them to the baking sheet and keep them in the fridge until set.
Pro Tips for Best Results
I tested this recipe three different ways to find my favorite method, and I can’t stress enough how important it is to use creamy peanut butter. Trust me, crunchy peanut butter changes the texture completely. You want that smooth, melt-in-your-mouth experience that creamy peanut butter delivers.
Another thing I learned is to never skip the coconut oil when melting the chocolate! It’s a game-changer for achieving a thin and sleek coating. I neglected to add it once, thinking it wouldn’t matter, and my chocolate ended up clumpy and hard to work with.
Finally, if you’re a little short on time, you can always skip the rolling and just press the mixture into a lined baking dish, chill, and cut into squares. I’ve done this when I was in a rush, and while it’s less fun, it still turns out delicious.
Common Mistakes to Avoid
I made this mistake the first time—don’t do what I did and skimp on chilling the bites before dipping! If you dip them while they’re still warm, they tend to lose their shape. In my eagerness, I thought I could speed up the process, but the result was a melted mess. (See the next page below to continue…)
Another common pitfall is not measuring your powdered sugar accurately. It’s essential to get the right consistency, so I’ve learned to use a scale for precision. If it’s too little, your mixture won’t hold together; too much, and it will be overly sweet.
Also, when it comes to melting chocolate, be careful! I burned a batch of chocolate chips once because I microwaved them for too long without stirring. Now, I always set my timer for 30 seconds and keep a close eye on it. Stirring frequently makes a world of difference in achieving that smooth texture.
Lastly, don’t forget to let the chocolate set completely before indulging! The anticipation is part of the fun, I promise. If you eat them before they’re set, you risk smudging the chocolate and ruining the beautiful look of these bites.
Serving Suggestions
I love serving these Butterfinger Bites at family gatherings or game nights. There’s just something magical about pulling them out from the fridge and watching everyone’s eyes light up at the sight of these homemade treats. I usually plate them in a decorative bowl—it makes the whole experience feel special.
I sometimes pair them with a scoop of vanilla ice cream for a delightful contrast of textures. The creaminess of the ice cream balances perfectly with the crunchy bites, and it makes for a fantastic movie night dessert. Trust me, once you taste them together, you’ll never want to go back.
When I want to take it up a notch, I drizzle some additional melted chocolate over the plate for an extra touch of glam. I’ve done this for parties, and it always impresses my guests. They think I’ve gone to great lengths, but in reality, I just had fun dressing them up!
Variations & Customizations
One of the beauties of this recipe is how you can customize it! I’ve seen people swap in almond butter for a nutty twist, which also adds a unique flavor profile. I tried this once, and while it was delicious, I found the classic peanut butter version still reigns supreme in my heart.
Another fun variation is adding crushed pretzels for a sweet and salty combo. The crunch from pretzels adds an unexpected texture boost that keeps every bite interesting. I went on a pretzel spree once, mixing them in, and it was a delightful surprise.
For those who love coconut, I recommend adding shredded coconut to the mixture. It brings in a tropical vibe that’s absolutely delightful. Just keep in mind that this will change the texture slightly, so tweak the cornflakes accordingly if you decide to try this version.
How to Store, Freeze & Reheat
After making a batch of Butterfinger Bites, I usually store them in an airtight container in the fridge, where they’ll stay fresh for up to two weeks. I find that they taste best chilled, with that slight firm bite and the chocolate staying beautifully crisp.
If I happen to make a double batch, I often freeze them. I lay them flat in a single layer on a baking sheet until they are firm, then transfer them to a freezer-safe bag. They’ll last about three months. Just remember to thaw them at room temperature for a bit before enjoying them; no one likes biting into a frozen treat.
Reheating isn’t necessary for these bites, but if I want that “just-made” feel, I’ll pop them in the microwave for a few seconds. Just be careful—watch them closely, as too much heat can ruin that lovely chocolate coating.
Conclusion
Making Butterfinger Bites is a truly delightful experience from start to finish. The joy of mixing, rolling, and dipping provides such a therapeutic process in my kitchen. Whether you’re sharing with friends or indulging by yourself, these treats are sure to evoke fond memories while creating new ones. So grab your ingredients and get started; you won’t regret it!