
Here’s the fun, slightly messy part: the dunk. Working quickly with 3-4 frozen buttercream balls at a time (keep the rest in the freezer), drop one into the melted chocolate. Use a fork to gently roll it around until it’s completely coated. Lift it out with the fork, tap it gently on the side of the bowl to shed excess chocolate, and then slide it off the fork back onto the parchment paper. If you’re adding sprinkles or nuts, sprinkle them on immediately before the chocolate sets. Repeat with all balls. The chocolate will set quickly. The contrast of the crisp shell and the cold, creamy center is absolute perfection.
Pro Tips for Best Results
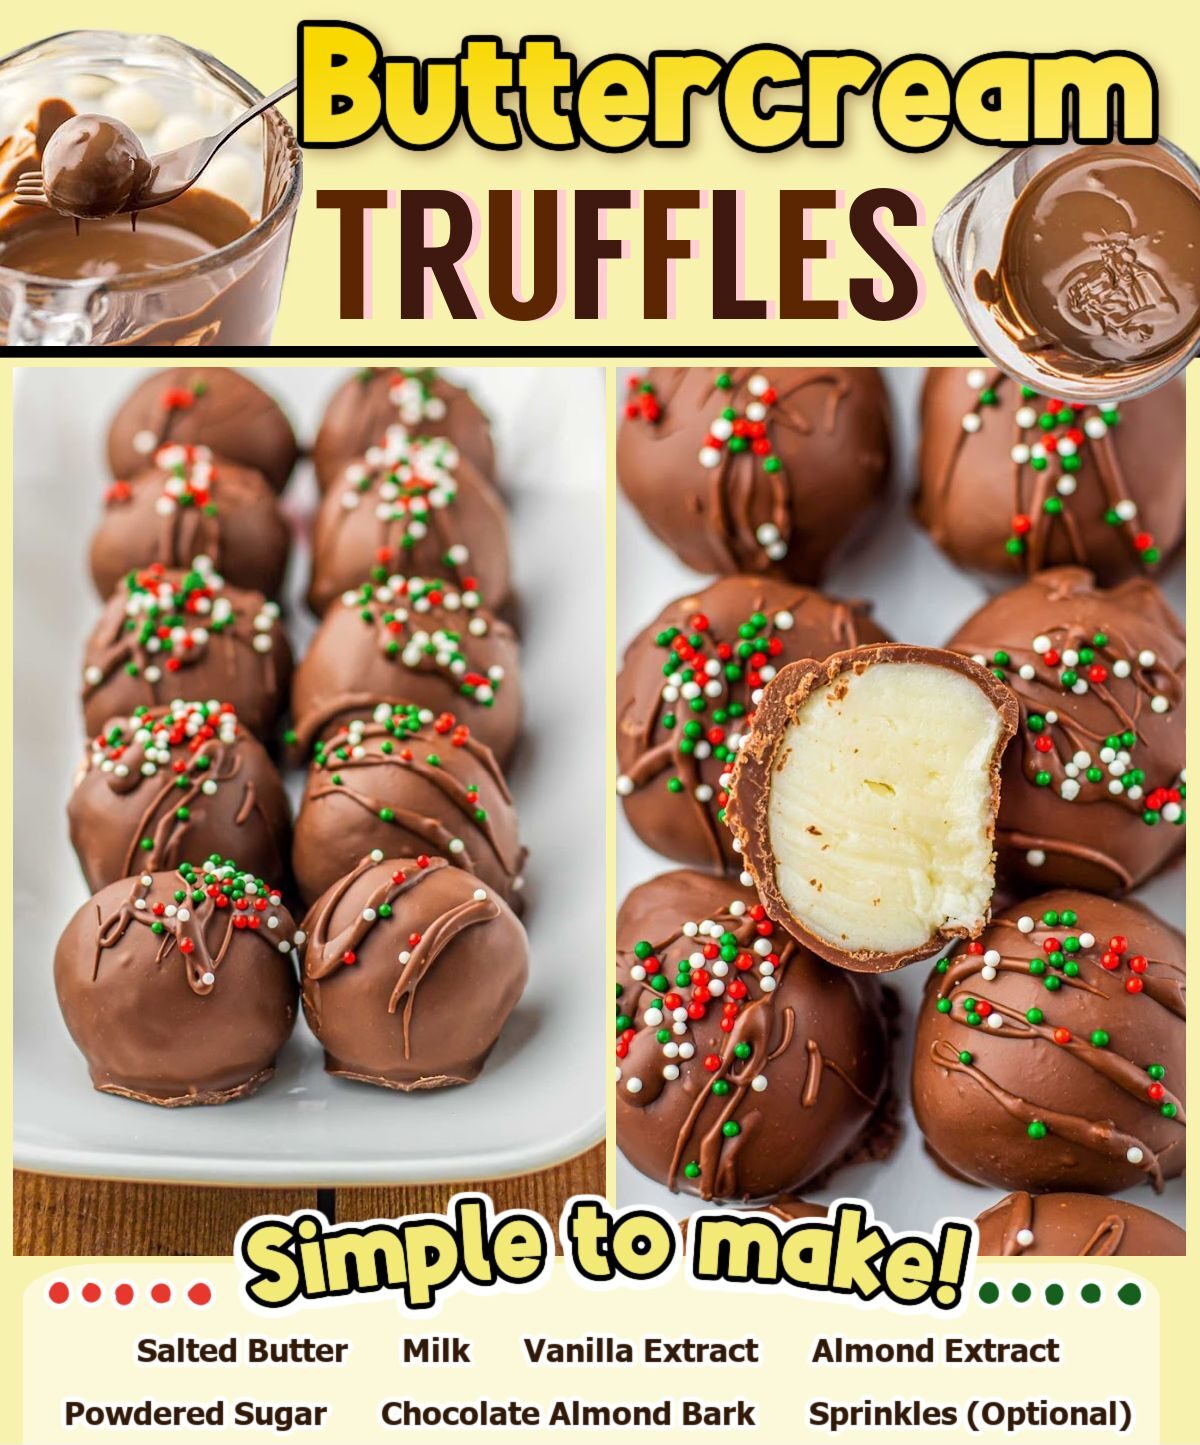
The consistency of your buttercream is everything. If it’s too soft, add a bit more powdered sugar. If it’s too dry and crumbly, add a tiny splash of milk or cream, just a teaspoon at a time. You want it to hold its shape when rolled. I’ve tested different butter-to-sugar ratios, and the one listed gives you the ideal firm-yet-creamy center after freezing.
For the smoothest, most professional-looking truffles, use a dipping tool or two forks. I find placing a dipped truffle on a fork over the bowl and using a second fork to gently push it onto the parchment creates a cleaner bottom with less of a “foot” or pooling of chocolate. It’s a small technique that makes a big visual difference.
If your melted coating starts to thicken or set up in the bowl while you’re working, don’t re-microwave it repeatedly. This can cause it to seize. Instead, add a tiny teaspoon of coconut oil or vegetable shortening to the bowl and stir. This will thin it back out to a perfect dipping consistency without affecting the set.
Common Mistakes to Avoid
Do not skip or shorten the freezing time. I was impatient my first time and dipped fridge-cold (not frozen) centers. They immediately started to melt, thinning the chocolate coating and creating misshapen, messy truffles. The centers must be frozen solid to create a thermal barrier against the warm chocolate.(See the next page below to continue…)