
I still remember the first time I made butter mints in my kitchen—the sweet, buttery aroma wrapped around me like a warm blanket, and I felt instantly transported back to the little candy dishes my grandmother kept on her coffee table. I had been searching for a nostalgic treat, something simple yet charming, and butter mints fit perfectly. The moment the minty sweetness hit the air, I knew this recipe would become one of my cozy go-to creations, the kind I reach for when I want a little softness in my day.
Why You’ll Love This Recipe
You’re going to love this recipe because it’s one of those magical, old-fashioned treats that feels delightfully simple but still incredibly special, and I’m telling you that from my own experience of making batch after batch and watching people’s faces light up when they try them.
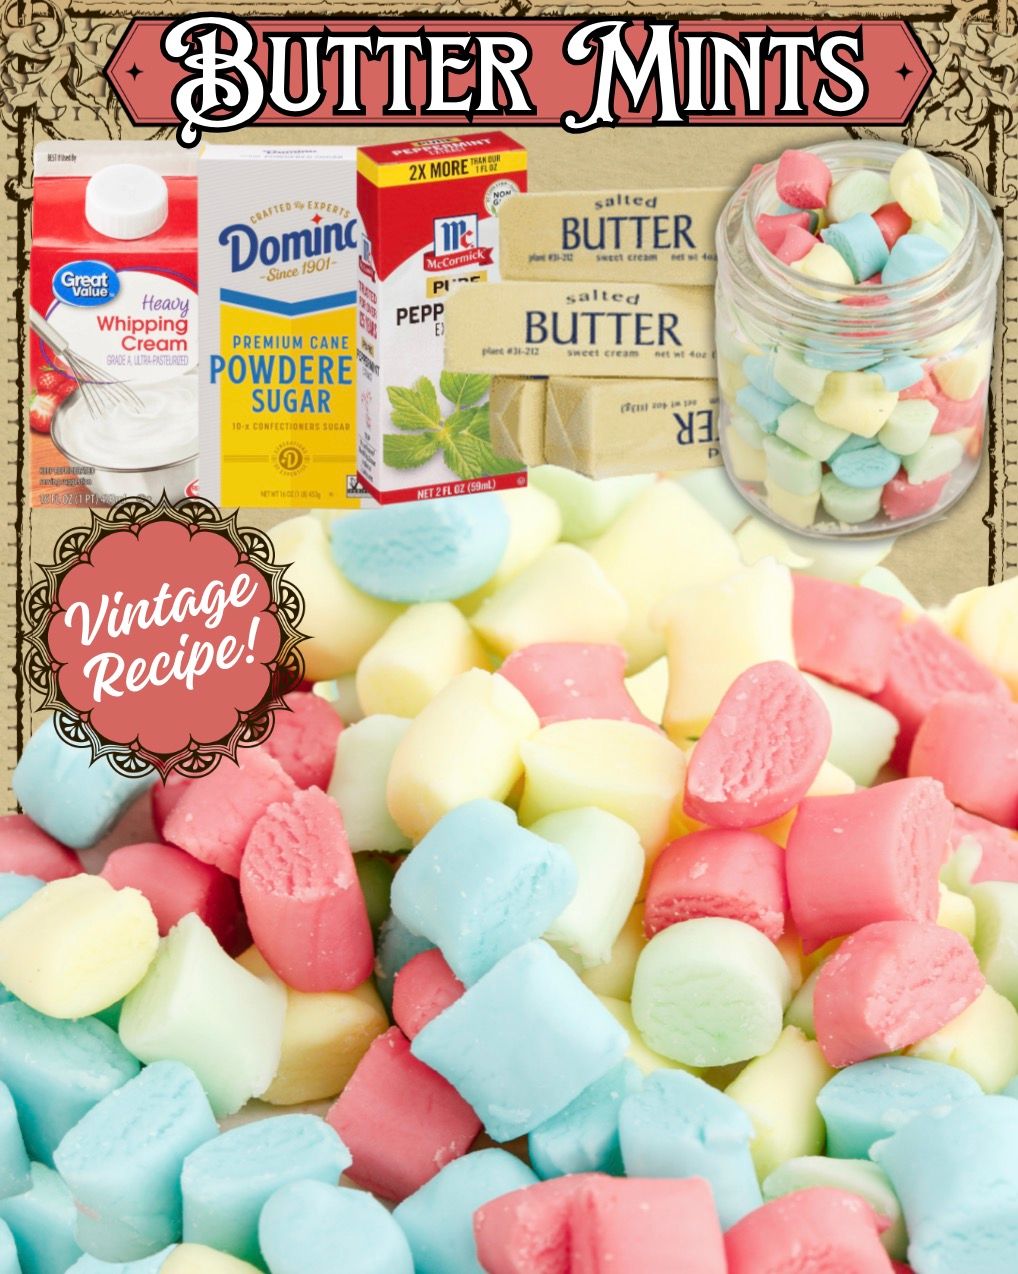
Ingredients
- ½ cup salted butter, softened
- 4 cups powdered sugar
- ⅓ cup heavy whipping cream
- 1 teaspoon peppermint extract
- Food coloring (optional—any shades you love)
After making these for years, I’ve discovered a few things that really matter with the ingredients. Softened butter—not melted—creates that dreamy, smooth texture. Heavy cream adds richness and keeps the mints from tasting dry (I tried using milk once, and trust me, it wasn’t the same). Peppermint extract can be swapped with spearmint if you prefer a gentler flavor, and the food coloring is just for fun—I love pastel colors, but bold shades work beautifully too.
Equipment Needed
- Mixing bowl
- Electric mixer or stand mixer
- Silicone spatula
- Cutting board
- Sharp knife
- Baking sheet or large tray
- Parchment paper
I’ve used everything from a hand mixer to a stand mixer, and both get the job done—the mixer simply helps avoid tired arms because the dough gets thick quickly. A silicone spatula keeps the sticky mixture under control, and a parchment-lined sheet gives the mints a place to dry without sticking. If you don’t have a cutting board, any clean flat surface will work, but I find a large board makes it easier to roll out long ropes of dough without bumping into things.
Step-by-Step Instructions
When I start making butter mints, the first thing I do is beat the softened butter until it’s creamy and smooth. This step always feels therapeutic to me because the mixture begins transforming right away. Once the butter looks pale and fluffy, I slowly add in the powdered sugar, mixing on low so it doesn’t puff up in my face like a sugar cloud—yes, I’ve done that. The mixture will look crumbly at first, but don’t worry; it comes together beautifully.
Next, I pour in the heavy cream and peppermint extract. This is the moment the fragrance fills the kitchen, and I always take a second to breathe it in. As the mixer works, the texture shifts into a thick, pliable dough. If it seems too sticky, I add a tablespoon or two of powdered sugar; if it’s too dry, a splash more cream brings it back to life. Getting the texture right makes the rolling step so much easier.
Once the dough is ready, I divide it into portions—usually four—and knead a drop or two of food coloring into each. Kneading it by hand warms the dough slightly and makes the colors blend smoothly. I’ve learned not to overdo the food coloring; even one drop can become vibrant fast. Then I roll each portion into long ropes, usually about ½-inch thick, though sometimes I go thinner if I want daintier mints.(See the next page below to continue…)