
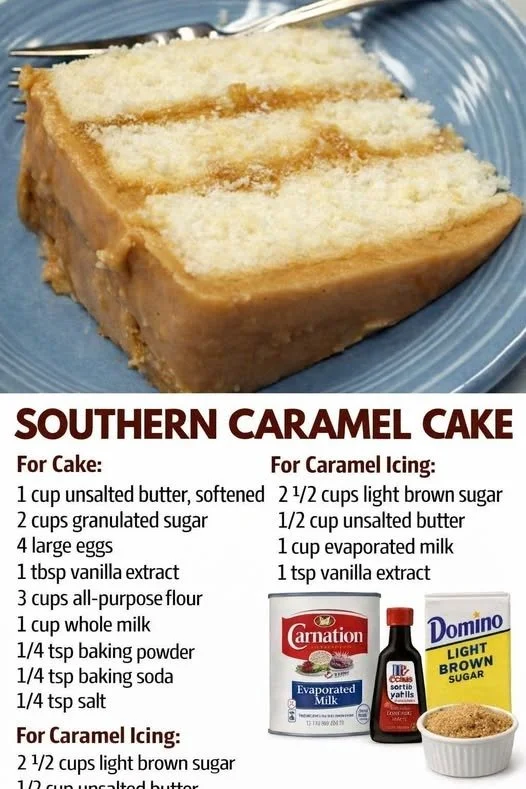
There’s something incredibly comforting about the smell of freshly baked cake wafting through my kitchen. It takes me back to my childhood, where every family gathering seemed to have a homemade cake at its center. One of my all-time favorites has to be Butter Cake—a classic that never fails to impress. It’s rich, buttery, and has a soft crumb that practically melts in your mouth. Today, I’m excited to share my go-to Butter Cake recipe that always brings a smile to my face and hopefully will do the same for you!
Why You’ll Love This Recipe
This Butter Cake is not just any cake; it’s a nostalgic combination of simple ingredients that yields an extraordinary result. It’s perfect for any occasion, whether it’s a cozy family dinner, a birthday celebration, or just a weekday treat to enjoy after dinner with a cup of tea. The best part? It’s incredibly easy to make, and I promise it will become a staple in your kitchen, just like it is in mine. (See the ingredients in the next page below…)
Ingredients
- 1 cup unsalted butter, softened
- 1 ½ cups granulated sugar
- 4 large eggs
- 2 teaspoons vanilla extract
- 2 ¾ cups all-purpose flour
- 1 tablespoon baking powder
- ½ teaspoon salt
- 1 cup milk
Equipment Needed
- Mixing bowls
- Electric mixer or whisk
- Measuring cups and spoons
- Rubber spatula
- 9-inch round cake pans or a 9 x 13-inch baking dish
- Parchment paper (for easier removal)
- Oven
Step-by-Step Instructions
Start by preheating your oven to 350°F (175°C). While the oven warms up, I like to prepare my baking pans by greasing them with a little butter and lining the bottoms with parchment paper. This ensures that my Butter Cake comes out perfectly without sticking. In a large mixing bowl, cream the softened butter and granulated sugar together until the mixture becomes light and fluffy—it should take about 3-4 minutes. The smell of butter and sugar blending together is one of my favorite sensations! (See the next page below to continue steps…)
Next, add the eggs one at a time, making sure to beat well after each addition. Then stir in the vanilla extract; this will elevate the flavors in such a lovely way. In another bowl, combine all the dry ingredients: flour, baking powder, and salt. Gradually add this mixture to the wet ingredients, alternating with the milk. Mix until the batter is just combined—it should be thick and creamy. I get excited at this stage as I see the batter coming together!
Pour the batter evenly into your prepared pans and smooth the tops with a rubber spatula. Bake for about 25-30 minutes for round cakes or 35-40 minutes for a 9 x 13 dish. To check if it’s done, insert a toothpick in the center; if it comes out clean, it’s ready! Once baked, let the cakes cool in the pans for about 10 minutes before transferring them to a wire rack to cool completely.
Pro Tips for Best Results
One key tip I’ve learned from making this Butter Cake is to ensure that all your ingredients are at room temperature before you start mixing. This helps to achieve that wonderfully smooth batter—a crucial factor for a light and fluffy cake. I often take my eggs and butter out an hour before I begin baking, and the difference is noticeable in the final texture!
I also recommend paying attention to how you measure your flour. I used to scoop flour straight from the bag, but I found that spooning it into the measuring cup and leveling it off gives a much lighter cake. If you’re anything like me, you might have a hefty scoop of flour sitting at the bottom that can weigh down the batter.
Finally, don’t skip the creaming step! Properly creaming the butter and sugar will infuse air into your batter, creating a light and airy texture. I noticed a significant change when I took the time to properly cream them together instead of rushing through it.
Common Mistakes to Avoid
One mistake I’ve made is forgetting to properly prep my baking pans. There’s nothing worse than a cake that won’t come out of the pan! Always grease and line your pans. I learned this the hard way, and now I follow this step religiously.
Another pitfall is overmixing the batter once the flour is added. I used to mix until everything was completely smooth, which led to a denser cake. Just mix until combined, and remember that a few lumps are okay! This approach keeps the cake light and fluffy. (See the next page below to continue…)
Also, keep an eye on your cake while it bakes. Ovens can differ, so don’t rely solely on baking times; check it a few minutes before the timer goes off. My first few attempts resulted in a slightly burnt crust because I was distracted by the delicious aroma filling my kitchen!
Lastly, make sure you let the cake cool completely before frosting it. I once rushed to decorate a still-warm cake, and the frosting melted right off! Patience pays off, my friends.
Serving Suggestions
This Butter Cake is delightful on its own, but I love to serve it with a dusting of powdered sugar or a simple glaze made from powdered sugar and milk. Fresh fruits like strawberries or raspberries add a lovely splash of color and flavor, making it look even more appealing. If I’m feeling particularly indulgent, I’ll whip up some fresh cream to serve on the side.
For gatherings, I often bake two layers and stack them with a layer of frosting in between. A classic buttercream frosting complements the richness of the cake beautifully. Alternatively, I’ve been known to go for a cream cheese frosting for a tangy twist.
Lastly, this cake pairs wonderfully with coffee or tea. I love slicing a piece in the afternoon and enjoying it while catching up with a friend over a warm beverage. It turns a simple moment into something special.
Variations & Customizations
I love experimenting with different flavors in my Butter Cake. One of my favorite variations is adding citrus zest, like lemon or orange, to the batter. It gives the cake a refreshing twist that’s perfect for spring. A little zest goes a long way in elevating the flavor, and you’re left with a delightful surprise in each bite.
Another fun twist I’ve enjoyed is folding in mini chocolate chips or chopped nuts. The warmth of the melted chocolate gives a nice contrast to the buttery cake, and the nuts add a pleasant crunch. You can even drizzle melted chocolate on top of the frosting for an extra indulgent treat!
If you’re looking to make it festive, I sometimes incorporate spices like cinnamon or nutmeg, especially during the fall season. These spices bring a cozy feel that complements the richness of the cake beautifully.
How to Store, Freeze & Reheat
Storing your Butter Cake properly is essential for maintaining its moistness. I usually wrap the cooled cake tightly in plastic wrap and store it in an airtight container on the counter for up to three days. If you want to keep it longer, you can refrigerate it, but I’ve noticed it tends to dry out a bit in the fridge.
Freezing is a fantastic option if you’re planning ahead. I love freezing individual slices wrapped in plastic wrap and then in foil. This way, I can easily pull out a piece whenever I have a craving. It keeps well for up to three months. Just make sure to let it thaw in the fridge overnight, and it will taste as fresh as the day it was baked!
When it comes to reheating, I’ve found that a quick spin in the microwave for about 10-15 seconds makes the cake warm and soft again. If you prefer, you could also pop it in a low oven for a few minutes, but be careful not to dry it out. Enjoying it warm is like receiving a warm hug from your kitchen!
Conclusion
I hope you enjoy making this Butter Cake as much as I do! It’s a simple yet delightful recipe that brings warmth and happiness to any occasion, big or small. Whether you’re enjoying a slice on your own or sharing it with loved ones, the joy it brings is undeniable. Happy baking, and may your kitchen be filled with sweet memories!