
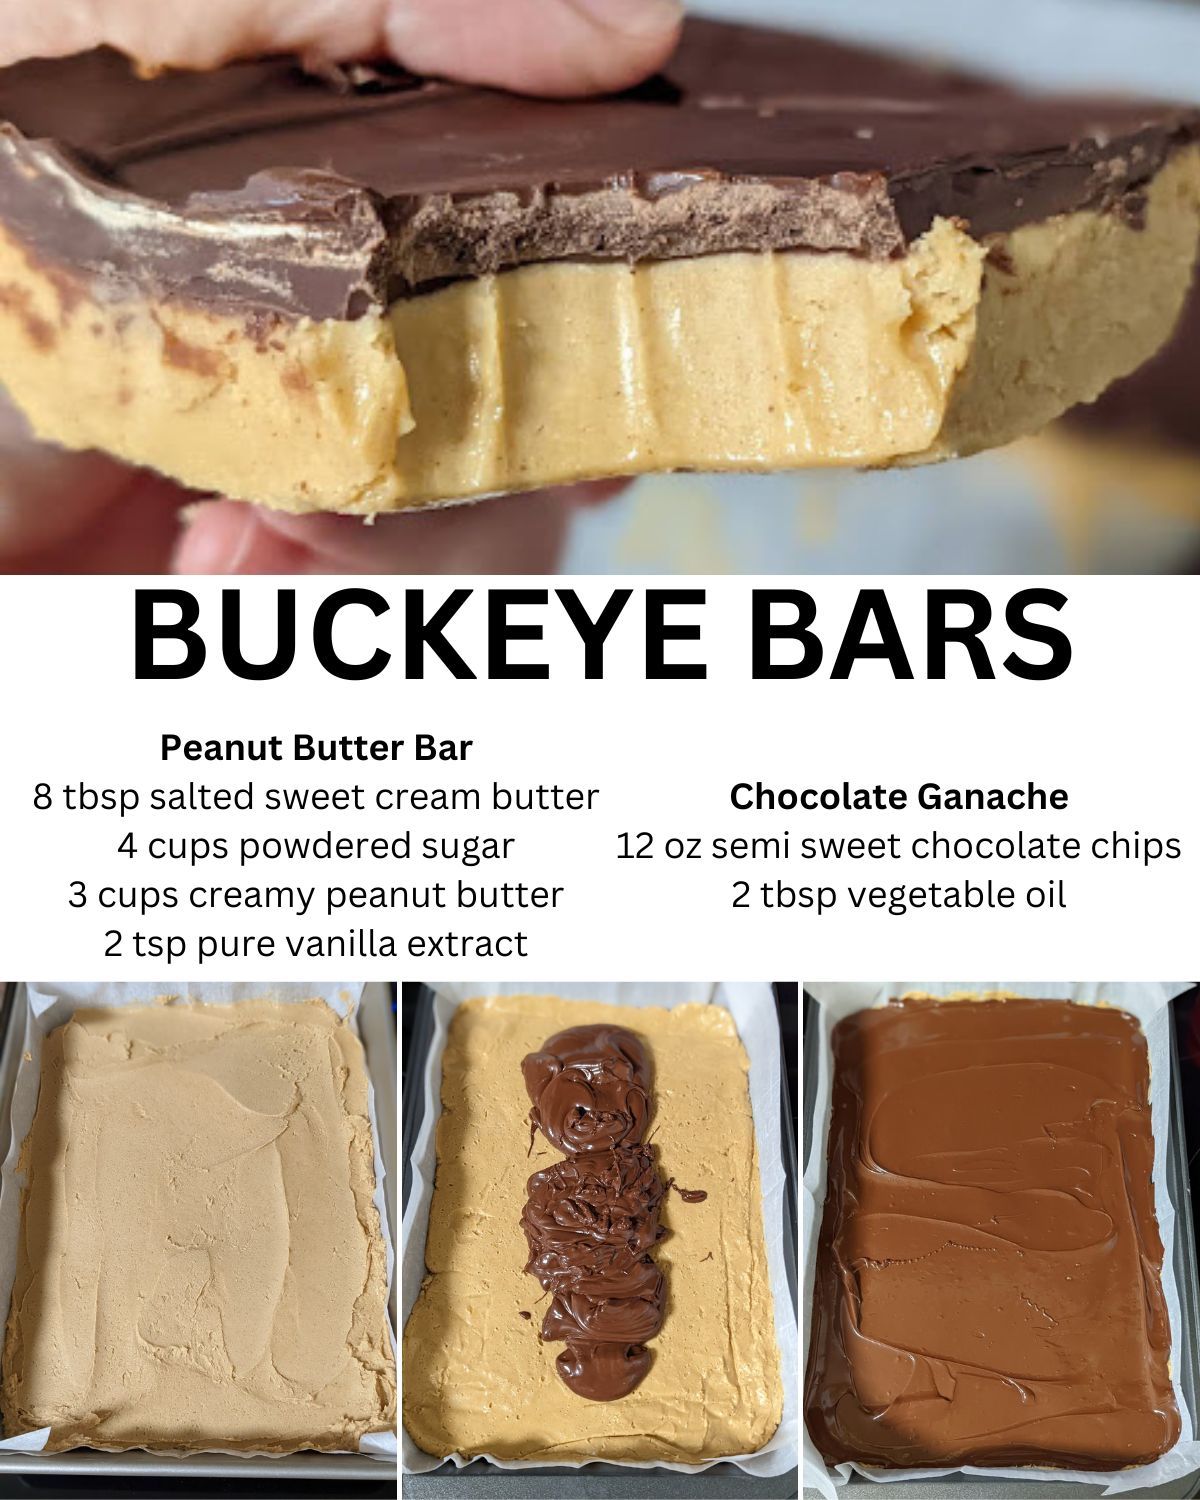
The mixture should be thick, smooth, and easy to press without sticking excessively to your hands. Transfer the peanut butter mixture into the lined pan and use a spatula or your palms to press it into an even layer. A smooth base ensures the chocolate layer spreads evenly and looks clean once set.
Prepare the chocolate topping by combining the chocolate chips and two tablespoons of butter in a microwave-safe bowl. Heat in 20–30 second intervals, stirring between each, until fully melted and glossy. Be careful not to overheat, as chocolate can burn easily.
If using a double boiler, melt the chocolate gently over simmering water, stirring constantly until smooth. Once the chocolate is melted and silky, pour it evenly over the peanut butter layer. Use a spatula to gently smooth the top, ensuring full coverage.
Refrigerate the pan for at least two hours or until the chocolate has completely set. For the cleanest slices, allow the bars to chill thoroughly. Once set, lift the bars out of the pan using the parchment paper handles. Place on a cutting board and slice with a sharp knife, wiping the blade between cuts for perfect, smooth edges. Your Buckeye Bars are now ready to serve, and each square will showcase the gorgeous contrast between creamy peanut butter and glossy chocolate.
Pro Tips for Best Results
One helpful tip for achieving perfect Buckeye Bars is ensuring your peanut butter layer is properly mixed and thick enough to support the chocolate topping. If the mixture feels too soft after adding the powdered sugar, add a small amount more until it reaches a firm but pliable consistency. This helps the bars slice neatly without losing their shape. Using high-quality chocolate also enhances the final result, giving the topping a rich flavor and smooth texture.
Another tip is to chill the peanut butter layer slightly before adding the chocolate topping. This helps the chocolate spread smoothly without mixing into the peanut butter. Even 15 minutes in the refrigerator can make a noticeable difference in the clarity of the layers. Smooth, distinct layers make the bars look more professional and polished.
When melting the chocolate, avoid overheating or rushing the process. Chocolate burns easily and can seize if heated too quickly or exposed to moisture. Use gentle heat and stir often for the best results. Adding a small amount of butter ensures a silky finish that spreads effortlessly across the peanut butter base.
Finally, slicing the bars after they have chilled thoroughly ensures clean, sharp edges. Using a warm knife—run under hot water and then dried—helps the blade glide through the chocolate without cracking it. Taking your time during this step gives each bar a beautifully finished look.
Common Mistakes to Avoid
One of the most common mistakes is not drying the peanut butter mixture enough. If the peanut butter base is too soft or under-mixed, the layers may not set properly, resulting in bars that are gooey rather than structured. Ensuring the powdered sugar fully incorporates helps create a firm, sliceable foundation.
Another mistake is using natural peanut butter, which often contains excess oil that causes the bars to separate or become greasy. For best results, stick with traditional creamy peanut butter. Natural peanut butters tend to separate over time and may affect both flavor and structure.
Some people rush the chilling process, cutting into the bars before the chocolate layer has fully hardened. This leads to smeared layers and uneven slices. Adequate chilling time is essential for the bars to maintain their shape and look neat. For best appearance, refrigerate for several hours or even overnight.
Lastly, overheating the chocolate can cause it to become thick or grainy. Chocolate should be melted slowly to maintain its smoothness. If overheated, it may not spread evenly, and the top layer of the bars can appear dull or streaky. Gentle melting ensures a glossy, smooth finish.(See the next page below to continue…)