
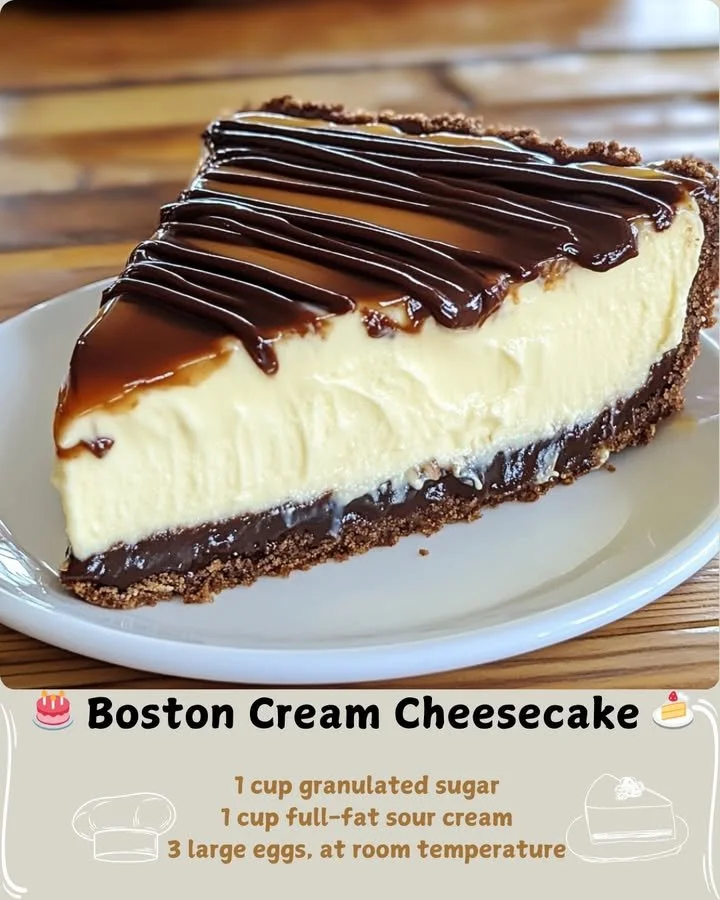
There’s something undeniably special about the rich, creamy indulgence of cheesecake meeting the nostalgic charm of a classic dessert. For me, that perfect union is found in Boston Cream Cheesecake. It’s the show-stopping centerpiece that turns any dinner into a celebration. With its velvety filling, buttery crust, and glossy chocolate glaze, this recipe has become my go-to for creating sweet, memorable moments.
Why You’ll Love This Recipe
What I adore most about this Boston Cream Cheesecake is how it feels both elegantly decadent and wonderfully comforting. The smooth, tangy cream cheese filling paired with that sweet, silky chocolate topping is a match made in heaven. It’s the kind of dessert that looks professionally made but is absolutely achievable in your own kitchen. Perfect for holidays, birthdays, or just because, it’s a versatile treat that never fails to delight. What’s better than that? (See the ingredients in the next page below…)
Ingredients
For the Crust:
1 ½ cups graham cracker crumbs
½ cup unsalted butter, melted
For the Filling:
2 cups cream cheese, softened
1 cup granulated sugar
1 teaspoon vanilla extract
3 large eggs
1 cup sour cream
For the Glaze:
1 cup semi-sweet chocolate chips
½ cup light corn syrup
Equipment Needed
9-inch springform pan
Mixing bowls
Electric mixer
Rubber spatula
Saucepan
Whisk
Measuring cups and spoons
Step-by-Step Instructions
To start making my Boston Cream Cheesecake, I first preheat the oven to 325°F (160°C). In a mixing bowl, I combine the graham cracker crumbs with the melted butter until it feels like wet sand. Pressing this firmly into the bottom of my springform pan is so satisfying—it’s the foundation for everything! I bake this crust for 10 minutes, then let it cool completely. This step ensures it stays crisp and won’t get soggy. (See the next page below to continue steps…)
Now, for the best part: the filling. In a large bowl, I beat the softened cream cheese and sugar together until it’s perfectly smooth and creamy. Next, I mix in the vanilla extract and the eggs, one at a time, just until they’re blended. Finally, I fold in the sour cream. The batter becomes luxuriously thick and smooth—it’s downright dreamy! I pour this over the cooled crust and smooth the top.
The baking requires a little patience. I bake it for 50-60 minutes, until the edges are set but the center still has a slight jiggle. Then comes my favorite trick: I turn off the oven, crack the door open, and let the cheesecake cool inside for a full hour. This slow cooling helps prevent cracks! After that, it chills in the fridge for at least 4 hours, though overnight is truly best.
While it chills, I make the simple chocolate glaze. In a saucepan, I melt the chocolate chips with the corn syrup over low heat, stirring until it’s gloriously smooth and shiny. Once the cheesecake is fully chilled, I pour the glaze over the top, letting it drip artfully down the sides. The transformation is stunning!
Pro Tips for Best Results
I’ve learned a few tricks along the way to ensure my Boston Cream Cheesecake comes out just right. First, make sure your cream cheese and eggs are truly at room temperature. I take them out about an hour before I start. This makes the filling incredibly smooth and prevents lumps—a total game-changer!
Another tip is to avoid overmixing once the eggs are added. I mix on low speed and just until combined. Overbeating can add too much air, which might cause the cheesecake to rise and crack as it bakes.
Lastly, don’t skip the long chill! Letting the cheesecake rest overnight in the refrigerator is the secret to perfect flavor and sliceability. The texture becomes beautifully firm yet creamy, making it worth the wait.
Common Mistakes to Avoid
One mistake I’ve made in the past is not using a springform pan. I once tried a regular pan, and let’s just say serving it was a disaster! The springform is essential for that clean, beautiful release. (See the next page below to continue…)
Another thing to watch out for is the water bath temptation. While some cheesecakes need one, this recipe doesn’t. I tried it once thinking it would help, but the crust became a bit soggy. Trust the method here—the slow oven cool-down is all the gentle treatment it needs.
I also learned not to test for doneness with a knife. Inserting a knife into the center can create a crack. Instead, I gently shake the pan; that slight jiggle in the middle tells me it’s perfectly done.
Finally, make sure your glaze isn’t too hot when you pour it. If it’s piping hot, it can melt the top of the chilled cheesecake. Letting it cool for a few minutes ensures a perfect, clean layer of chocolate.
Serving Suggestions
When it comes to serving my Boston Cream Cheesecake, I love using a cake stand to show off its beautiful layers. A little dollop of freshly whipped cream on the side adds a lovely, light contrast.
I often serve it as the grand finale to a special dinner, paired with a cup of strong coffee or a glass of dessert wine. The rich cheesecake and bitter coffee complement each other so wonderfully.
Sometimes, I even add a few fresh raspberries or a mint sprig on the plate for a pop of color and a touch of freshness that cuts through the richness beautifully!
Variations & Customizations
I love experimenting with variations of my Boston Cream Cheesecake. One of my favorites is adding a tablespoon of orange zest to the filling; it brightens the whole dish with a subtle, refreshing citrus note.
Another fun idea is to swap the chocolate glaze for a salted caramel drizzle. The sweet and salty combination is absolutely irresistible and feels like a whole new dessert!
For a fun twist, I sometimes mix a handful of mini chocolate chips into the crust for an extra chocolatey crunch. It’s a simple change that delights everyone.
How to Store, Freeze & Reheat
If you happen to have leftovers (which is rare, but it can happen!), storing my Boston Cream Cheesecake is super easy—just cover it tightly and keep it in the fridge. It stays fresh and delicious for up to 5 days.
You can also freeze it! I wrap the whole cheesecake (or individual slices) tightly in plastic wrap, then in foil. It keeps beautifully for up to a month. When I’m ready to enjoy it, I just thaw it overnight in the refrigerator.
I don’t recommend reheating the whole thing, but if I want a single slice slightly warmed, I’ll pop it in the microwave for just 10-15 seconds. It makes the chocolate glaze a little soft and the filling incredibly lush.
Conclusion
In conclusion, Boston Cream Cheesecake has a special place in my heart (and my kitchen). It’s such a delightful, impressive recipe that always brings a smile to my face and those of my loved ones. I hope you enjoy making this recipe as much as I do! Grab your cream cheese, and let’s get baking