
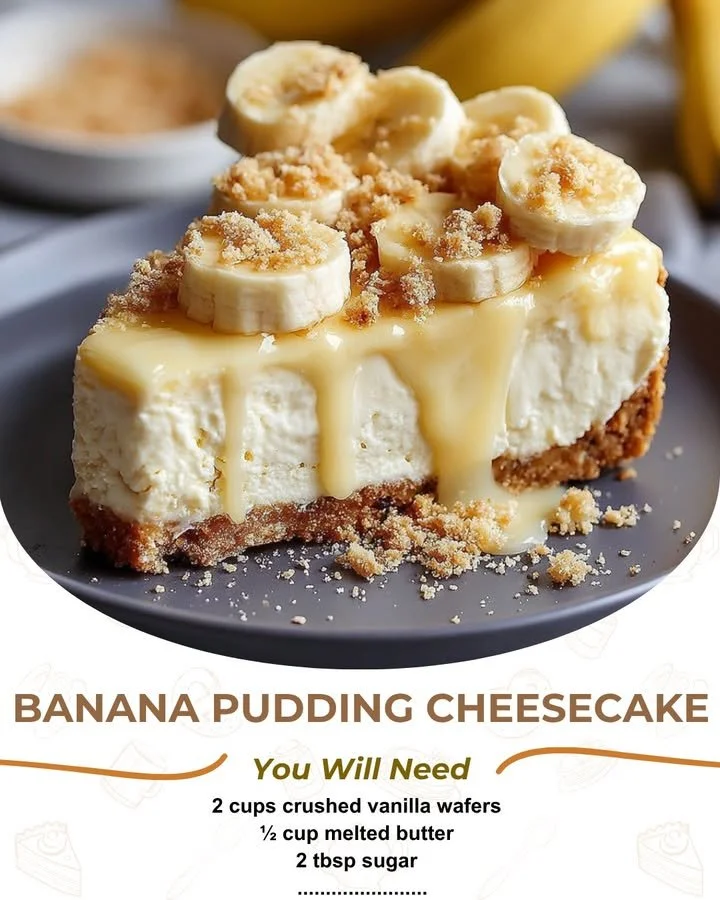
This delightful concoction combines two beloved classics—banana pudding and cheesecake—into one creamy, dreamy treat. Whether it’s for a special occasion or just a sweet way to brighten your day, this recipe is sure to impress family and friends alike.
Why You’ll Love This Recipe
There’s something magical about the way ripe bananas blend with velvety cream cheese and fluffy whipped topping, creating a dessert that feels both nostalgic and indulgent. The buttery graham cracker crust adds the perfect crunch, while the banana slices and vanilla pudding elevate every bite to pure bliss. Trust me, you’re going to want to savor every spoonful of this deliciousness. (See the ingredients in the next page below…)
Ingredients
– 1 ½ cups graham cracker crumbs
– ½ cup unsalted butter, melted
– 2 cups cream cheese, softened
– 1 cup powdered sugar
– 1 teaspoon vanilla extract
– 1 cup heavy whipping cream
– 1 box (3.4 oz) instant vanilla pudding mix
– 2 cups milk
– 3 ripe bananas, sliced
– Whipped cream for topping (optional)
Equipment Needed
– 9-inch springform pan
– Mixing bowls
– Electric mixer
– Rubber spatula
– Whisk
– Measuring cups and spoons
– Plastic wrap
Step-by-Step Instructions
To start off, let’s make the crust. In a medium bowl, I combine the graham cracker crumbs with the melted butter until it resembles wet sand. Then, I press this mixture evenly into the bottom of my springform pan, creating a sturdy base for all that creamy goodness to come. Once it’s all packed in, I pop it in the fridge to set. This step is crucial because a well-chilled crust holds its shape beautifully. (See the next page below to continue steps…)
Now for the creamy filling! In a large mixing bowl, I beat the softened cream cheese and powdered sugar together until it’s smooth and velvety. Then, I add in the vanilla extract for that extra flavor kick. In a separate bowl, I whisk the heavy cream until stiff peaks form, then gently fold it into the cream cheese mixture, creating a light and fluffy texture that’s irresistible.
Next, it’s time to layer! I take the chilled crust out of the fridge and layer half of the cream mixture over the crust, smoothing it out. Then comes a delightful layer of sliced bananas and a layer of the instant vanilla pudding mixed with milk. I repeat the layers, ending with the remaining cream mixture on top. It’s a colorful, inviting sight that honestly makes my mouth water!
Finally, I cover my cheesecake with plastic wrap and let it chill in the fridge for at least four hours, but ideally overnight. This allows the flavors to meld together beautifully, and trust me, it’s worth the wait!
Pro Tips for Best Results
When I first made this recipe, I tested different types of bananas. Believe me, using perfectly ripe bananas makes a huge difference in both flavor and texture! Look for bananas that are speckled but not overly bruised; those will give your cheesecake the most delicious natural sweetness.
Another tip I learned along the way is to make sure your cream cheese is at room temperature before you start mixing. I’ve had the experience of trying to mix cold cream cheese and ended up with lumps in my batter. Nobody wants that! Leaving it out for about an hour before you begin is a small step that yields smoother results.
Lastly, if you want an extra special touch, try drizzling some caramel sauce over the top before serving. It adds a rich flavor that pairs beautifully with the bananas. I always do this, and it turns the dessert from delectable to downright decadent!
Common Mistakes to Avoid
One common mistake I made the first time is not letting the pudding mixture thicken enough before layering it. It’s important to whisk the milk and pudding mix together thoroughly until it’s firm. If it’s too runny, it can make the layers messy. You’ll want a nice, thick consistency to create smooth, clean layers. (See the next page below to continue…)
Another pitfall is forgetting to chill the cheesecake for long enough. I know it can be tempting to dig in right away, but allow it to set in the fridge overnight for the best flavor and texture. The longer it chills, the more the flavors meld, and the firmer it gets.
I also recommend using a sharp, warm knife to cut your cheesecake. This prevents the layers from squishing together and keeps your slices looking pristine. Just dip the knife in hot water, wipe it off, and slice for clean edges. Trust me, it makes a world of difference!
Serving Suggestions
When it comes to serving, I love to amp up the presentation. I usually garnish each slice of cheesecake with a dollop of whipped cream and a sprinkle of crushed graham crackers on top. It’s simple but adds a lovely touch that really invites everyone to dig in.
For a brunch or special occasion, pairing this cheesecake with fresh berries or a fruit salad elevates it beautifully. The tartness of the berries balances the sweetness of the cheesecake perfectly, making it a refreshing complement.
Also, keep in mind that this Banana Pudding Cheesecake is delicious chilled, but if your guests prefer a warm treat, serve it slightly at room temperature. Just take it out of the fridge about 30 minutes before serving, and you’ll have a luscious dessert that’s both comforting and tasty!
Variations & Customizations
One of the things I love about this recipe is how versatile it is. If you want to switch things up, consider using different flavors of pudding mix. Chocolate or butterscotch pudding can create an entirely different flavor profile that still works beautifully with the banana layers.
I also sometimes add a tablespoon of peanut butter to the cream cheese mixture. It gives the cheesecake a subtle nutty flavor that’s absolutely delicious and complements the bananas well. You could even layer crushed cookies, like Nilla Wafers or Oreos, in between the layers for an added crunch.
For a tropical twist, try adding some coconut. Either mixing in shredded coconut into the filling or sprinkling it on top of the whipped cream can transport your taste buds to a sunny beach. It’s all about what flavors you and your loved ones enjoy most!
How to Store, Freeze & Reheat
Once the Banana Pudding Cheesecake is assembled and you’re ready to store any leftovers, cover it tightly with plastic wrap or place it in an airtight container. It will keep in the refrigerator for up to five days—if it lasts that long, of course!
If you find yourself with more cheesecake than you can eat, great news! You can freeze slices. Wrap each slice tightly in plastic wrap and then in aluminum foil to protect it from freezer burn. It should keep well for up to two months. When you’re ready to enjoy a slice, simply take it out of the freezer and let it thaw in the fridge overnight.
Reheating this cheesecake is not necessary, but if you prefer to enjoy it a little warmer, simply let it sit at room temperature for about 30 minutes before serving. This can help bring back some of the creamy texture that’s a hallmark of a great cheesecake!
Conclusion
I hope you feel inspired to whip up this Banana Pudding Cheesecake in your kitchen. It’s a true showstopper that brings joy to any gathering or simply a lovely indulgence for yourself. Remember, cooking is all about having fun and making delicious memories—so grab your ingredients and enjoy the process! Happy baking!