
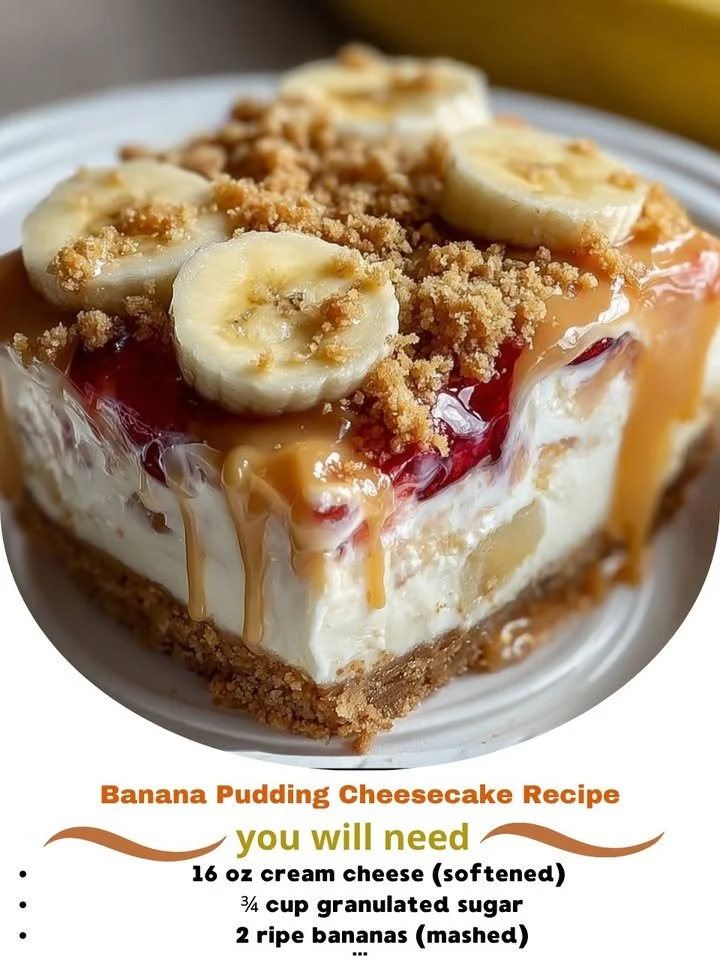
Banana Pudding Cheesecake is one of those desserts that can instantly transport me back to my childhood. You know those moments when you take a bite and just feel all the warmth and love that went into it? That’s exactly how I feel when I make this delightful treat. With its creamy cheesecake texture combined with the nostalgic flavors of banana pudding, it has become a staple in my kitchen. Today, I’m excited to share my version of this dessert, complete with step-by-step instructions so you can whip it up in no time!
Why You’ll Love This Recipe
This Banana Pudding Cheesecake is an absolute crowd-pleaser with layers of flavors and textures that just harmonize beautifully. The creamy richness of the cheesecake balances perfectly with the sweet banana flavors and the crunch of the Nilla wafers. Plus, it’s a showstopper for any gathering, making it the perfect ending to a meal or a sweet treat to enjoy with friends and family. Trust me, once you try it, you’ll understand why it’s one of my favorites! (See the ingredients in the next page below…)
Ingredients
– 1 ½ cups Nilla wafer crumbs
– ½ cup unsalted butter, melted
– 2 (8-ounce) packages cream cheese, softened
– 1 cup granulated sugar
– 1 teaspoon vanilla extract
– 3 large eggs
– 1 cup sour cream
– 2 ripe bananas, mashed
– 1 package instant vanilla pudding mix
– 2 cups whole milk
– Whipped cream (for topping)
– Slices of fresh banana (for garnish)
Equipment Needed
– 9-inch springform pan
– Mixing bowls
– Electric mixer (or whisk)
– Spatula
– Measuring cups and spoons
– Rubber scraper
– Refrigerator
Step-by-Step Instructions
To kick things off, preheat your oven to 325°F (163°C) and get that atmosphere filled with warmth. In a mixing bowl, combine the Nilla wafer crumbs and melted butter until the crumbs are well-coated. Press this mixture firmly into the bottom of your springform pan to create a solid crust. This step is crucial! It sets the stage for all the delicious layers to come. (See the next page below to continue steps…)
Next, in a new bowl, blend the softened cream cheese and sugar until it’s smooth and creamy. This part is my favorite because the sweet aroma fills the kitchen! Add in the vanilla extract and mix well. Now, beat in the eggs, one at a time, ensuring each one is fully incorporated before adding the next. This gives the cheesecake that rich texture we all love. After that, stir in the sour cream and the mashed bananas until it’s all well combined.
Once those flavors meld together, pour your cheesecake mixture over the crust in the springform pan and smooth the top with a spatula. Now, let’s get it into the oven! Bake for about 60 minutes, or until the center is set and just slightly jiggly. It will continue to firm up as it cools. When it’s out, let it cool at room temperature for a bit before refrigerating it for at least 4 hours (or overnight, if you can wait!).
Finally, when you’re ready to serve, whip up some cream and spread it on top of the cheesecake, garnishing it with fresh banana slices. The anticipation is almost too much to bear, but trust me—it’s worth the wait as you slice into that creamy, dreamy dessert.
Pro Tips for Best Results
I tested this three ways: with the bananas mixed in, layered, and as a topping. My personal favorite method is mixing the bananas directly into the cheesecake filling. This way, you get that lovely banana flavor in every single bite.
I also discovered that letting the cheesecake sit in the fridge overnight does wonders for the flavors to meld together. The wait can be tough, but trust me, you will savor the result. The flavors are always more pronounced after a good night’s rest!
Lastly, make sure your cream cheese is really softened before you start mixing. If it’s even a bit cold, you’ll find it tougher to get that smooth texture, and nobody wants a lumpy cheesecake!
Common Mistakes to Avoid
One common mistake I made was not letting my cheesecake cool gradually before placing it in the fridge. If you rush it, the sudden change in temperature can lead to cracks on the surface. So, remember to let it cool on the countertop first! (See the next page below to continue…)
Another thing to avoid is overmixing your cheesecake batter. I’ve learned it’s best to mix just until combined, especially after adding the eggs. Overmixing can incorporate too much air, leading to cracks during baking.
Always use ripe bananas for the best flavor. Unripe bananas can be too starchy and won’t give you that sweet, rich flavor we associate with good banana bread or pudding. Choose bananas that are nicely speckled for the perfect balance of sweetness.
And finally, don’t forget to grease the sides of the springform pan! Even though I usually use a non-stick pan, I learned the hard way that an extra layer of butter or cooking spray makes for an easier release, which is always welcome.
Serving Suggestions
When it comes to serving Banana Pudding Cheesecake, I love to pile on the whipped cream and garnish with thick slices of fresh banana. It adds that lovely pop of color and flavor, making each slice even more enticing.
This cheesecake is delightful as is, but you can also serve it alongside a scoop of vanilla ice cream for an indulgent treat. The creamy ice cream will complement the cheesecake beautifully, enhancing that rich texture and flavor.
Finally, if you’re feeling a bit adventurous, drizzle some caramel sauce on top. It adds a lovely depth that pairs excellently with the bananas, making each bite even more luxurious.
Variations & Customizations
While I adore traditional banana flavors, you can absolutely play around with this cheesecake recipe. One of my favorite variations is adding a swirl of peanut butter into the batter for a delightful twist. The combination of banana and peanut butter is a classic that never fails to impress!
If you want to make it a bit more tropical, consider folding in some crushed pineapple or adding coconut flakes. These elements would create a lovely tropical vibe, perfect for summer gatherings.
For those who love a little extra crunch, sprinkle some crushed Nilla wafers on top of the whipped cream before serving. It adds a satisfying texture and reinforces the nostalgic vibe of banana pudding!
How to Store, Freeze & Reheat
Storing any leftovers is quite simple! Just cover the cheesecake with plastic wrap or foil and keep it in the refrigerator. It should stay fresh for about 4 to 5 days—if you can resist eating it all before then!
If you want to make this cheesecake ahead of time, you can freeze it! Just make sure to let it cool completely and then wrap it tightly in plastic wrap and foil before placing it in the freezer. It can be stored for up to 3 months. When you’re ready to enjoy it, just transfer it to the refrigerator to thaw overnight.
To reheat, I recommend letting it come to room temperature before serving any slices. If you prefer it a little warm, pop it in the oven on a low temperature for a few minutes. Just be careful not to overheat it, as it can affect the texture!
Conclusion
I truly hope you enjoy making this Banana Pudding Cheesecake as much as I do! It’s the perfect blend of creamy, sweet, and nostalgic goodness that never fails to lift my spirits. Whether it’s for a family dinner, a holiday celebration, or just because you deserve a treat, this cheesecake is a guaranteed hit. Enjoy every delightful bite!