
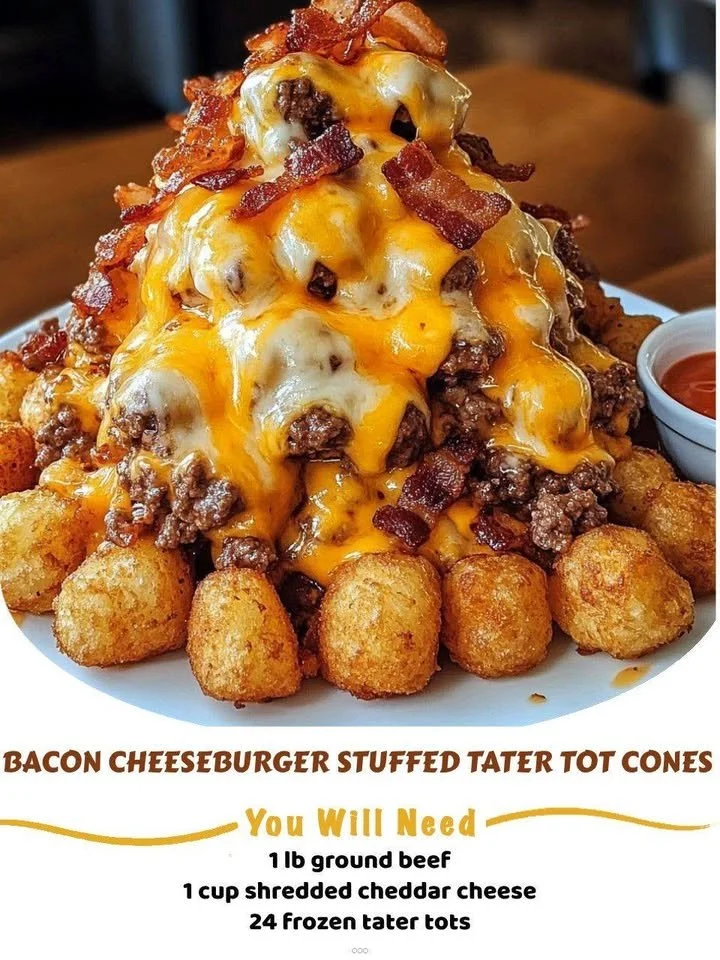
Welcome to my kitchen, where I love experimenting with fun and delicious recipes! Today, I’m excited to share one of my favorites: Bacon Cheeseburger Stuffed Tater Tot Cones. Imagine biting into a crispy tater tot cone filled with juicy, flavorful bacon cheeseburger filling. It’s the ultimate comfort food that can easily steal the spotlight at any gathering or make for an incredible weeknight dinner.
Why You’ll Love This Recipe
This recipe combines all the elements we adore about burgers and tater tots but rolls them into a fun, portable cone! It’s perfect for parties, game days, or when you simply want a cozy meal that’s bursting with flavor. Plus, who can resist the crispy exterior paired with the gooey goodness of melted cheese and savory bacon? It’s a fun twist that will have everyone coming back for seconds. (See the ingredients in the next page below…)
Ingredients
– 1 lb ground beef
– 1/2 cup cooked, crumbled bacon
– 1 cup shredded cheddar cheese
– 2 tablespoons ketchup
– 1 tablespoon mustard
– Salt and pepper to taste
– 2 cups frozen tater tots
– 4 large cones (for stuffing)
– Optional toppings: diced pickles, lettuce, and additional bacon
Equipment Needed
– Large skillet
– Mixing bowl
– Baking sheet
– Parchment paper
– Cone molds (can be DIY or store-bought)
Step-by-Step Instructions
Let’s dive into making these delightful cones! Begin by preheating your oven to 400°F (200°C) and lining a baking sheet with parchment paper. In a large skillet over medium heat, cook the ground beef until it’s browned, seasoning with salt and pepper to your taste. Once it’s done, add in the crumbled bacon, ketchup, and mustard, mixing everything together until well combined and heated through. The aroma of sizzling beef and bacon is just heavenly! (See the next page below to continue steps…)
Now it’s time to assemble our cones! Take your tater tots and crush them slightly to make them more malleable—this makes it easier to mold them into a cone shape. On a cone mold, begin layering the tater tots, pressing them firmly to create a sturdy vessel. Make sure to cover the entire mold evenly for optimal crunchiness. After you’ve shaped all your cones, bake them in the preheated oven for about 20 minutes until they’re golden brown and crispy. My kitchen always fills with the most mouthwatering smells at this stage!
Once the tater tot cones are baked and crispy, remove them from the oven and let them cool for a few minutes. Carefully remove them from the molds, and it’s time to fill them! Spoon generous amounts of the burger mixture into each tater tot cone, then sprinkle shredded cheddar cheese on top. If you’re feeling indulgent, you can also add more crumbled bacon for that extra crunch. Return the filled cones to the oven for another 5-10 minutes or until the cheese has melted and is bubbling just slightly—all those layers of flavor are coming together beautifully!
The last step is to let the cones cool for a couple of minutes before serving them up. You can add your favorite toppings like diced pickles and fresh lettuce to give that classic cheeseburger feel. The combination of warm cheese, savory bacon, and that crispy exterior is downright irresistible!
Pro Tips for Best Results
I tested this recipe in three different ways to find the best method for making the tater tot cones. The first method had too many soggy tots, and the second batch didn’t hold together. My winning method? Baking the tater tots first and then molding them into cones gave me the perfect crispy texture!
Also, when shaping the cones, I found that lightly spraying the cone molds with cooking spray before adding the tater tots helps a lot. It allows for easy removal and ensures each cone comes out beautifully without sticking. Just a light coating can make all the difference!
Lastly, don’t hesitate to get creative with your filling. I’ve added sautéed onions and even jalapeños for a spicy kick. Each variation brings something unique to the table and keeps my family guessing what I’ll whip up next!
Common Mistakes to Avoid
One common mistake I made during my first attempt was not cooking the beef thoroughly. It’s essential to ensure that your ground beef is fully cooked to avoid any food safety issues. Plus, the flavor will be much richer with the beef nicely browned! (See the next page below to continue…)
Another hiccup I encountered was overfilling the cones. I got a bit too excited and packed them too tightly, which caused a mess when trying to take a bite. Remember, there’s such a thing as too much goodness! Being generous with the filling is great, but leave a little wiggle room for the cheese and toppings!
Lastly, don’t skip the part of former cooling before serving. The tater tots need a moment to settle and firm up; otherwise, you’ll risk the cones breaking apart. Trust me; you want them to hold up while you enjoy every cheesy, bacon-filled bite.
Serving Suggestions
These Bacon Cheeseburger Stuffed Tater Tot Cones make an excellent appetizer for your next gathering or game day. I love serving them alongside a variety of dipping sauces like ranch or barbecue for added flavor. Guests can customize their cones, adding extra toppings like fresh salsa or guacamole for a twist—this has always been a crowd-pleaser in my home!
For a fun family dinner, pair these cones with a crisp side salad or some sweet potato fries. The flavors complement each other well, and it’s a meal that creates a lively atmosphere around the table.
If you’re feeling adventurous, consider serving these cones with a side of homemade chili. The rich, thick chili pairs beautifully with the crispy cones and takes your meal to the next level—perfect for those cozy evenings when you want a filling dish without too much fuss.
Variations & Customizations
One of the best parts about these cones is how adaptable they are! If you’re looking to make them vegetarian, swap out the beef and bacon for a hearty mixture of sautéed mushrooms, black beans, and corn. Add extra spices for flavor, and you won’t even miss the meat!
I’ve also tried a BBQ chicken variation, substituting cooked shredded chicken and mixing in some barbecue sauce. The sweetness of the BBQ combined with the crispy tater tot shell is a fantastic combination that’s been a huge hit in my kitchen.
Finally, for those late-night cravings or simpler snacks, why not go mini? Use baby tater tots to make bite-sized versions of the cones! Perfect for parties or just an evening with friends, they offer a fun, handheld alternative that everyone can enjoy without feeling too stuffed.
How to Store, Freeze & Reheat
If you happen to have any leftovers (which is rare in my house!), store them in an airtight container in the refrigerator. They’ll stay fresh for up to three days. I recommend reheating in the oven at 350°F (175°C) for about 10-15 minutes to regain that delightful crispiness.
For those who love to meal prep, these cones freeze quite well too! Before baking, carefully place the filled cones on a parchment-lined baking sheet and freeze them. Once frozen, you can transfer them to a resealable freezer bag, where they’ll last for a couple of months. Just pop them in the oven frozen when you’re ready to enjoy—a quick and easy dinner solution!
When reheating frozen cones, simply bake at 375°F (190°C) for a bit longer, around 20-25 minutes, keeping an eye on them to ensure they’re heated through and crispy. Trust me, it’s worth the wait!
Conclusion
I hope you enjoy making these Bacon Cheeseburger Stuffed Tater Tot Cones as much as I do! They’re a delightful way to bring comfort food into a new light and are perfect for any occasion. The crunch, the flavor, and the joy of sharing them with friends and family will make this dish a favorite in your kitchen. Happy cooking!