
Avoid overfilling your taco shells. It’s tempting to pack in as much deliciousness as possible, but a too-full shell is difficult to eat and will likely crack under the weight. Aim for a moderate layer of cheesecake filling and a spoonful of apples. You want a balanced bite, not a structural disaster. I’ve created many a delicious but messy plate by being overzealous here.
Don’t assemble the tacos too far in advance. The moisture from the fillings will start to soften the beautiful crisp shell. I aim to assemble them no more than 10-15 minutes before serving. You can prep all the components ahead of time—the shells can be made hours in advance and stored in an airtight container, and the fillings can be chilled—but combine them at the last minute for the perfect crunch.
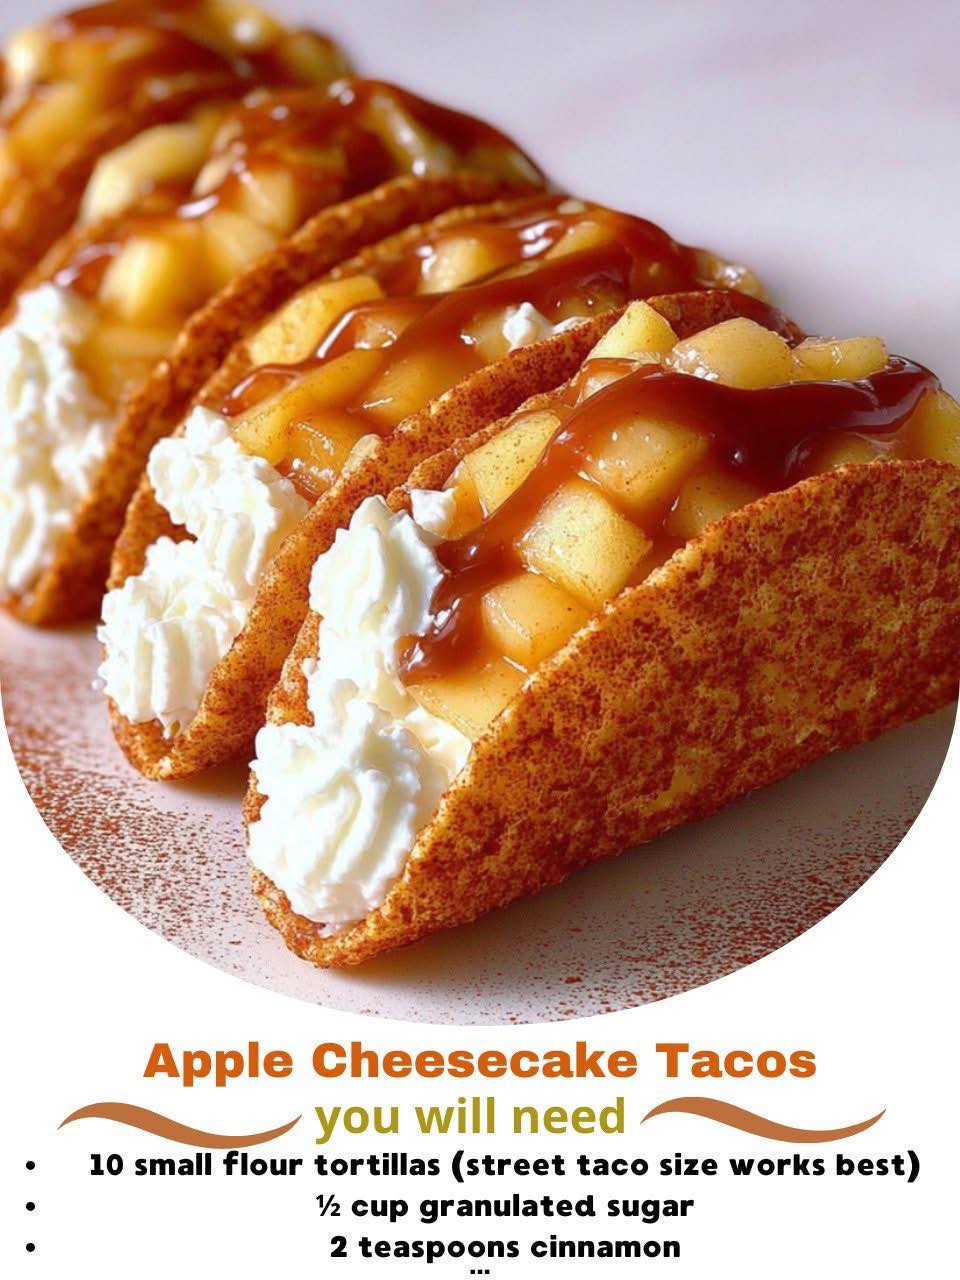
Finally, don’t forget to let the apple mixture cool slightly. If you spoon scalding hot apples directly onto the cold cheesecake filling, it will start to melt and turn runny, causing everything to slide out of the shell. A warm, not hot, temperature is the goal. Let them sit in the pan off the heat for about 5 minutes before assembling.
Serving Suggestions
I love serving these on a large platter lined with a fall-themed kitchen towel or some parchment paper. The variety of colors—the golden shells, creamy filling, and tender apples—looks so inviting. I place a small bowl of extra caramel sauce on the side for those who want an extra drizzle, and maybe a little dish of chopped toasted pecans for sprinkling.
For a fun party setup, I create a “taco bar” with all the components in separate bowls: the crisp shells, the cheesecake filling in a piping bag for neatness, the warm apples in a slow cooker on the “warm” setting, and little bowls of toppings like caramel, chocolate sauce, crushed graham crackers, or mini chocolate chips. It lets everyone customize their own and turns dessert into an interactive event.
They’re also fantastic with a scoop of vanilla bean ice cream on the side. The ice cream melts into the warm apples and creates another wonderful layer of creaminess. I like to serve them after a casual autumn dinner of soup or chili—they feel like the perfect, playful dessert finale to a cozy meal.
Variations & Customizations
For a different fruit filling, try using ripe, diced pears sautéed with a touch of ginger instead of cinnamon. The flavor is elegant and sophisticated. In the summer, a mix of fresh berries (tossed with a little sugar to macerate) is a beautiful and refreshing alternative to the cooked apples. I’ve made a mixed berry version for a Fourth of July party, and it was a huge hit.
You can play with the shell flavor, too. Add a pinch of nutmeg or apple pie spice to the cinnamon-sugar mixture for extra warmth. For a decadent twist, after baking and cooling the shells, you can dip the open edges in melted chocolate and let it set before filling. It adds a lovely flavor and makes them look even more special.
If you’re not a fan of cream cheese, a simple whipped coconut cream sweetened with a little maple syrup makes a wonderful dairy-free or lighter filling. I’ve also made a version where I mixed a tablespoon of prepared cheesecake flavored pudding mix into the whipped cream for an even more intense cheesecake flavor without having to make the full filling.
How to Store, Freeze & Reheat
These are best enjoyed immediately after assembly. However, you can store all the components separately for later. The baked and cooled taco shells will stay crisp in an airtight container at room temperature for up to 2 days. The cheesecake filling can be kept covered in the refrigerator for 3 days. The spiced apple mixture can be refrigerated in an airtight container for up to 4 days.
I do not recommend freezing the assembled tacos, as the shells will become soggy upon thawing and the filling’s texture will suffer. You can freeze the baked, unfilled taco shells in a single layer in a freezer bag for up to a month. Thaw at room temperature, and if they’ve lost their crispness, you can refresh them in a 300°F oven for 3-5 minutes.
To serve leftovers, you’ll likely have to assemble new tacos from the stored components. If you have pre-assembled leftovers, the shells will be soft. You can carefully re-crisp an assembled taco on a baking sheet in a 350°F oven for just 3-4 minutes, watching closely. The filling will warm slightly but won’t melt completely. It’s not quite the same as fresh, but it’s still delicious.
Conclusion
Creating these Apple Cheesecake Tacos has brought so much playful joy into my kitchen. They remind me that dessert doesn’t have to be serious to be spectacular, and that the best recipes often come from a place of happy experimentation. I hope you have as much fun making and sharing these as I do. Gather your ingredients, embrace the crunch, and enjoy every delightful, messy, delicious bite