
The first time I made these Christmas Chocolate Caramel Cups, my entire kitchen filled with the buttery aroma of bubbling caramel and melting chocolate, and I knew I had stumbled onto something truly magical. I remember leaning over the saucepan, watching the sugar transform into a glossy amber swirl while holiday music played in the background, and thinking, “This is exactly what December feels like.” These little cups quickly became a family favorite because they’re festive, easy to eat, and give you that perfect mix of creamy caramel and smooth chocolate in every bite.
Why You’ll Love This Recipe
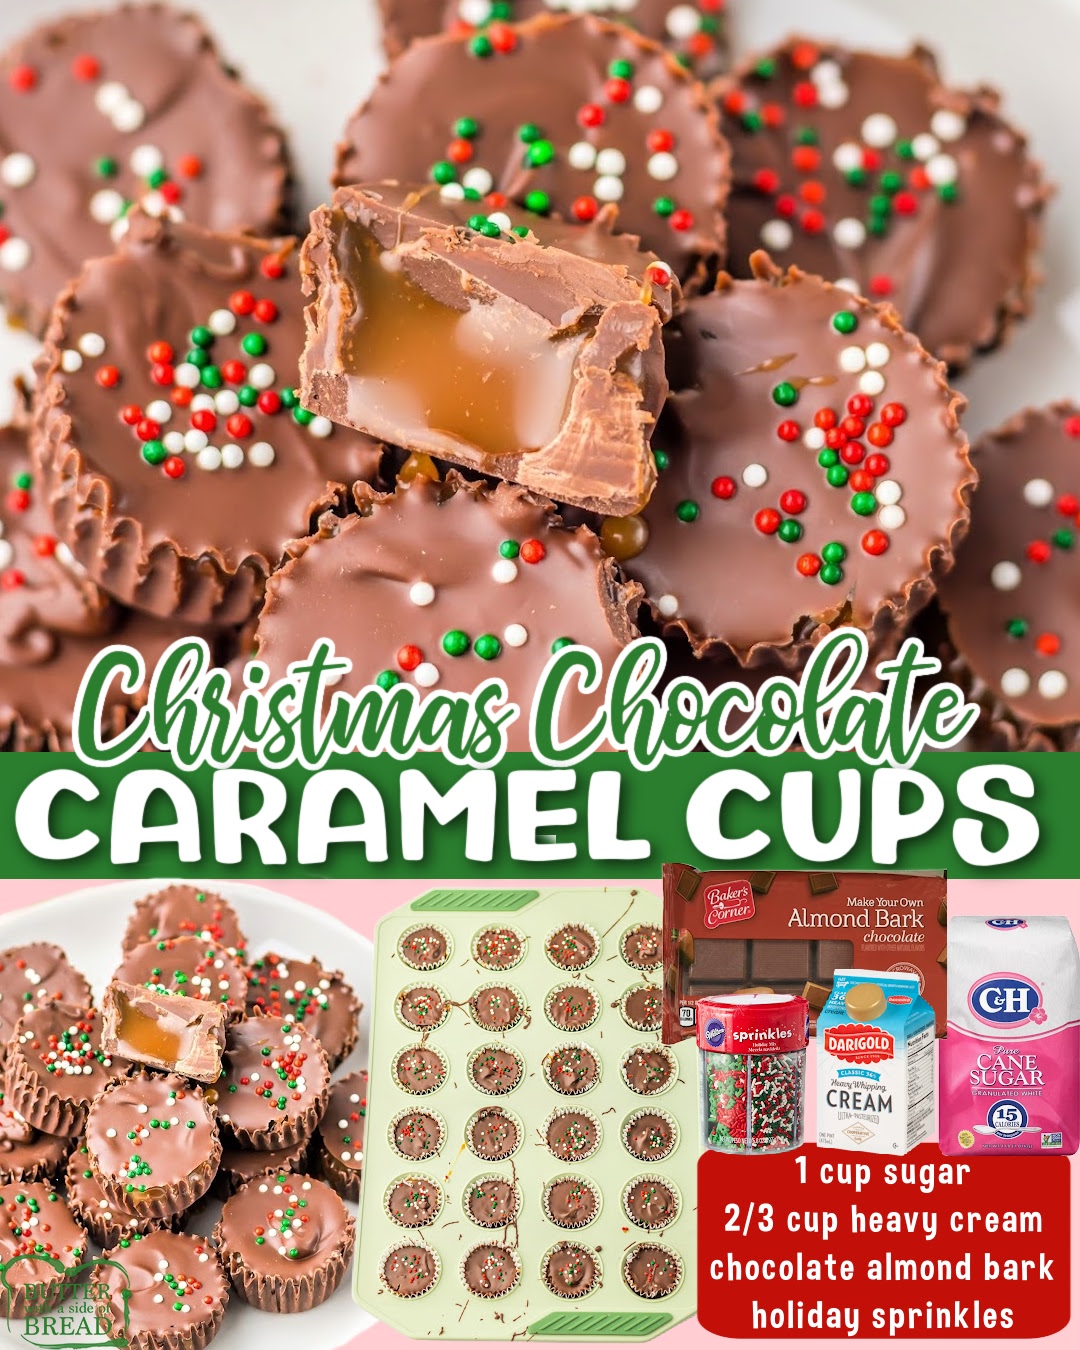
You’ll love this recipe because it delivers the kind of homemade holiday candy that looks impressive but is surprisingly easy to pull off, even if you’re not a candy-making expert. From the rich chocolate shell to the soft, velvety caramel filling, every bite tastes like something from a boutique confectionery, yet you can make it right at home with just a few ingredients. The process feels cozy and rewarding, and you can customize the look with sprinkles to match any Christmas theme. Best of all, these cups store beautifully, making them a wonderful gift option you’ll feel proud to share.
Ingredients
- 1 cup sugar
- 2/3 cup heavy cream
- 24 oz chocolate almond bark
- Holiday sprinkles
After working with this recipe multiple times, I’ve learned a few helpful substitution tips. You can use milk chocolate or dark chocolate candy melts instead of almond bark if that’s what you prefer, but almond bark stays smooth longer and is less likely to seize. For the caramel, heavy cream is non-negotiable; it’s what gives the filling that dreamy soft texture. And while sprinkles are technically optional, I find that they add a festive crunch and make the cups look instantly holiday-ready.
Equipment Needed
- Mini muffin pan
- Mini cupcake liners
- Heavy saucepan
- Heat-resistant spatula
- Small cookie scoop or spoon
Each of these tools makes a difference when it comes to both convenience and the final appearance. The mini muffin pan ensures your cups hold their shape, while the liners make removal effortless and help the chocolate set neatly. A heavy saucepan is essential for preventing caramel scorching, and trust me, I’ve learned the hard way that thin pans just don’t distribute heat well enough. A small scoop keeps the chocolate layers consistent, but even a simple spoon works if that’s what you have on hand.
Step-by-Step Instructions
When I start this recipe, I always begin by preparing my mini muffin pan with paper liners, because once the chocolate starts melting, you want everything ready to go. I melt half of the almond bark first, using short microwave bursts so it doesn’t overheat. When it’s silky and smooth, I spoon a small amount into each liner and use the back of the spoon to push the chocolate slightly up the sides. It doesn’t have to be perfect; the caramel will sit beautifully even in slightly uneven cups.
Next, I make the caramel, and this part always feels like kitchen magic. I pour the sugar into my saucepan over medium heat and let it warm until it melts into a golden liquid, resisting the urge to stir too early. Once it reaches that stunning amber color, I whisk in the heavy cream slowly, and every time the mixture bubbles up dramatically, it still makes me smile. After another minute or two of gentle simmering, the caramel thickens into the perfect velvety texture for filling the cups.(See the next page below to continue…)