
The first time I made these Cream Cheese Mints, my entire kitchen filled with the soft, sweet scent of peppermint and powdered sugar, and it instantly brought back memories of holiday gatherings from my childhood. I remember mixing the dough with my hands and feeling it turn velvety and smooth, almost like edible play dough. As I shaped each little mint, I felt this unexpected calm wash over me—almost like a cozy holiday craft session. They chilled beautifully, tasted even better, and quickly became one of those recipes I pull out every season without fail.
Why You’ll Love This Recipe
You’ll love this recipe because it is shockingly easy, incredibly delicious, and versatile for almost any occasion—holidays, baby showers, weddings, birthday parties, graduation tables, or just because you want something sweet and nostalgic. They melt on your tongue with that creamy, cool peppermint flavor, and you can customize the colors, shapes, and intensity of the mint extract exactly to your liking. Plus, they require no baking, no fancy equipment, and no stressful steps—you’ll feel like a kitchen pro from the very first batch.
Ingredients
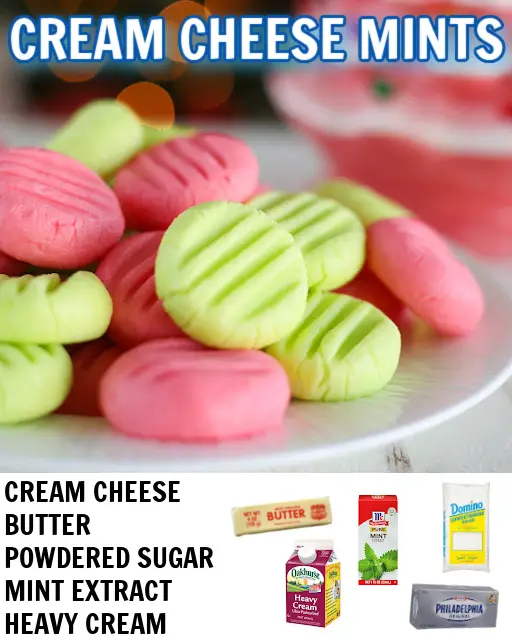
- 4 oz cream cheese, softened
- 1 tbsp butter, softened
- 4 cups powdered sugar
- ½ tsp mint extract
- 1–2 tbsp heavy cream (optional for texture)
- Gel or liquid food coloring of choice
You can swap mint extract for peppermint extract, spearmint extract, or even a blend if you like a more unique flavor profile. Just keep in mind that extracts vary in strength—peppermint tends to be stronger than classic mint, so start small and taste as you go. If you want the mints to stay very firm, keep the heavy cream to a minimum; if you prefer a softer dough, that little splash of cream helps tremendously. Gel food coloring works beautifully because it doesn’t water down the dough, but liquid coloring works fine if used sparingly.
Equipment Needed
- Mixing bowl
- Electric mixer or handheld whisk
- Rubber spatula
- Fork (for pressing patterns)
- Baking sheet or tray
- Parchment paper
An electric mixer makes beating the cream cheese and butter together easier, but if yours is packed away, you can absolutely do it by hand with a little patience. A rubber spatula helps scrape the sides of the bowl so nothing goes to waste. The fork is what creates those classic crisscross grooves on top, though you can also use cookie stamps or molds if you want fancier designs. Parchment paper prevents sticking and makes cleanup a breeze, and a baking sheet helps chill the mints evenly.
Step-by-Step Instructions
I always start by making sure the cream cheese and butter are softened to room temperature. This is one of those steps you really can’t rush. When the ingredients are soft, they blend into a silky mixture without lumps. I beat them together in a bowl until the mixture becomes smooth, creamy, and almost glossy. As soon as that happens, I add the mint extract and mix again so the flavor distributes evenly—my kitchen always smells like a candy shop at this stage.
Next, I begin adding the powdered sugar one cup at a time. This part always feels a bit magical because the mixture gradually thickens from creamy to dough-like. Once it becomes too thick for the mixer, I switch to kneading by hand. The dough should feel soft but firm, a little like modeling clay—you’ll know it’s ready when it stops feeling sticky. If it’s still too sticky, another sprinkle of powdered sugar always helps. If it becomes too stiff, a drop or two of heavy cream brings it back to life.
When the dough is ready, I divide it into separate bowls if I want multiple colors. This is where the fun really begins. Adding food coloring not only brightens the mints but also makes the whole process feel festive. I knead each color until the shade is uniform, then pinch off small pieces and roll them into smooth little balls. The dough rolls beautifully when it’s the right consistency, soft enough to shape but firm enough to hold its form.(See the next page below to continue…)