
The very first time I made these creamy, old-fashioned caramels, my entire kitchen filled with the warm, buttery aroma that instantly reminded me of holiday gatherings from my childhood. As the mixture bubbled slowly on the stove, I felt that same cozy excitement I used to feel watching my grandmother make homemade candy. When I finally poured the glossy golden caramel into the pan and later tasted that first soft, melt-in-your-mouth square, I knew this recipe was something special that I’d be making year after year.
Why You’ll Love This Recipe
You’ll love this caramel recipe because it gives you that nostalgic, velvety, buttery flavor you remember from childhood without being overly complicated—just the perfect combination of sweetness, chewiness, and old-fashioned comfort in every single bite.
Ingredients
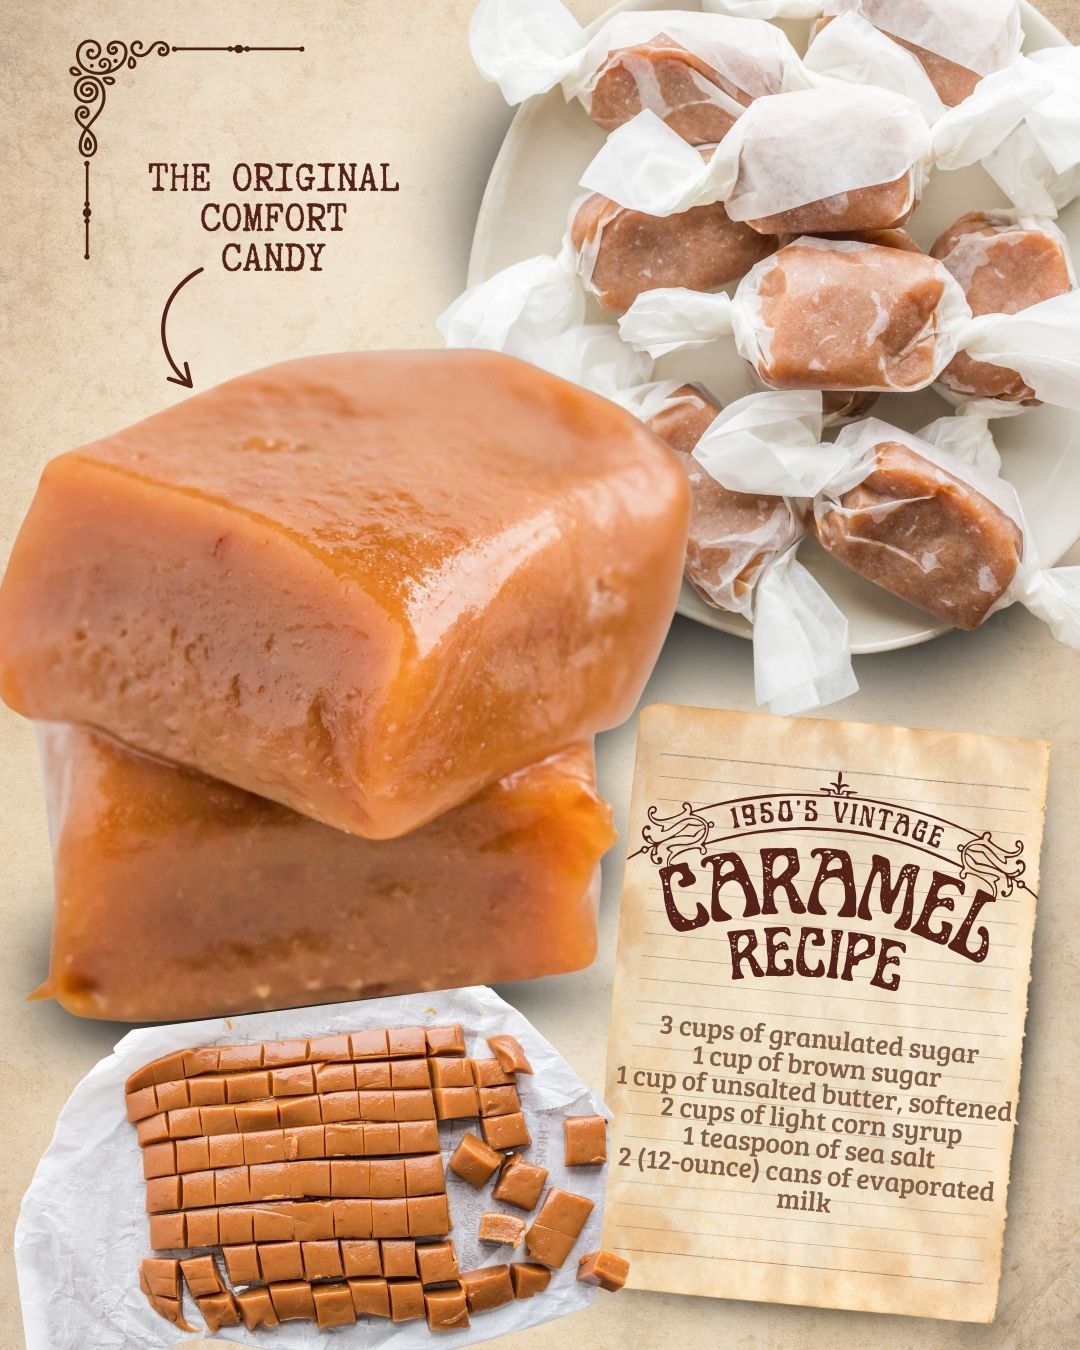
- 3 cups granulated sugar
- 1 cup brown sugar
- 1 cup unsalted butter, softened
- 2 cups light corn syrup
- 1 teaspoon sea salt
- 2 (12-ounce) cans evaporated milk
I’ve tested several caramel recipes over the years, and this classic ratio of sugars, butter, and evaporated milk gives the most reliable texture—soft enough to chew, firm enough to wrap. While you can experiment with using part heavy cream, evaporated milk gives a richer caramel flavor and prevents curdling. Sea salt adds depth, and using both white and brown sugar creates that deep caramel color and buttery taste you expect from a vintage recipe.
Equipment Needed
- Large heavy-bottomed pot
- Candy thermometer
- Wooden spoon
- 9×13 baking pan
- Parchment paper
- Sharp knife
- Wax paper (for wrapping)
A heavy-bottomed pot makes a huge difference when making caramel because it heats evenly and prevents scorching—I learned this after ruining a batch years ago in a thin pot. The candy thermometer is absolutely essential for accuracy, and parchment paper ensures the caramel lifts out easily. I always use a wooden spoon because it doesn’t get too hot and can handle the thick mixture. Wax paper makes wrapping the finished caramels easy and gives them that charming old-time look.
Step-by-Step Instructions
When I start making these caramels, I always prep everything first because once the caramel starts cooking, things move quickly. I line my baking pan with parchment paper and butter the sides to make sure the caramel doesn’t stick. Then I mentally prepare myself for the stirring—caramel is simple, but it does require your attention. I gather all the ingredients within reach so I can add them at the right moments without scrambling.
I begin by melting the butter in the heavy pot over medium heat. Once it’s melted and bubbling slightly, I add both sugars, the corn syrup, and the sea salt. As the ingredients blend together, the mixture thickens into a glossy golden swirl that fills the kitchen with the sweetest buttery smell. I stir constantly at this stage to keep everything smooth. When the sugars dissolve completely, I slowly pour in the evaporated milk, taking my time so the mixture doesn’t cool too quickly.
Next comes the simmering stage—the most important part of the recipe. I attach my candy thermometer to the side of the pot, making sure it’s not touching the bottom, and continue stirring as the caramel cooks. It starts out pale and creamy, but as the temperature climbs, it darkens into that beautiful caramel color. The bubbles turn thicker and slower, and each time I scrape the spoon across the bottom, I can feel the mixture becoming silkier. I keep stirring gently, patiently waiting for it to reach 238°F (soft-ball stage).(See the next page below to continue…)