
Most Cool Whip Candy recipes follow the same basic pattern: Cool Whip is folded into melted chocolate to create a fluffy, mousse‑like mixture, which is then spread in a pan and frozen until very firm. Once solid, the slab is cut into bite‑size squares (or the mixture is scooped into mounds) and either dipped in more melted chocolate or coated in almond bark, forming a smooth shell around the soft center.
Because the center is mostly whipped topping and chocolate, the texture when chilled is like a lighter, fluffier nougat, very similar to a 3 Musketeers bar or chocolate bonbons but without any candy thermometer or complicated sugar work.
Equipment
- 8×8‑inch or 9×9‑inch baking dish lined with parchment paper, with some overhang for lifting out the candy.
- Medium microwave‑safe bowl (or heatproof bowl over a pan of simmering water) for melting chocolate.
- Large mixing bowl for folding Cool Whip into the melted chocolate (sometimes the same bowl if it’s large enough).
- Rubber spatula for folding Cool Whip into chocolate and smoothing the mixture in the pan.
- Knife or bench scraper for cutting the frozen slab into squares.
- Forks or candy‑dipping tools for coating the pieces in melted chocolate or almond bark.
- Baking sheet lined with parchment paper to hold dipped candies while the coating sets.
- Freezer and refrigerator space for firming the center and setting the chocolate coating.
Ingredients (with measurements)
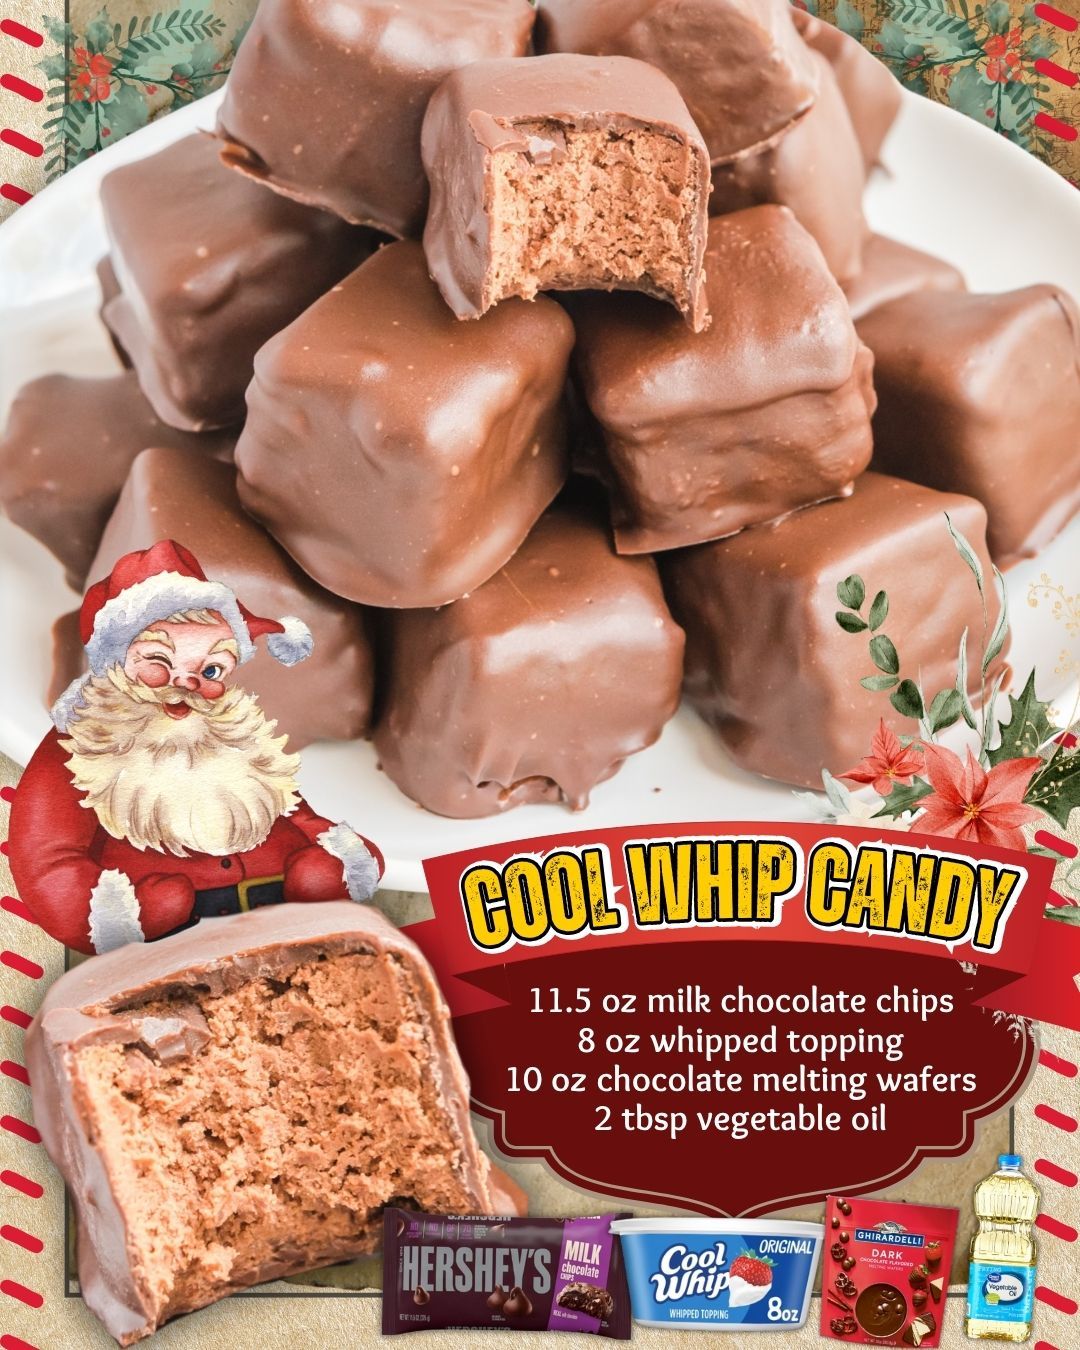
A classic 3‑ingredient Cool Whip Candy (3 Musketeers style) looks like this.
Center:
- 11.5–12 oz (about 325 g) milk chocolate chips or chopped milk chocolate, for the filling.
- 1 tub (8 oz / 226 g) Cool Whip or other frozen whipped topping, thawed.
Coating:
- 24 oz (about 680 g) dark chocolate melting wafers, chocolate candy melts, or almond bark for dipping.
Some recipes use larger batches with 6 cups of milk chocolate chips and the same 8‑oz tub of Cool Whip, yielding about 32 pieces, but the ratio remains: roughly 3:1 chocolate to Cool Whip for the center. Others swap the milk chocolate in the center for white chocolate or use almond bark for coating with white‑chocolate drizzle, but the structure is the same.
Optional decorations:
Instructions and steps
The first step is to prepare the pan and melt the chocolate for the center. An 8×8‑inch or 9×9‑inch baking dish is lined with parchment paper, with enough overhang on two sides to lift the candy slab out later.
Milk chocolate chips or chopped milk chocolate are added to a microwave‑safe bowl and melted in 20–30 second bursts at 50% power, stirring between each interval until smooth and fully melted. Chocolate can also be melted over a double boiler, but the microwave method keeps things quick and easy as long as the chocolate is not overheated.
Once the chocolate is melted, it needs a brief cooling before meeting the Cool Whip so the whipped topping doesn’t completely collapse. After letting it sit for a couple of minutes until warm but not hot, the Cool Whip is added.
Some recipes have you scrape the Cool Whip into the melted chocolate and beat with a hand mixer on medium until thoroughly combined and fluffy; others prefer folding with a spatula, gently combining until the mixture is uniform. As the Cool Whip hits the chocolate, the chocolate may firm up slightly into tiny bits, giving a mousse‑like or whipped nougat texture; recipes note this is normal and part of the candy’s structure.
The chocolate‑Cool‑Whip mixture is then poured or scraped into the lined baking dish and spread into an even layer with a spatula, smoothing the top as much as possible.
The pan goes into the freezer for at least 30 minutes to 1–2 hours, depending on recipe, until the mixture is firm enough to cut cleanly into pieces. Some recipes chill first in the fridge and then move to the freezer to avoid ice crystals, but nearly all emphasize that the center needs to be very firm before cutting and dipping.
When the center is solid, the slab is lifted out of the pan using the parchment overhang and placed on a cutting board. A sharp knife is used to cut it into bite‑size squares, typically around 1–1½ inches each; many recipes aim for 16–36 candies from an 8×8 pan, depending on how big you want the pieces.
The cut squares are moved to a parchment‑lined baking sheet, spaced apart so they don’t stick together, and returned to the freezer for another 30 minutes or so to ensure they are very cold and firm before dipping.
Next comes the coating step. Dark chocolate melting wafers, almond bark, or chocolate candy melts are placed in a clean microwave‑safe bowl and melted in 20–30 second bursts at 50% power, stirring after each, until smooth and fluid.
Using coating chocolate or almond bark helps prevent seizing and ensures a nice snap and shine without tempering. Some recipes note that dark chocolate around the sweet milk‑chocolate Cool Whip center balances the sweetness nicely.
Only a few frozen squares are removed from the freezer at a time so they stay firm while dipping. One piece is dropped into the melted chocolate, turned with a fork or dipping tool to coat it completely, then lifted out and the excess chocolate is allowed to drip off back into the bowl—often with a gentle tap of the fork on the bowl’s edge.
The coated candy is placed onto the parchment‑lined baking sheet. While the coating is still wet, sprinkles, chopped nuts, or crushed cookies can be scattered on top for decoration. This process is repeated for all the pieces, reheating the coating chocolate briefly if it begins to thicken.
After all the candies are coated and decorated, the baking sheet is placed in the refrigerator or freezer to allow the chocolate to fully set. Many recipes suggest chilling for at least 30 minutes to an hour for a firm shell that won’t smudge when handled.
Once the coating is fully hard, the candies can be transferred to an airtight container and stored in the refrigerator or freezer; they are usually served chilled or straight from the freezer for the best texture and shape.
Variations
Cool Whip Candy can be customized in several ways while keeping the same basic method. Some recipes incorporate instant chocolate pudding mix into the center along with Cool Whip for extra chocolate flavor and a slightly firmer, more nougat‑like texture before dipping.
Others use white chocolate in the center and coat with milk or dark chocolate, or vice versa, for a layered chocolate experience; for example, white chocolate chips melted and mixed with Cool Whip for the filling, then dipped in milk chocolate with a white chocolate drizzle.
Sprinkles and toppings make the candy fit different holidays. Christmas versions decorate the tops with red and green sprinkles, gold stars, or crushed candy canes. Easter or birthday versions use pastel or rainbow sprinkles.
Because the base is neutral chocolate, adding themed sprinkles is an easy way to match any occasion. Some recipes also roll the chilled centers into balls and either dip them in chocolate or simply roll them in cocoa powder, crushed cookies, or pretzels, creating Cool Whip truffles instead of bar‑style candies.
A few versions simplify even further by freezing small scoops or mounds of plain Cool Whip, then dipping those directly in chocolate for extremely airy candies that are more like chocolate‑covered frozen mousse bites; these sometimes use powdered sugar and vanilla in the Cool Whip for extra sweetness.
Others add coconut oil or butter to the coating chocolate for a softer shell or to help the chocolate flow more smoothly during dipping.
However it is tweaked, the core idea of Cool Whip Candy remains the same: combine Cool Whip with melted chocolate for a light, nougat‑like center, chill until firm, cut or scoop into bite‑size pieces, and coat in more chocolate for a polished, store‑bought‑style candy that’s surprisingly easy to make at home.