
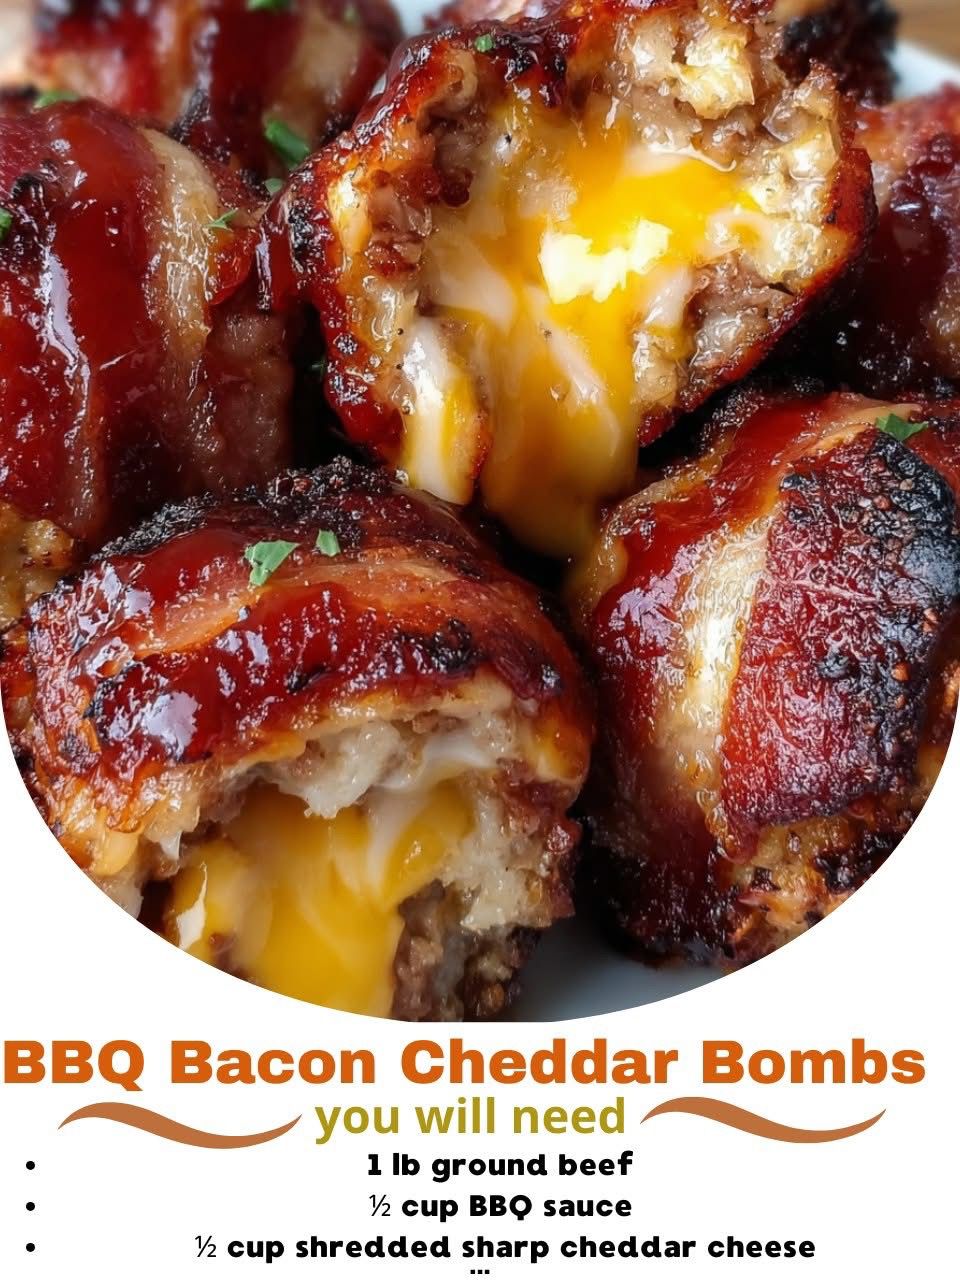
BBQ Bacon Cheddar Bombs are the unapologetically over-the-top meatballs of your backyard cookout dreams. Each “bomb” hides a molten cube of sharp cheddar inside a juicy, BBQ-seasoned beef ball that’s wrapped in bacon and glazed until sticky, smoky, and caramelized. They’re ideal for game day, tailgates, parties, or a fun twist on burger night—bite-sized, messy in the best way, and guaranteed to vanish the moment they hit the table.
Equipment You Will Need
- Mixing bowl
- Measuring cups and spoons
- Cutting board
- Sharp knife (for cutting cheese cubes)
- Baking sheet or grill-safe pan
- Parchment paper or foil (for baking)
- Tongs
- Basting brush
- Instant-read thermometer (helpful)
Ingredients List
For the meat mixture
- 1 lb ground beef (80/20 for juiciness)
- ½ cup BBQ sauce (plus more for glazing)
- ½ cup shredded cheddar cheese
- 1 teaspoon garlic powder
- 1 teaspoon onion powder
- ½ teaspoon smoked paprika
- ½ teaspoon salt
- ½ teaspoon black pepper
For stuffing and wrapping
- 4–6 oz sharp cheddar cheese, cut into small cubes (about ¾–1 inch)
- 10–12 slices thin-cut bacon
For glazing and finishing
- ½–¾ cup BBQ sauce (your favorite, for brushing)
- Fresh chopped parsley or green onions (optional, for garnish)
Step-by-Step Instructions
Start by prepping the fillings and flavor base. Cut the block of cheddar into small cubes, roughly ¾–1 inch each—big enough to give a good cheesy center, but small enough that they’ll melt and stay enclosed by the meat. Set the cubes aside in a bowl or on a plate.
Line a baking sheet with parchment paper or foil for easier cleanup, and set it nearby for shaping the bombs.
In a large mixing bowl, combine the ground beef, ½ cup BBQ sauce, shredded cheddar, garlic powder, onion powder, smoked paprika, salt, and pepper.
Use clean hands to gently mix until everything is evenly distributed, but avoid overworking the meat, which can make the bombs dense. The mixture should feel cohesive and moist, but not sloppy.
Divide the meat mixture into 10–12 equal portions, depending on how large you want your bombs. Take one portion in your hand and flatten it into a thick patty in your palm.
Place a cube of cheddar in the center, then gently wrap the meat around the cheese, sealing it on all sides to form a compact ball. Pinch any seams closed so the cheese stays inside as it melts. Place the formed meatball on the prepared baking sheet and repeat with the remaining portions and cheese cubes.
Now wrap them in bacon. Lay a strip of bacon on the cutting board. Place a meatball at one end and roll the bacon around it, stretching slightly as you go so it spirals over as much surface as possible. If needed, use a second half or full strip to fully cover the ball, especially if your bacon is thin.
Tuck the ends under the ball or secure them with a toothpick. Arrange the bacon-wrapped bombs back on the baking sheet with a little space between each so they cook evenly.
Decide whether you’re baking or grilling. To bake, preheat your oven to 375°F (190°C). To grill or smoke, preheat your grill to medium heat with an indirect cooking zone (around 350–375°F), oiling the grates or using a grill-safe pan to catch drips.
For baking, place the sheet of bacon-wrapped bombs in the preheated oven and bake for about 20–25 minutes. The bacon should start rendering and turning golden, while the meat approaches doneness.
Carefully remove the tray, brush the bombs generously with BBQ sauce on all exposed sides, then return them to the oven for another 10–15 minutes, or until the bacon is deeply browned, the sauce is sticky and caramelized, and the internal temperature of the beef reaches at least 160°F.
If grilling, arrange the bombs over indirect heat (not directly over the flame) and close the lid. Cook for about 15–20 minutes, turning occasionally with tongs so the bacon browns on all sides.
Begin basting with BBQ sauce during the last 10–15 minutes, brushing, turning, and brushing again until the bacon is glossy and the sauce is tacky, not wet. If your grill setup allows, you can briefly move them over more direct heat at the end to crisp the bacon—just watch closely to avoid flare-ups from the bacon fat.
Once fully cooked, transfer the BBQ Bacon Cheddar Bombs to a clean platter or tray and let them rest for 5–10 minutes.
This rest allows the juices to redistribute and helps the molten cheese inside thicken slightly so it doesn’t all rush out at the first bite. Garnish with a sprinkle of chopped parsley or green onions if you like a fresh pop of color on the rich, saucy surface.
Expert Tips for Success
Sealing the cheese in well is crucial. When shaping each meatball, press the meat firmly around the cheese cube and double-check for cracks or thin spots. Any gaps increase the chance of cheese leaking out while cooking. Chilling the assembled bombs for 15–20 minutes before baking or grilling can help them hold their shape and keep the cheese centered.
Thin-cut bacon works best for crispiness and coverage. Thick-cut bacon can stay rubbery by the time the meat is done, forcing you to overcook the beef to get the bacon properly rendered. If you only have thick-cut, consider par-cooking the bacon briefly before wrapping or giving the bombs extra time over indirect heat with careful monitoring.
When using BBQ sauce as a glaze, add it toward the latter half of cooking. Sauces high in sugar can scorch if exposed to high heat for too long. Brushing in layers near the end lets it caramelize and get sticky without burning. If using a grill, keep flare-ups in check by cooking mostly over indirect heat and only moving to direct heat briefly for final crisping.
Variations and Substitutions
There are many ways to customize BBQ Bacon Cheddar Bombs to match your cravings. Swap cheddar for other melty cheeses like pepper jack, Colby Jack, smoked gouda, or mozzarella for a different flavor and cheese pull. A cube of cream cheese mixed with shredded cheese inside can create an ultra-creamy center.
You can also play with the meat base. Use a blend of ground beef and pork for extra richness, or incorporate a bit of ground chorizo or Italian sausage for spice and seasoning. For a slightly lighter version, use leaner beef or ground turkey, but keep a bit of fat for juiciness and don’t overcook.
Flavor the BBQ sauce and seasoning to fit your theme. Use a smoky, spicy BBQ sauce and add a pinch of cayenne or chipotle powder to the beef for a hot version. For something sweeter, choose a honey or brown sugar BBQ sauce and reduce the added salt slightly. A dash of Worcestershire sauce or steak seasoning in the meat mixture can also add depth.
Serving Suggestions
BBQ Bacon Cheddar Bombs shine as a party appetizer or game day snack, arranged on a platter with toothpicks or mini skewers so guests can grab them easily. Serve with extra BBQ sauce on the side for dipping, along with ranch or a smoky mayo if you want multiple dip options.
They also work as a fun main dish. Plate a few bombs alongside coleslaw, potato salad, mac and cheese, cornbread, or baked beans for a full backyard BBQ-style meal. For a handheld option, tuck one or two bombs into a soft roll, add pickles and extra sauce, and serve as ultra-loaded mini sandwiches.
Because they’re rich, pairing them with something fresh—like a crisp green salad, cucumber-tomato salad, or grilled vegetables—helps balance the plate. A cold drink, from sweet tea to beer or soda, completes the experience and cuts through the smoky, cheesy fattiness.
Storage, Freezing, and Reheating
If you have leftovers, let the bombs cool to room temperature, then transfer them to an airtight container. Refrigerate for up to 3–4 days.
To reheat, place them on a baking sheet and warm in a 325°F oven or air fryer until heated through and the bacon re-crisps. Avoid microwaving for too long, as it can make the bacon rubbery and encourage the cheese to leak out.
BBQ Bacon Cheddar Bombs also freeze well, making them great for prepping ahead. You can freeze them either unbaked or fully cooked.
For unbaked, assemble and wrap the bombs, place them on a tray to freeze until solid, then transfer to a freezer bag. Bake from frozen at 350–375°F, adding extra time and glazing with BBQ sauce in the last part of baking as usual.
For cooked bombs, cool completely, then freeze in a single layer before transferring to containers or bags. Reheat from frozen in a 325°F oven, covered for the first portion to heat the centers, then uncovered to re-caramelize the bacon and sauce. This flexibility means you can keep a stash ready for unexpected guests, late-night cravings, or an easy win on your next game day spread.