
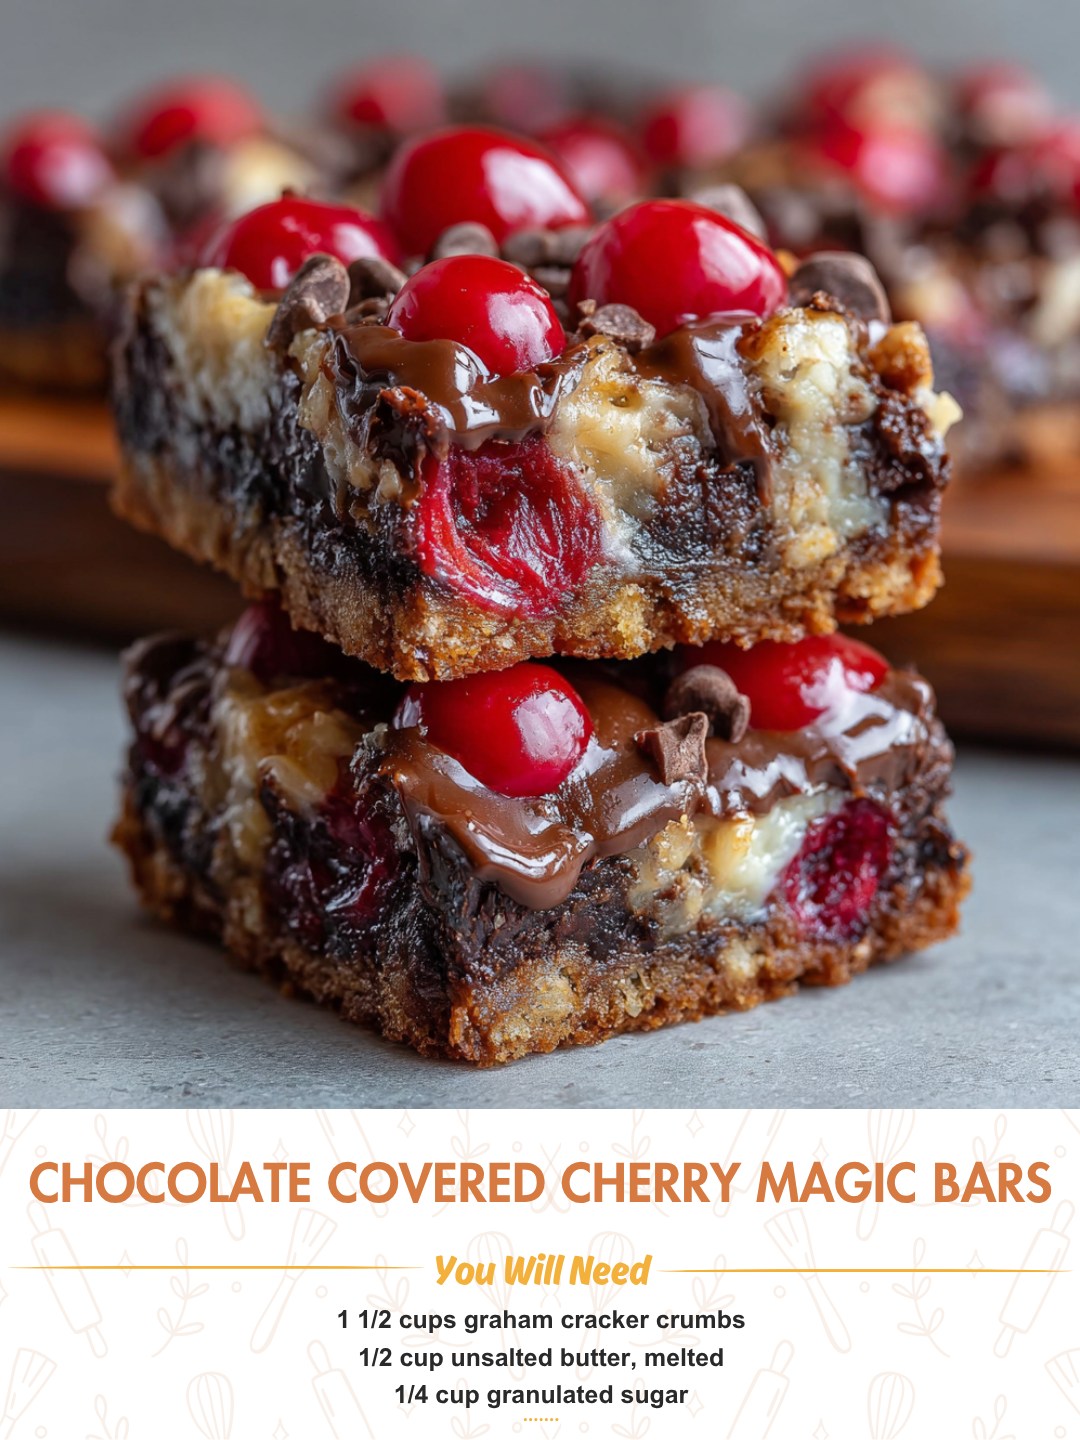
Chocolate Covered Cherry Magic Bars are a rich, gooey tray bake that taste like a pan of chocolate-covered cherries collided with classic 7-layer bars. A buttery graham cracker crust gets topped with sweetened condensed milk, juicy maraschino cherries, chocolate chips, coconut, and nuts, then baked until toasty and caramelized. They slice into pretty bars with pops of red cherry and are perfect for potlucks, holidays, Valentine’s Day, or any time you want a no-fuss dessert that disappears fast.
Equipment You Will Need
- 9×13-inch baking pan
- Mixing bowl
- Small microwave-safe bowl or saucepan (for butter)
- Measuring cups and spoons
- Rubber spatula or wooden spoon
- Parchment paper (optional, for easy lifting)
- Sharp knife for slicing
Ingredients List
For the crust
- 1½ cups graham cracker crumbs
- ½ cup unsalted butter, melted
- 2 tablespoons granulated sugar (optional, for a slightly sweeter crust)
For the magic bar layers
- 1 can (14 oz) sweetened condensed milk
- 1½ cups semisweet chocolate chips (or a mix of semi and milk chocolate)
- 1–1½ cups maraschino cherries, well drained and chopped, patted very dry
- 1½ cups sweetened shredded coconut
- 1 cup chopped pecans or walnuts
Step-by-Step Instructions
Preheat your oven to 350°F (175°C). Lightly grease a 9×13-inch baking pan, and if you like, line it with parchment paper, leaving an overhang on the long sides to make lifting and slicing easier. Set the pan aside while you mix the crust.
In a mixing bowl, stir together the graham cracker crumbs, melted butter, and granulated sugar (if using) until the crumbs are evenly coated and the mixture looks like damp sand. Pour the crumb mixture into the prepared pan and press it firmly into an even layer on the bottom using your fingers or the bottom of a measuring cup. Make sure the crust is compacted so it holds together after baking.
Pour the sweetened condensed milk evenly over the graham crust, using a spatula to coax it into the corners and spread it to cover the surface.
This sticky layer is what binds all the toppings together and gives the bars their chewy, caramelized texture. Let it sit for a moment while you prepare the toppings.
Make sure your cherries are very well drained and patted dry with paper towels; too much liquid can make the bars soggy or cause the filling to weep. Sprinkle the chopped cherries evenly over the condensed milk layer.
Follow with an even layer of chocolate chips, then the chopped nuts, and finally the shredded coconut on top. Gently press the toppings down with your hand or the back of a spatula so they make good contact with the condensed milk.
Place the pan in the preheated oven and bake for about 25–30 minutes, or until the coconut on top is lightly golden and the edges are bubbling and slightly browned. Keep an eye on the bars toward the end of baking; if the coconut is browning too quickly, you can loosely tent the pan with foil to prevent over-toasting while the center finishes.
Remove the pan from the oven and set it on a cooling rack. Let the bars cool completely in the pan; as they cool, the sweetened condensed milk will firm up and hold all the layers together, and the bars will be much easier to slice. For the cleanest cuts, you can chill the cooled pan in the refrigerator for an hour or so before cutting.
Once fully cool and set, use the parchment overhang to lift the slab out of the pan (if lined), or cut directly in the pan with a sharp knife. Slice into small squares or rectangles—these bars are rich, so smaller pieces go a long way. Wipe the knife between cuts if the chocolate or cherries are sticking for neater edges.
Expert Tips for Success
Drying the cherries thoroughly is one of the most important steps. Maraschino cherries hold a lot of syrup, and if they go onto the bars wet, they can make the crust soggy and cause the bars to ooze. Drain, chop, then pat them dry in a couple of layers of paper towels before adding to the pan.
Layering and pressing the toppings down gently helps them bake into a cohesive bar instead of flaking off. Make sure the coconut and nuts are making contact with the condensed milk so they adhere as it bakes. If your oven runs hot, check on the bars early and tent with foil as needed to keep the coconut from burning.
For cleaner slices, cool the bars completely, then chill. Use a sharp chef’s knife or long serrated knife and press straight down instead of sawing back and forth. Wiping the blade between cuts keeps the red cherry streaks and melted chocolate from smearing across every piece.
Variations and Substitutions
You can easily tweak Chocolate Covered Cherry Magic Bars to match your preferences. Swap some or all of the semisweet chips for dark chocolate chips if you like a more intense chocolate flavor, or use white chocolate chips alongside the semisweet for a pretty contrast. Mini chocolate chips also work well and scatter more evenly.
Change up the nuts by using almonds, hazelnuts, or macadamias instead of pecans or walnuts, or omit nuts entirely if needed; the bars will still hold together thanks to the condensed milk and coconut.
For an extra cherry punch, drizzle a little of the reserved cherry syrup over the coconut before baking (sparingly, to avoid sogginess), or add a drop or two of almond extract to the condensed milk for that classic chocolate-covered cherry flavor.
If you’re not a big fan of coconut, you can reduce the amount or replace part of it with extra chocolate chips or chopped nuts. Just keep in mind that coconut contributes to the chewy, toasty top, so completely removing it will change the bar’s texture.
Serving Suggestions
Serve these bars at room temperature so the chocolate is set but still pleasantly soft and the layers are chewy.
They’re perfect on a dessert tray with other bar cookies and brownies, and their pops of red cherry make them particularly nice for Christmas platters, bake sales, and Valentine’s Day treats. A light dusting of powdered sugar on top can add a pretty finish if you’re serving them for a special occasion.
For an extra-indulgent dessert, plate a bar with a scoop of vanilla ice cream and a drizzle of chocolate or cherry sauce.
They also pair beautifully with coffee or hot chocolate, cutting through the richness with a bit of bitterness or warmth. Because they’re sturdy and slice cleanly, they travel well, making them ideal for potlucks and parties.
Storage, Freezing, and Make-Ahead Tips
Chocolate Covered Cherry Magic Bars store very well. Once fully cooled and cut, place them in an airtight container, layering with parchment or wax paper to prevent sticking. They keep at room temperature for about 3–4 days, or in the refrigerator for up to a week. Chilling can help them stay extra firm and chewy; just let them sit out briefly before serving if you prefer a softer bite.
These bars also freeze nicely. Arrange cut bars in a single layer on a baking sheet and freeze until solid, then transfer them to a freezer-safe container or bag with parchment between layers. They can be frozen for up to 2–3 months.
Thaw at room temperature or in the fridge, then serve as usual. This make-ahead friendliness makes them a great option when you want a special, candy-bar-style treat ready to go without last-minute effort.