
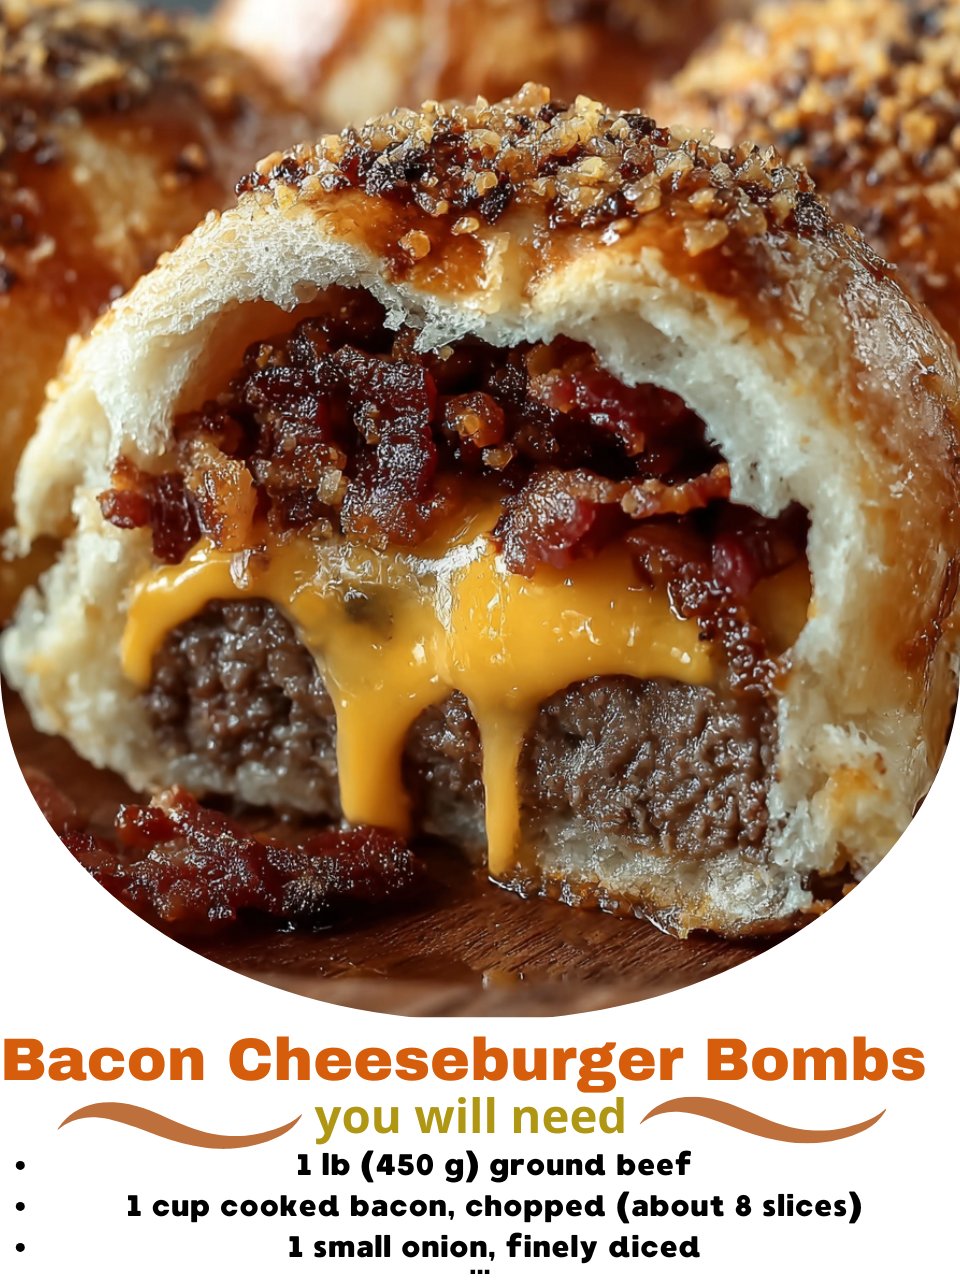
Bacon Cheeseburger Bombs are the ultimate party-pleasing, family-friendly, irresistibly cheesy snacks that capture everything you love about a classic bacon cheeseburger—wrapped into golden, handheld bites. Each bomb is stuffed with juicy seasoned beef, melty cheese, crispy bacon, and a touch of burger sauce, all encased in a warm, fluffy dough that bakes to perfect golden brown.
They’re fun to make, unbelievably satisfying to eat, and absolutely guaranteed to disappear fast whether you serve them as appetizers, game-day treats, or weeknight dinner bites. Every bite delivers a bold hit of smoky bacon, stretchy cheese, savory beef, and that familiar burger richness, making them an addictive crowd-pleaser. Dip them in ketchup, ranch, or special sauce and prepare to watch them vanish in minutes.
Equipment You Will Need
- Large skillet
- Mixing bowls
- Baking sheet
- Parchment paper
- Rolling pin
- Basting brush
- Measuring cups and spoons
- Rubber spatula
- Small bowls for dipping sauces
Ingredients List
- Burger Filling
- 1 lb ground beef
- ½ cup cooked, crumbled bacon
- 1 small onion, finely diced
- 2 cloves garlic, minced
- 1 tbsp Worcestershire sauce
- 1 tsp salt
- ½ tsp pepper
- 1 tsp paprika
- 1 cup shredded cheddar or cubed cheese
- For Assembly
- 1 can refrigerated biscuit dough or pizza dough
- 2 tbsp melted butter
- 1 tsp garlic powder
- 1 tsp dried parsley
- Optional sesame seeds for topping
- Dipping Sauces
- Ketchup
- Ranch
- Burger sauce
- Spicy mayo
Step-by-Step Instructions
Begin by browning the ground beef in a large skillet over medium heat. Add the diced onion and cook until softened, then stir in garlic, Worcestershire sauce, salt, pepper, and paprika. Cook until the beef is fully browned and fragrant. Remove from heat and drain excess grease.
Fold in the cooked bacon and allow the mixture to cool slightly. Add the shredded or cubed cheese and mix gently so the cheese distributes evenly but doesn’t melt completely before baking.
Preheat your oven to 375°F (190°C). Line your baking sheet with parchment paper. Open your biscuit or pizza dough and flatten each piece into a small circle using a rolling pin or your hands.
Spoon a mound of the beef-bacon-cheese filling into the center of each dough circle. Carefully wrap the dough around the filling, pinching the seams tightly to form a sealed ball. Place each bomb seam-side-down on the prepared baking sheet.
Mix melted butter with garlic powder and parsley, then brush the tops of each bomb generously. Add sesame seeds if you want that classic burger-bun look. Bake for 14–18 minutes or until golden brown, puffy, and sizzling around the edges. Allow the bombs to cool slightly before serving, as the filling will be very hot. Plate them with dipping sauces and enjoy immediately for maximum cheesy goodness.
Expert Tips for Success
Let the beef mixture cool before adding cheese—hot filling melts the cheese prematurely and makes sealing harder. Use biscuit dough for softer, fluffier bombs or pizza dough for chewier, stretchier results. When sealing, be sure no gaps remain; even tiny cracks can allow cheese to leak.
Slightly dampening your fingers helps pinch seams shut more effectively. Don’t overfill—the dough needs room to wrap completely around the filling.
Brushing the dough with seasoned butter deepens the golden color and adds irresistible flavor. If your bombs brown too quickly, loosely tent the baking sheet with foil halfway through baking. Use cubed cheese instead of shredded for extra-melty pockets inside each bomb.
For crispier bottoms, preheat your baking sheet before placing the bombs on it. Always allow a few minutes of cooling time; this helps the cheese set slightly for better bites.
To ensure even cooking, space the bombs apart so heat circulates properly. If making large batches, rotate the trays halfway through baking. For extra flavor, sprinkle with smoked paprika or add chopped pickles inside the filling. These simple techniques guarantee consistently delicious results.
Variations and Substitutions
Swap cheddar for pepper jack, Swiss, or mozzarella depending on your flavor preferences. Add diced pickles to the filling for a more authentic cheeseburger taste. Mix in jalapeños for heat or sautéed mushrooms for a mushroom-Swiss twist. For a barbecue version, add a spoonful of BBQ sauce to the mixture before assembling.
Use turkey or chicken instead of beef for lighter bombs. For a keto-friendly version, wrap the filling in low-carb dough or use cheese-based dough alternatives. You can also create pizza bombs by swapping the filling with marinara, pepperoni, and mozzarella. A breakfast version works beautifully with scrambled eggs, bacon, and cheddar wrapped in biscuit dough.
For a gourmet twist, add caramelized onions and smoked gouda. Replace Worcestershire with steak sauce or add a touch of mustard for a tangy hit. You can also brush the finished bombs with more melted butter and sprinkle with Parmesan for extra richness.
Serving Suggestions and Pairings
Serve Bacon Cheeseburger Bombs with a trio of dipping sauces—ketchup for classic flavor, ranch for creaminess, and spicy mayo for heat.
Arrange them on a platter for parties, game nights, or tailgates. Add toothpicks for easy grabbing. These bombs pair wonderfully with French fries, onion rings, or potato wedges for a full burger-inspired feast.
A crisp side salad balances their richness, while coleslaw adds crunch and tang. Serve alongside baked beans, corn salad, or mac and cheese for a comfort-food lineup. When serving as a main dish, pair them with roasted vegetables or garlic-butter green beans. For a lighter option, plate them with sliced cucumbers, tomatoes, and pickles.
Drink pairings include lemonade, soda, iced tea, and root beer. Adults can enjoy them with beer, hard cider, or a simple red wine like Pinot Noir. They’re versatile enough to shine at casual gatherings or as fun weeknight bites that the whole family loves.
Storage, Freezing, and Reheating
Store leftover bombs in an airtight container in the refrigerator for up to four days. Reheat in the oven or air fryer at 350°F (175°C) for 6–8 minutes to restore crispness. Avoid microwaving if possible—it softens the dough and reduces texture. If reheating in the microwave, use short intervals to avoid overheating the filling.
To freeze, arrange uncooked bombs on a baking sheet and freeze until solid. Transfer to freezer bags and store up to two months. Bake from frozen at 375°F, adding a few extra minutes. You can freeze cooked bombs as well; thaw overnight and reheat in an air fryer or oven. Keep dipping sauces separate for best results.
If the bombs dry out during reheating, brush with melted butter. You can also revive the flavor with extra cheese or bacon bits sprinkled on top. These bombs freeze and reheat beautifully, making them excellent for meal prep or party planning.
Frequently Asked Questions
Can I use pre-cooked ground beef?
Yes—just heat it with onions, garlic, and seasoning before filling.
Why did my cheese leak out?
The dough wasn’t sealed tightly or was stretched too thin.
Can I air fry them instead of baking?
Yes, air fry at 350°F for 8–10 minutes until golden.
What’s the best cheese to use?
Sharp cheddar or cubed American cheese gives classic burger flavor.
Can I make them ahead?
Absolutely—assemble and refrigerate up to 24 hours.