
Introduction
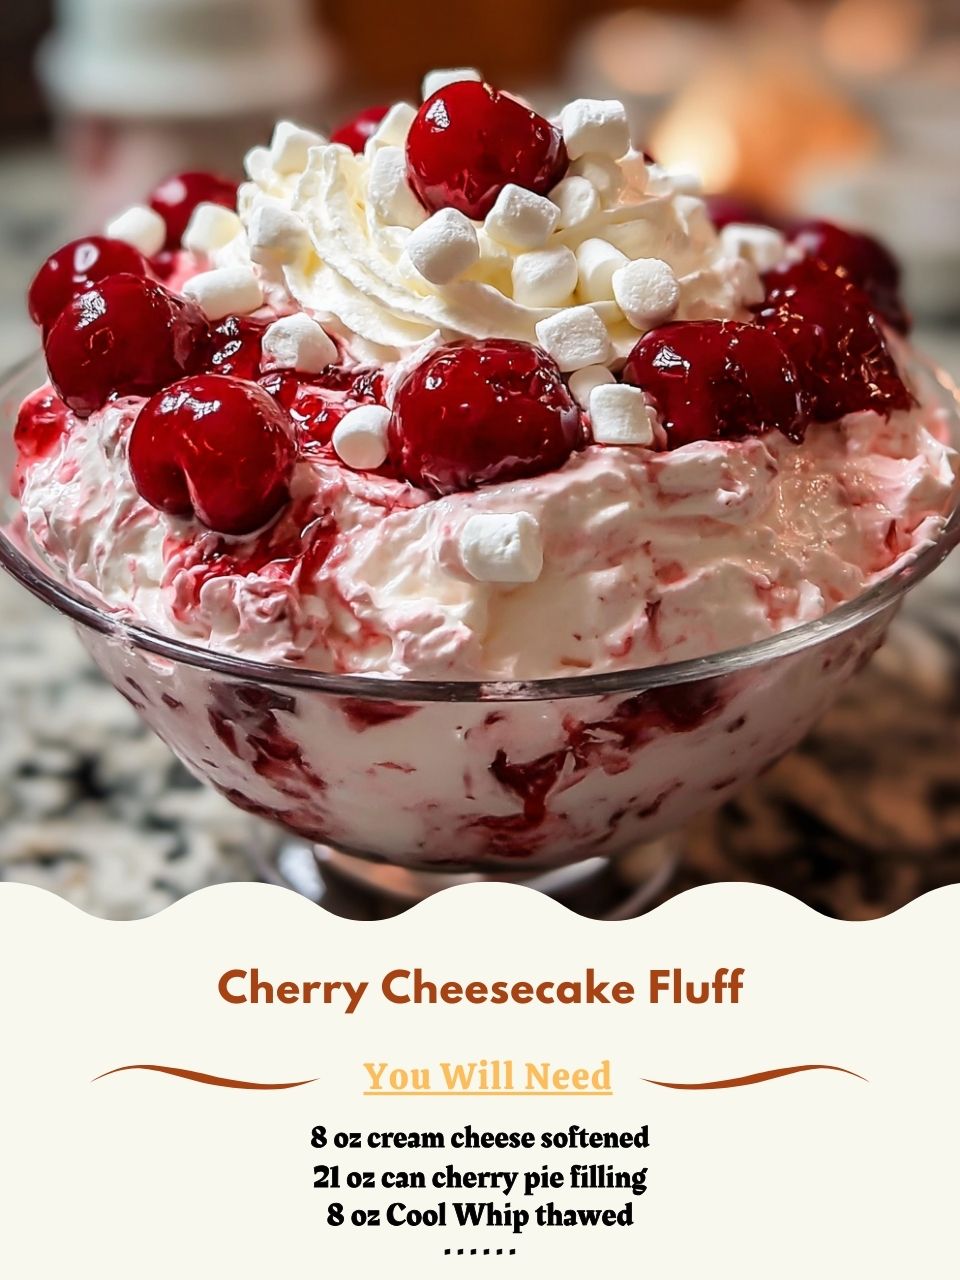
Cherry Cheesecake Fluff is the kind of no-bake dessert that feels luxurious without asking much from you in the kitchen. It blends the classic flavors of cherry cheesecake—silky cream cheese, lush cherries, and a touch of vanilla—into one light, spoonable treat that practically floats. Perfect for potlucks, family gatherings, or a simple after-dinner indulgence, this fluff comes together in minutes and tastes even better as it chills.
The combination of creamy filling, soft marshmallows, and graham cracker crunch creates layers of flavor and texture reminiscent of a full cheesecake, but with far less work. This recipe is ideal for both beginners and seasoned home cooks who want a fast, crowd-pleasing dessert that never fails to impress while offering endless room for creativity.
Equipment You Will Need
Preparing Cherry Cheesecake Fluff requires only a handful of basic tools, which is one reason this dessert has become a favorite among home cooks. Start with a large mixing bowl that offers enough space to fold all your ingredients together without deflating the whipped topping.
A medium bowl is helpful for blending the cream cheese and sweetened condensed milk until smooth. An electric hand mixer or a stand mixer fitted with the paddle attachment ensures that your cream cheese becomes perfectly creamy without lumps.
You will also need a rubber spatula so you can gently fold in delicate ingredients without losing the fluffy texture that gives this dessert its signature lightness. Measuring cups and spoons are necessary for maintaining accuracy in sweetness and balance.
A can opener is required for the cherry pie filling and the sweetened condensed milk. Finally, choose your serving vessel—this dessert looks especially beautiful layered or scooped into a trifle dish, glass bowl, or individual dessert cups for a more elegant presentation.
Ingredients List
- 8 oz (225 g) cream cheese, softened
- 1 can (14 oz / 397 g) sweetened condensed milk
- 1 tsp vanilla extract
- 1 tub (8 oz / 225 g) whipped topping, thawed
- 1 can (21 oz / 595 g) cherry pie filling
- 1 ½ cups mini marshmallows
- 1 cup graham cracker crumbs or crushed digestive biscuits
- ¼ cup finely chopped pecans or almonds (optional)
- Pinch of salt
- Additional cherry pie filling for garnish (optional)
- Extra graham cracker crumbs for topping (optional)
Step-by-Step Instructions
Begin by ensuring your cream cheese is completely softened. This single step significantly affects the smoothness of the final dessert because cold cream cheese tends to remain lumpy even with prolonged mixing. Place the softened cream cheese in a medium mixing bowl and use your electric mixer on medium speed to beat it until it becomes creamy, fluffy, and uniform.
You should see no chunks—only a smooth, pale base. Once the cream cheese looks perfectly blended, slowly add the sweetened condensed milk, pouring it in a steady stream while mixing on low speed. Incorporate the vanilla extract and a pinch of salt, which brightens the flavors and balances the sweetness. Continue mixing until the mixture is velvety and the texture resembles a thick cheesecake batter.
Turn off your mixer, then add the thawed whipped topping. Instead of mixing with the beaters—which would deflate it—use your rubber spatula to gently fold the whipped topping into the cream cheese mixture.
Folding ensures the fluff maintains its airy texture. Use long, slow motions, scraping down the sides and bottom as you rotate the bowl. The mixture should become soft, voluminous, and cloud-like.
In a larger bowl, combine the mini marshmallows with the graham cracker crumbs. The marshmallows add sweetness and body, while the graham crumbs offer a cheesecake-like element and pleasant texture. If you’re adding nuts, stir them in now.
Pour the creamy mixture from the medium bowl into the large bowl and gently fold again to distribute everything evenly. Avoid crushing the marshmallows; you want them to keep their soft, pillowy texture.
Now it’s time for the cherries. Open the can of cherry pie filling and spoon generous dollops onto the fluff mixture. Fold two or three times—no more—so the cherries create marbled ribbons rather than blending into a uniform color. This creates lovely swirls of red throughout the dessert and allows each bite to contain a burst of cherry flavor.
Transfer the completed mixture into your serving dish, smoothing the top with the back of a spoon. For an extra decorative touch, spoon small mounds of cherry pie filling over the surface and sprinkle with additional graham crumbs.
Cover the dish tightly with plastic wrap and refrigerate for at least two hours. Chilling allows the flavors to meld, the mixture to thicken, and the texture to become even more cheesecake-like. Overnight chilling produces the most decadent result.
When ready to serve, give the fluff a moment to soften slightly at room temperature, then scoop into bowls, dessert glasses, or jars. If serving for a special event, you can pipe the fluff using a large piping bag to give it a polished, professional appearance.
Expert Tips for Success
For the best results, always begin with room-temperature cream cheese. This is the single most important step in achieving a silky, lump-free base. If your cream cheese isn’t fully softened, small lumps will remain throughout the fluff, affecting the mouthfeel.
Another helpful tip is to fold gently at every stage instead of stirring aggressively; folding prevents the mixture from becoming dense or runny. Allow enough chilling time—Cherry Cheesecake Fluff really shines when it has had several hours to rest, as the flavors round out and the mixture firms slightly.
If you prefer a tangier cheesecake flavor, you can add a spoonful of plain Greek yogurt or an extra ounce of cream cheese without harming the structure. For a prettier presentation, reserve a bit of cherry pie filling to swirl on top just before serving.
Variations and Substitutions
This recipe is incredibly versatile, making it easy to adapt to different tastes, seasons, or holidays. Swap cherry pie filling for blueberry, strawberry, raspberry, blackberry, or even peach for a completely different fruit profile. If you love citrus, add a teaspoon of lemon zest to brighten the overall flavor.
For a richer base, use mascarpone in place of some of the cream cheese. You can also experiment with different crumb bases—vanilla wafers, chocolate graham crackers, Oreo crumbs, or shortbread each bring a unique character.
For a tropical twist, use pineapple tidbits drained well, toasted coconut, and shortbread crumbs. If you need the dessert to be lighter, choose reduced-fat cream cheese and light whipped topping. For a nut-free version, simply omit the nuts and add extra graham crumbs.
Serving Suggestions and Pairings
Cherry Cheesecake Fluff is naturally eye-catching, which makes it a perfect dessert for gatherings. In large bowls or trifle dishes, it creates a lush, colorful centerpiece. For parties, serving in individual glasses or jars adds elegance and makes portioning effortless.
You can accent each serving with a spoonful of extra cherry filling, a mint leaf, or a dusting of crumbs for texture and color contrast. This dessert pairs beautifully with coffee, hot chocolate, or black tea. Because it is rich and sweet, it also complements salty snacks or cheese boards if served in a dessert buffet.
During warm weather, pair it with fresh berries or sliced peaches for a refreshing touch; in colder months, serve it after heartier meals as a light, creamy finish.
Storage, Freezing, and Reheating
Cherry Cheesecake Fluff stores wonderfully in the refrigerator, and many people find it tastes even better the next day. Keep it in an airtight container or tightly wrapped dish for up to three days. Over time, the mixture may loosen slightly from the cherry filling’s moisture, but a gentle stir revives it easily.
Freezing is possible but may slightly alter the texture. If you choose to freeze it, store in an airtight container and freeze for up to one month. Thaw overnight in the refrigerator before serving. Note that this dessert is meant to be enjoyed cold, so there is no reheating required—simply chill, scoop, and enjoy.
Frequently Asked Questions
Can I use homemade whipped cream instead of frozen whipped topping?
Yes, but make sure it is whipped to medium peaks so it holds structure. Homemade whipped cream can deflate faster, so the dessert may be softer the next day.
Can I make this dessert ahead of time?
Absolutely. Making it the day before gives the best texture, as the marshmallows soften and the flavors meld.
Is this recipe gluten-free?
It can be. Use gluten-free graham crumbs and verify that your pie filling and whipped topping are gluten-free.
How can I reduce the sweetness?
Use ¾ of the sweetened condensed milk or add a spoonful of Greek yogurt to balance the flavor.
Can I change the fruit?
Yes—any pie filling works beautifully. Strawberry and blueberry are especially popular variations.