
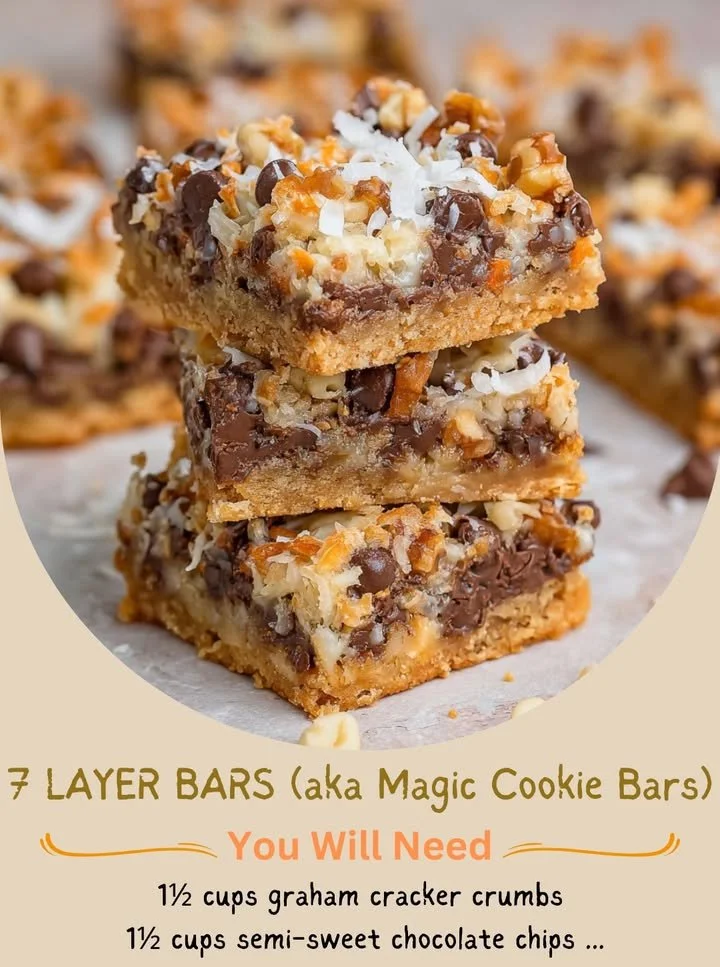
There’s something undeniably magical about the way a simple combination of ingredients can create a treat that feels like a hug from the inside. One of my absolute favorites is the deliciously gooey, rich 7 Layer Bars, often known as Magic Cookie Bars. These bars have a delightful blend of textures and flavors, featuring a crunchy base, creamy layers, and a toasted coconut topping that just makes you want to dive in for another bite. Today, I’m excited to share my go-to recipe for these irresistible treats!
Why You’ll Love This Recipe
If you’re looking for a dessert that’s easy to prepare yet bursting with flavor, 7 Layer Bars won’t disappoint. These bars are incredibly versatile; you can even change up the layers depending on what you have on hand or your personal taste preferences. Plus, they come together in just a few simple steps! Every time I take a bite, I’m transported back to cozy family gatherings and the warmth of my grandmother’s kitchen, making this recipe not just a sweet treat, but a cherished memory as well. (See the ingredients in the next page below…)
Ingredients
- 1 ½ cups graham cracker crumbs
- ½ cup unsalted butter, melted
- 1 can (14 oz) sweetened condensed milk
- 1 cup semisweet chocolate chips
- 1 cup butterscotch chips
- 1 cup shredded sweetened coconut
- 1 cup chopped nuts (walnuts or pecans work great)
- ½ tsp salt
Equipment Needed
- 9×13 inch baking dish
- Mixing bowl
- Measuring cups and spoons
- Rubber spatula or spoon
- Aluminum foil or parchment paper (for easy removal)
Step-by-Step Instructions
To start, preheat your oven to 350°F (175°C). Grease your baking dish with a bit of cooking spray, or line it with aluminum foil or parchment paper for easier cleanup later. In a mixing bowl, combine the graham cracker crumbs and melted butter until the mixture resembles wet sand. Press this mixture firmly into the bottom of the prepared baking dish. This crust is the base of your bars, so make sure it’s packed down nicely! (See the next page below to continue steps…)
Next, pour the sweetened condensed milk evenly over the crust, letting it seep into any gaps for added moisture and sweetness. Now comes the fun part—layering! Sprinkle the chocolate chips, butterscotch chips, nuts, and shredded coconut over the milk, making sure they’re distributed evenly. This layering process is what truly makes these bars magical; every bite has a bit of everything!
Once your layers are in place, pop the baking dish into the preheated oven and bake for about 25 to 30 minutes. You’ll know they’re ready when the edges start to turn golden brown, and the coconut is toasted to perfection. I love the smell that fills my kitchen as they bake—it’s sweet and nutty, almost a little nostalgic! After baking, take the bars out and let them cool completely in the pan before slicing into squares.
Pro Tips for Best Results
I’ve tested this recipe a few different ways, and one key tip is to make sure your butter is fully melted but not hot when mixing with the graham cracker crumbs. If it’s too hot, it can melt the sugars in the graham crackers, making the base too dense. It’s all about finding the right balance!
Another pro tip is to let the bars cool more than you think you need to before removing them from the baking dish. They’re quite soft when warm, and if you try to slice them too early, you’ll end up with a gooey mess. So, patience is essential here!
Lastly, I always prefer to use sweetened coconut for this recipe. The extra sweetness and chewiness really elevate the flavor profile and complement the richness of the chocolate and butterscotch layers. Trust me, it makes all the difference in every bite!
Common Mistakes to Avoid
One mistake I made the first time I made these bars was not pressing the graham cracker mixture firmly enough into the pan. If the base isn’t packed down well, the bars can crumble and fall apart when cutting. Now, I always use the bottom of a measuring cup to ensure it’s compact! (See the next page below to continue…)
Another pitfall is baking at too high of a temperature. If your oven gets too hot, the coconut can burn while the bars are still raw in the middle. So, keep an eye on them, especially towards the end of baking time, to avoid any caramelization.
Lastly, I’ve noticed that various brands of sweetened condensed milk can vary in thickness and sweetness. If you’ve used a brand that seems particularly thick, you might need to increase your baking time a bit. Always a good idea to judge by eye and feel!
Serving Suggestions
These 7 Layer Bars are delightful on their own, but if you want to make them even more special, consider serving them warm with a scoop of vanilla ice cream on the side. The contrast of warm bars with cold ice cream creates a delicious combination that’s hard to resist.
Another serving suggestion is to drizzle them with chocolate or butterscotch sauce for an extra layer of sweetness. Just melt some of either sauce in the microwave and drizzle it over the cut bars for a beautiful and enticing presentation!
For a fun twist, try pairing your 7 Layer Bars with a rich cup of coffee or a steaming mug of hot cocoa. The sweetness of the bars complements the robust flavors of your beverage, making for a cozy treat any time of day.
Variations & Customizations
One of the best things about 7 Layer Bars is how easily you can customize them to suit your tastes. If you’re not a fan of butterscotch, swap in peanut butter chips or even white chocolate chips for a different flavor profile. Alternatively, if you want to switch things up, add a layer of chopped dried fruits like cherries or cranberries for a tart contrast!
For a nut-free version, simply omit the nuts or use seeds like sunflower seeds in their place. This makes it a great option for gatherings where allergies might be a concern. Plus, they still pack a wonderful crunch!
Lastly, you can even change the base by using different types of cookies—think crushed Oreos or vanilla wafers. Each variation leads to a slightly different taste and texture, keeping things exciting in my kitchen!
How to Store, Freeze & Reheat
Storing your 7 Layer Bars is simple! I recommend keeping them in an airtight container at room temperature for up to a week, but I must admit, they rarely last that long in my house! If you want to make them ahead of time, they also freeze beautifully. Just wrap them tightly in plastic wrap and then place them in a freezer-safe container. They can last for up to three months in the freezer!
When you’re ready to enjoy the frozen bars, let them defrost at room temperature for a couple of hours. If you prefer them warm, pop them in the microwave for about 10-15 seconds to help melt any chocolate chips and bring back that wonderful gooey texture without them becoming too hot.
If you have leftover bars (which is rare for me), reheating them in the oven at 350°F for a few minutes is an excellent way to restore their freshness. Just keep an eye on them to avoid burning!
Conclusion
I hope you enjoy making and sharing these 7 Layer Bars as much as I do! They’re a versatile and delightful treat that never fails to bring smiles to my family and friends. Whether you’re preparing them for a special occasion or simply whipping them up for a cozy night in, they’re sure to become a beloved recipe in your kitchen. Happy baking!