
Equipment Needed
- Food processor
- Large mixing bowl
- Hand mixer or sturdy spatula
- Baking sheet
- Parchment paper or wax paper
- Small microwave-safe bowl
- Forks or dipping tools
- Cooling rack (optional)
Step-by-Step Instructions
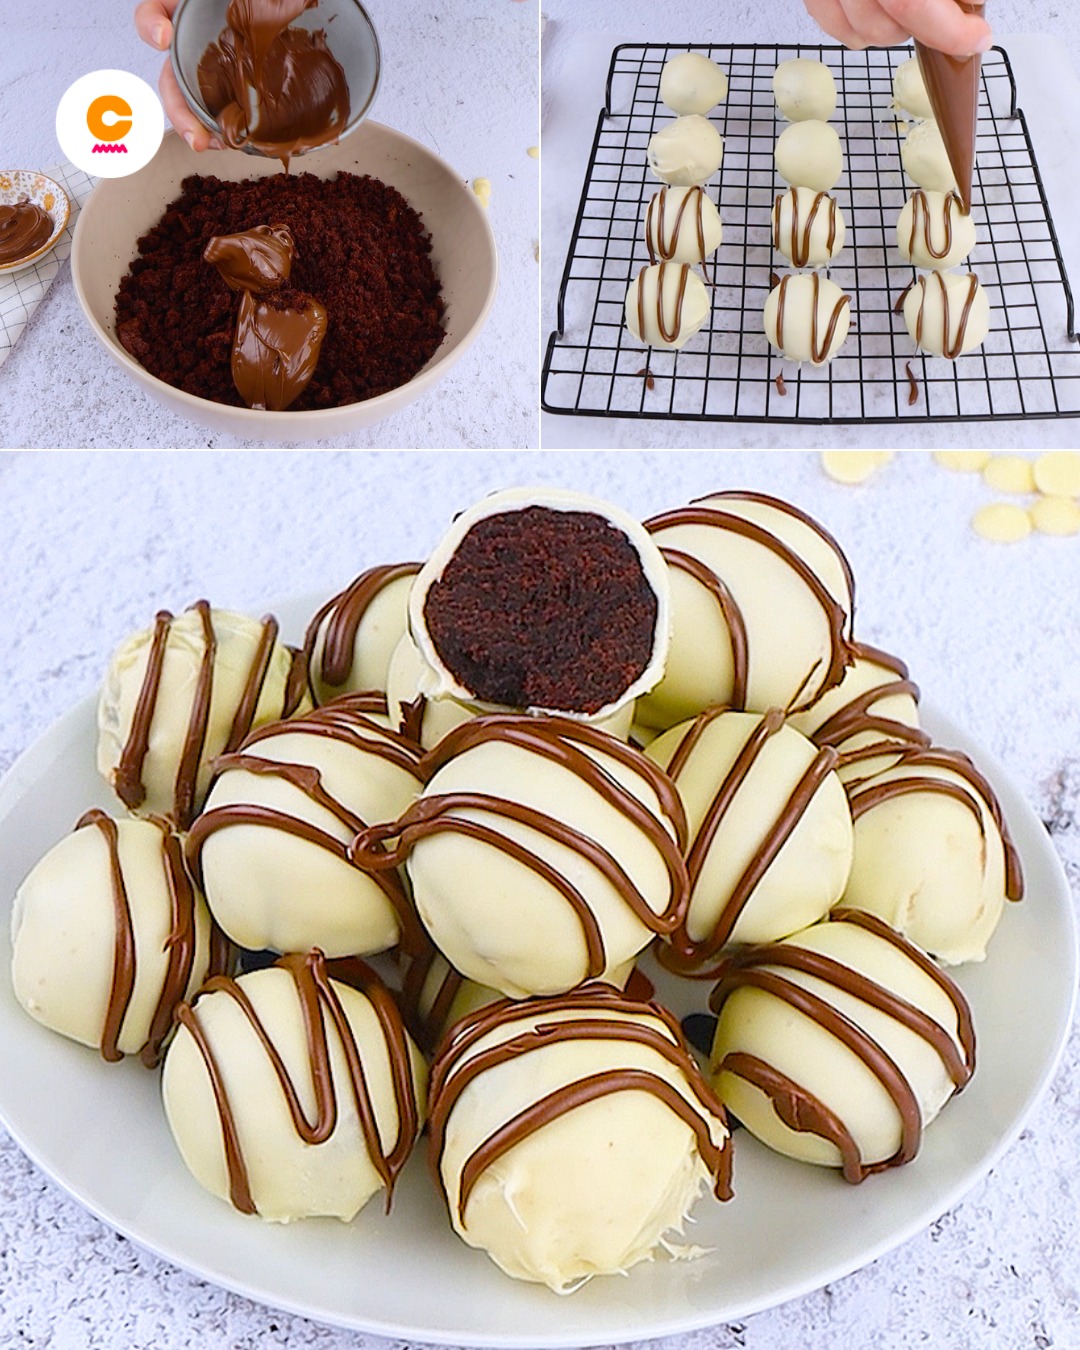
First, I line a baking sheet with parchment paper. This is where my truffles will chill, and the non-stick surface is crucial. Next, I take my entire package of Oreos—creams and all—and pulse them in the food processor until they become fine, uniform black crumbs. You want them to look like dark, sandy soil. I once tried crushing them in a bag with a rolling pin, and while it worked, the texture wasn’t as even, and some larger pieces made rolling difficult. The food processor is the quick, foolproof route.
I dump these delicious crumbs into a large mixing bowl. To this, I add the full 8-ounce block of softened cream cheese. Now, here’s where you can choose your tool. I’ve used a hand mixer on low, but I actually prefer using a sturdy spatula or even my clean hands to mash and mix them together. It takes a bit of elbow grease, but it lets me feel when the mixture is perfectly combined. You’re done when no white streaks of cream cheese remain and you have a uniform, thick, fudgy, and slightly sticky dough. It will smell amazing—like chocolate cheesecake.
Now, for the rolling. I use a small cookie scoop (about 1 tablespoon) to portion the dough. This ensures all my truffles are the same size. I roll each portion quickly between my palms to form a smooth ball. A pro tip I learned: if the dough is too sticky, pop the whole bowl in the fridge for 15-20 minutes. If my hands get too sticky while rolling, I rinse them in cold water and dry them thoroughly. I place each ball on the prepared baking sheet. Once all the dough is rolled, I transfer the sheet to the freezer for at least 30 minutes. This firm-up step is non-negotiable; it prevents the truffles from falling apart when you dip them in the warm chocolate.(See the next page below to continue…)