
Equipment Needed
- Large mixing bowl
- Baking sheet
- Parchment paper or a silicone baking mat
- Fork or dipping tool
- Microwave-safe bowl or double boiler
- Spatula
Step-by-Step Instructions
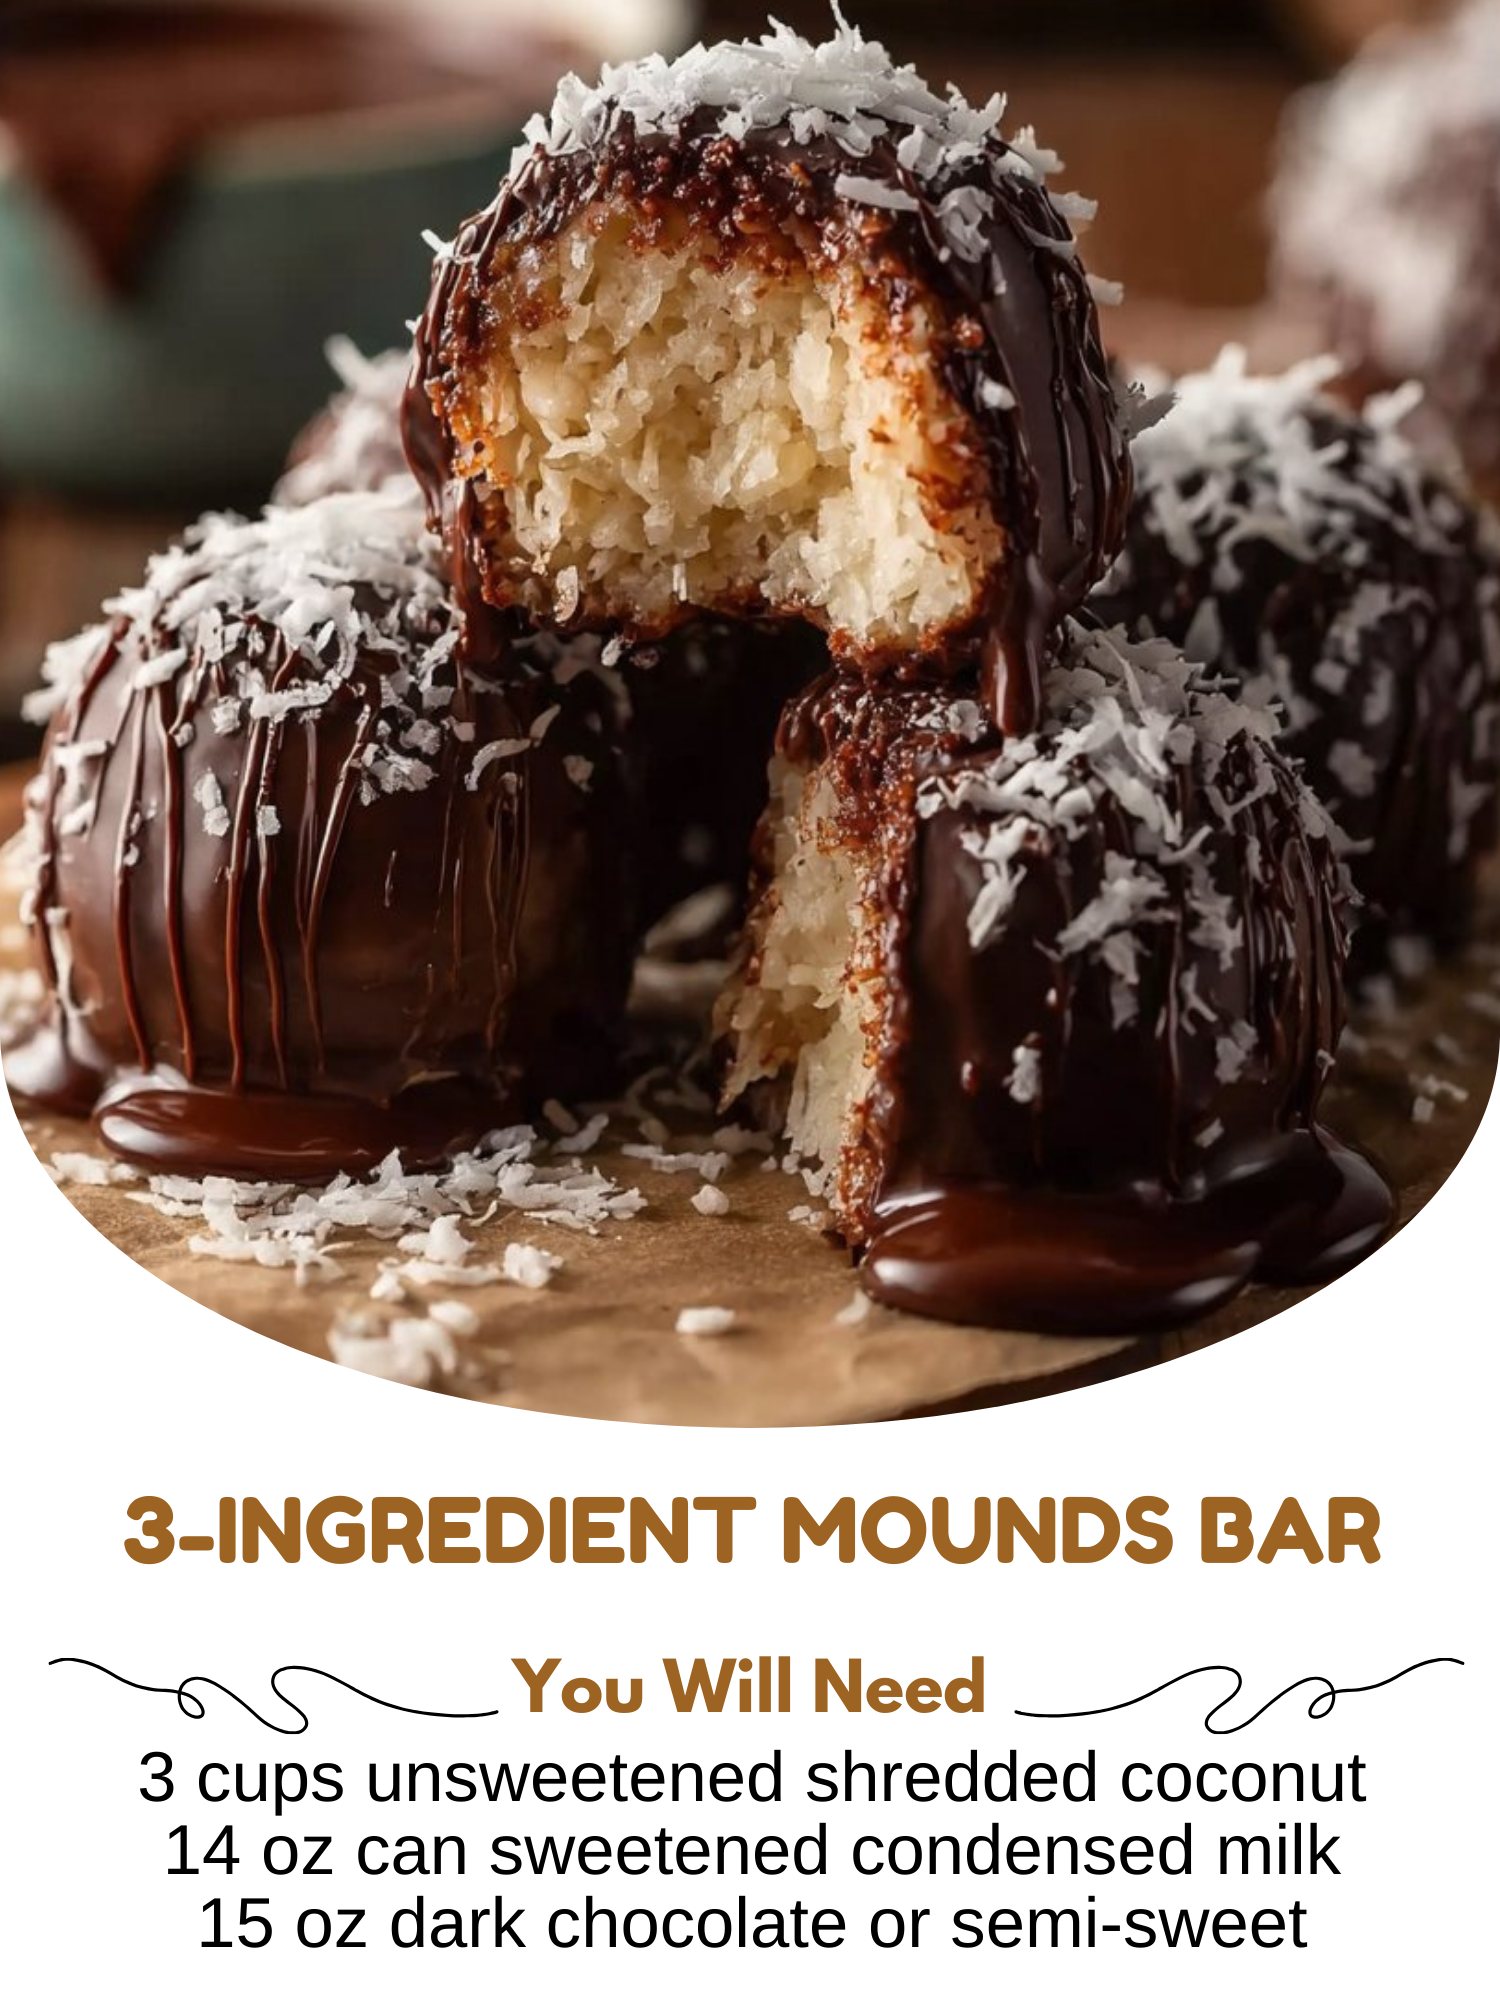
My first step is always to line a large baking sheet with parchment paper. This is non-negotiable for easy cleanup and preventing sticky disasters. Then, in a large mixing bowl, I combine the entire bag of unsweetened shredded coconut with the full can of sweetened condensed milk. I use a sturdy spatula at first, but I quickly ditch it for my clean hands. There’s something so satisfying about mixing it this way—you can feel the texture come together perfectly. It will seem dry at first, but as you press and knead it for a minute, it transforms into a cohesive, sticky, and fragrant dough that holds its shape when squeezed.
Now for the fun, slightly messy part: forming the balls. I scoop out about a tablespoon of the mixture and roll it firmly between my palms into a tight, compact ball. The key word is firmly. If you just gently shape them, they can be a bit crumbly. I place each finished ball on the prepared baking sheet. Once the sheet is full, I slide the whole tray into the freezer for at least 30 minutes. This chill is the most important step in the entire process; it firms up the centers so they don’t fall apart when you dip them in the warm chocolate.
While the centers are chilling, I melt my chocolate. I prefer the microwave for control. I chop my dark chocolate bar into small, even pieces and place them in a clean, dry, microwave-safe bowl. I melt it in 30-second bursts at 50% power, stirring vigorously between each burst. This gentle heat prevents the chocolate from seizing or burning. I stir until it’s completely smooth and fluid, like a velvety chocolate sauce. If it seems too thick, I might add a tiny teaspoon of coconut oil to help it thin out for a smoother dip.(See the next page below to continue…)